1. Introduction
This document will refer Outsystem data grid, is a user interface component that allows to display data in a structured way. The data grid is particularly useful when we want to present data from a database or an external source in a grid format, similar to a table. But this document especially cover how we make data grid as edit mode. This allows users to update, add records in grid, providing a more interactive and dynamic user experience.
2. Technologies and Tools Used
The following technology has been used to make Outsystem data grid as edit mode
- Outsystem Data Grid (Install From Forge)
- JSON objects & Java Script
- Entities (Student)
- Specified Server & Client Actions (Import From Manage Dependencies)
3. How to Install Data Grid From Forge
Step1: Use the following link to reach Outsystem Forge website
https://www.outsystems.com/forge/list?q=data%20grid&t=&o=most-
Step2: Search “Data Grid” from search area and click the data grid.
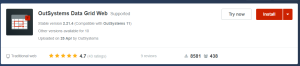
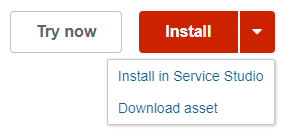
Step-3: Click install in service studio option
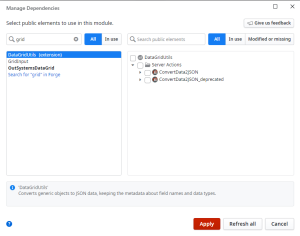
Step-4: After installation complete it will appear on your service studio. Click Manage Dependencies (Ctrl+Q) to select grid then click apply button.
3.1 Entities
In Outsystems, an entity is a fundamental building block used to define the data model of your application. It represents a data structure that corresponds to a database table or view. Entities are a core part of Outsystems data modeling capabilities, allowing you to define the data schema and manage data in your application efficiently.
3.2 Client & Server Actions
In OutSystems, client actions and server actions are two types of reusable logic that developers can create to implement business logic in their applications. They allow developers to encapsulate functionality into separate units, promoting code reusability and maintainability.
4. Steps with Screen-shot
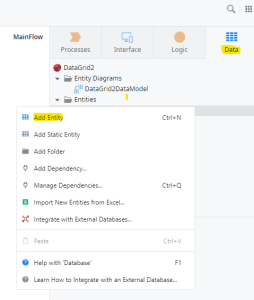
Step-1: Create Entity From Database (Student)
Step-2: Add Attributes for Student Entity (Name,Department and Address)

Step-3: Drag and Drop Student Entity in Main flow. It automatically creates a Form and report page
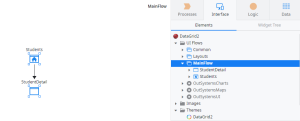
Step-4: Add new Empty Screen (Student_Grid) for Data Grid Report in Main flow
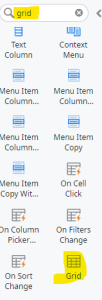
Step-5: Left side of the property container filter grid tool.
Drag and Drop the grid tool in Student_Grid Screen
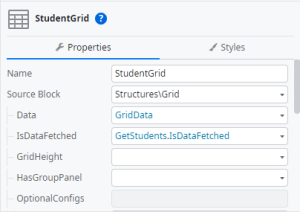
Step-6: Grid Properties we need to fill following details
| Name | Student Grid |
| Source Block | Structures\Grid |
| Data | Fill Later |
| IsDataFetched | Fill Later |
| (+)Optional Configurations
Allow Column Edit |
TRUE |
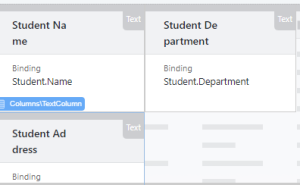
Step-7:Drag and Drop Text Column Tool for three Entity attributes
(Name,Department, and Address)

Properties
Header – “Student Name”
“Student Department”
“Student Address”
Binding – “Student.Name”
“Student.Department”
“Student.Address”
Step-8: Add Local Variable(Grid Data) with Text Data Type for
Student_Grid Screen(Screen Name and Right Click)
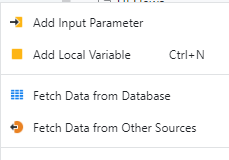
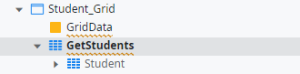
Step9:Screen Name + Right Click you have one options for fetch data from data source. Drag and Drop Student Entities from data base it automatically creates get student aggregation.
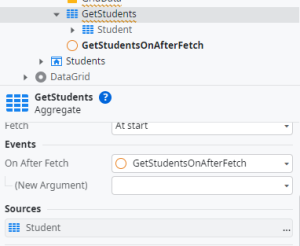
Step10: Aggregate GetStudents have list of events in properties section. Select “On After Each” Event from list. It show one pop up box then click New Client Action tab. Now it create one client action for student_Grid Screen.
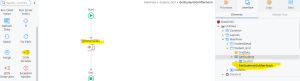
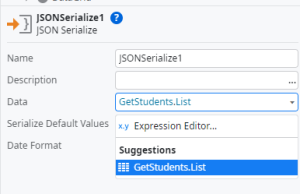
Step11:Now double click on the client action. Drag and Drop JSON Serialize object from left side property tools. Set data property for JSON Object is GetStudents.List
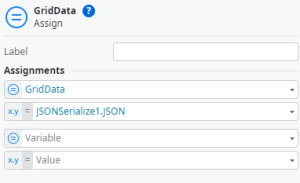
Step-12: Drag and Drop assign variable and map assign
variable = GridData and Expression as JSON Serialize

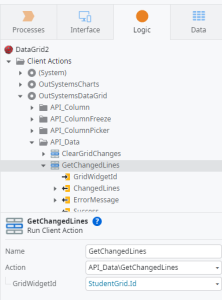
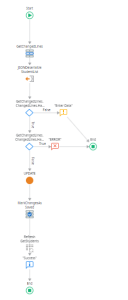
Step13: Add new client action “SaveOnClick” and double click on client action to enter into it. Drag and Drop “Get Change Lines” Tool from API_Data and set property Grid Widget id = StudentGrid.Id
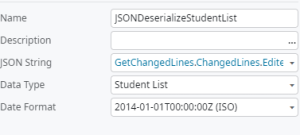
Step14:Drag and Drop JSON Deserialize object and set property DATA TYPE = “Student.List” and JSON STRING = “GetChangedLines.ChangedLines.EditedLines”.
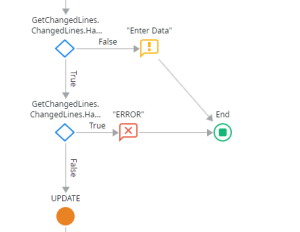
Step-15: Now we check two conditions. Two if statement we need to drag and drop.
Condition 1 – GetChangedLines.ChangedLines.HasChanges
First condition True Means it check another condition. If false then execution go to end
Condition 2 – GetChangedLines.ChangedLines.HasInvalidLines
First condition True then meet this condition. Here it meets true then goes to end of the flow. If false then go for the server actions.
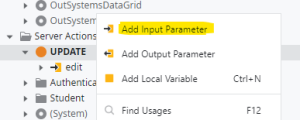
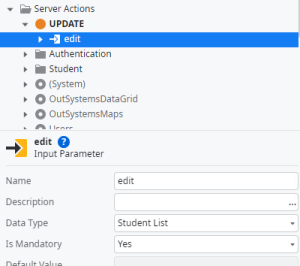
Step16:Give Name of the server action “Update”. To add input parameter edit (Right click of update action) for server action and map data type as Student List
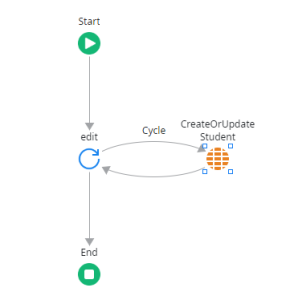
Step17:Now double click for Server action and add For Each Tool from left side pane. And add CREATE OR UPDATE Action and make cycle connectivity for for each and Action.
For Each tool —–> Record List property mapping edit input parameter
Create or Update action —–> map all the columns for Student Entity

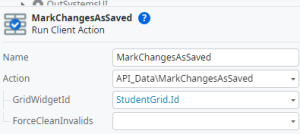
Step18: Add “Mark Changes as Saved“ From API Data into client action (Save on click) after server action and set Grid widget id = StudentGrid.ID . Finally add success message for acknowledgment.

Step-19 : Following for Whole process for save on click client action
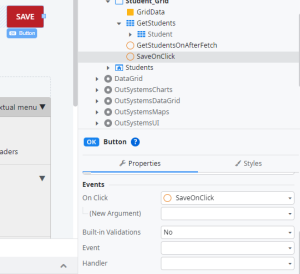
Step20:Now add one new button on Student_Grid Form then change button name as Save and button action mapping event for saveonclick client action.
Step21:Now add another one button on Student_Grid From and change it name as Add row. Double click on add row button it automatically creates a new Event named as “Add Row On Click” Event. Inside of the Event we need to create one client action “Add Bottom Row” action and set action property Grid Data = Student Grid.ID
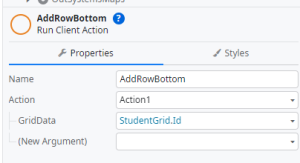
Step22:Add Bottom Row Action add input parameter as “GridId”. Now add java script code in the Add Bottom Row action . Set property GridId=GridId
var gridObj = GridAPI.GridManager.GetGridById($parameters.GridId);
var items = new Array(1).fill(_.cloneDeep({}));
if (gridObj) {
gridObj.dataSource.addRow(gridObj.rowMetadata._grid.rows.length + 1, items);
}
Step-23: Now add Student Grid Important property
Step-24: Now Click publish button on the top of the window.
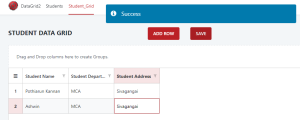
5. OUTPUT SCREENSHOTS
ADDROW
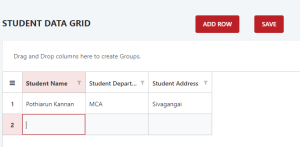
SAVE

UPDATE
CONCLUSION
The Data Grid in OutSystems is a powerful and versatile component that enhances the presentation and manipulation of data within web and mobile applications. OutSystems is a low-code development platform that allows developers to create complex applications quickly and efficiently, and the Data Grid plays a crucial role in displaying tabular data in a user-friendly manner. I hope get the clear information about the Data Grid.