Oracle Cloud – GL Journal Import by using FBDI Process
Overview FBDI Journal Import
Oracle Cloud made life easy for the data entry in creating/preparing journal entries in general ledgers. This is avoiding lot of customizations, which need to interact with other systems. In any business, we will be having different operating systems or third party systems from where the journal data has to come to oracle for accounting purpose, since oracle is for the accounting representation and for reporting purpose.
We can use the Journal Import file-based data import functionality to upload journal entry data from external systems into Oracle General Ledger module. Oracle made use of the documents from the oracle repository; we can download and make use of those documents.
How to Download Journal Import /FBDI template
Step1: click on this URL and it will take you to cloud space. URL: https://docs.oracle.com/en/cloud/saas/index.html
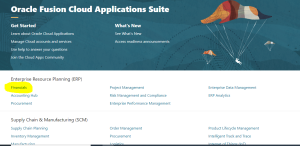
Step2: since we are talking about journal import, we need to select the Financials
Once you click on the Financials, it will take you to the below window
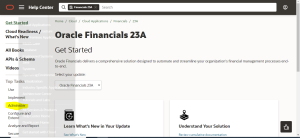
Step3: Click on the Administrator option as highlighted above screenshot
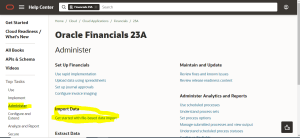
Step4: Once you click on Administrator, you will see an option Import Data – File Based Data import, as highlighted in the above screenshot.

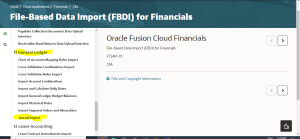
Step5: Once you click on the get start with File Based Data import, it will take you to the above window and it will show you the financial modules. We need to scroll down to the General Ledger to see the Journal Import functionality.
Step6: When we see journal import, we need to click on that option and it will take you to the template.
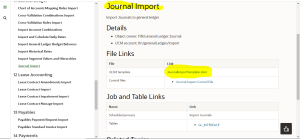
Step7: as long as you see the JournalimportTemplate.xlsm , we need to click to download the template.
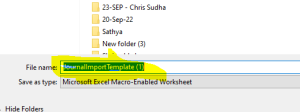
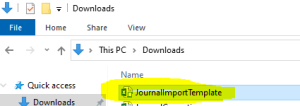
Step8: Once you click on that template, it will download and will ask you to save in your local machine to get start with it.
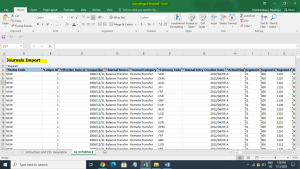
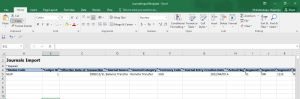
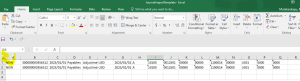
Step9: When you open the file, it looks like this below, we need to remove the existing sample data and need to fill it with our data to load it.
How to Prepare Journal Import Data File
Here in this section we will discuss about how to prepare a data file
Step1: We need to remove the existing sample data from the sheet and kept only one record for reference.
Step2: to fill the data, we need to get the ledger id, category and source..etc
To get the ledger id, please follow the below
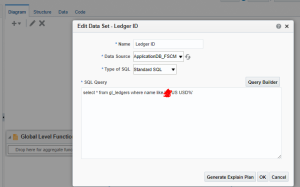
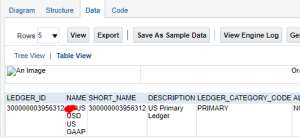
Click on OK and it will show you the ledger details along with ID
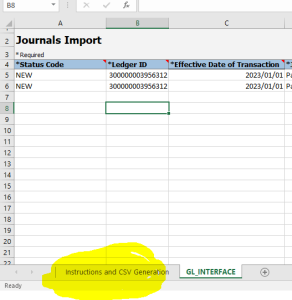
Step3: We just filed with the journal details (took only two lines for sample, we can use many based on the requirement)
Step4: once the data file is ready, we need to click on the Instructions and CSV Generation sheet
Step5: we need to click on the Generate CSV file
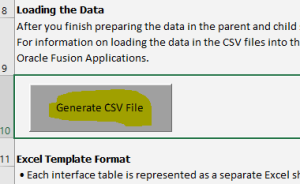
Step6: When you click on Generate CSV it will generate a csv file and will ask to save in local machine.
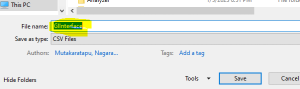
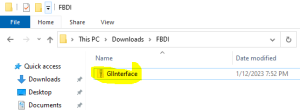
Step7: Click on Save and it will ask for the file location where to save, select the same and save it. Once it saved, it will be displayed as ZIP file as shown in the below screenshot.
Step8: When you open and see data, it will not have any header details in it. It will be displayed as below.
Step9: Data File is ready to upload in to oracle application.
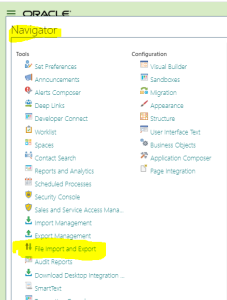
Process Journal Import in Oracle Cloud – FBDI
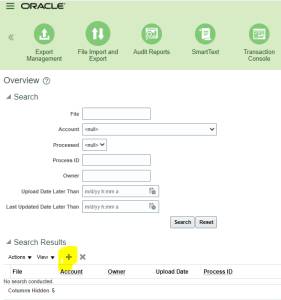
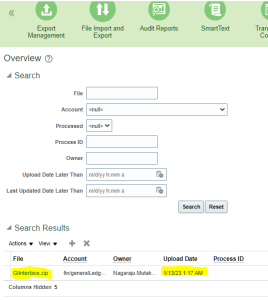
Step1: Navigate to the File Import and Export path as shown below.
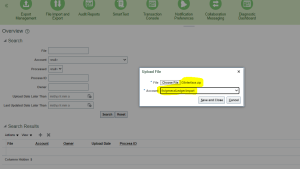
Step2: we need to click on the + icon to create and place file in UCM.
Step3: We need to select the file, need to select the Account as fin/generalledger/import and click on save and close.
Step4: once you click on Save and Close, it will show you the file that we just uploaded in UCM.
Step5: We need to navigate to ESS window to submit “Load interface File for import” job. Please find the below screen and click on OK
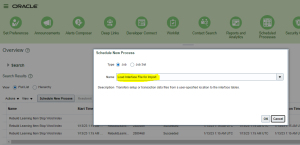
Step6: once you click on Ok, it will ask you to select the parameters as import process and data file (which we uploaded in UCM
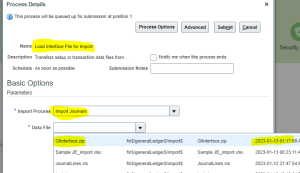
Step7: select the required parameters as above and click on submit button, it will trigger two child jobs as below.
![]()
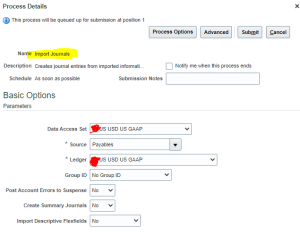
Step8: We need to run the “Import Journals” job and click on ok to select parameters
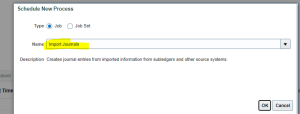
Step9: Please fill the parameters as below and click on submit
Step10: Import Journals will trigger a child job to import the data, check for the output of the child job.
![]()
Step11: Journal import child job has the output, which shows us the journal batch imported successfully.
![]()
Step12: we will navigate to application General Accounting>>Journals>>Manage Journals and search for the journal we created.
We can see the journal as expected.
![]()
Hope this document helped you to understand the FBDI Journal import process. Please stay tune to the Next Topic ___ Nagaraju Mutakaratapu
