1. Overview
If we need to generate our report with the APEX_DATA_EXPORT this Document will Explain you how to generate the report with the APEX_DATA_EXPORT
2. Technologies and Tools Used
The following technology has been used to achieve the same.
- Javascript
- OracleApex 1
- Pl/Sql code
3. Use Case
It will help us to generate a report with with the APEX_DATA_EXPORT to convert our general reports into apex export
- ARCHITECTURE
Step 1 : Create a table and populate it with some sample records.
CREATE TABLE emp
(
empno NUMBER,
first_name VARCHAR2(240),
last_name VARCHAR2(240),
mgr NUMBER,
deptno NUMBER,
sal NUMBER,
created_date TIMESTAMP (6),
comm NUMBER,
hiredate DATE,
JOB VARCHAR2(240),
ename VARCHAR2(240),
PRIMARY KEY (empno) USING INDEX ENABLE
);
/
INSERT INTO emp (empno, first_name, last_name, mgr,
deptno, sal, created_date)
VALUES
(1, ‘Larry’, ‘Ellison’, ,
10, 5000, LOCALTIMESTAMP);
INSERT INTO emp (empno, first_name, last_name, mgr,
deptno, sal, created_date)
VALUES
(2, ‘Juan’, ‘Juan’, 1,
10, 3500, LOCALTIMESTAMP);
INSERT INTO emp (empno, first_name, last_name, mgr,
deptno, sal, created_date)
VALUES
(3, ‘Keith’, ‘Block’, 1,
10, 3800, LOCALTIMESTAMP);
/
Step 2: Create a new blank page in our oracle application
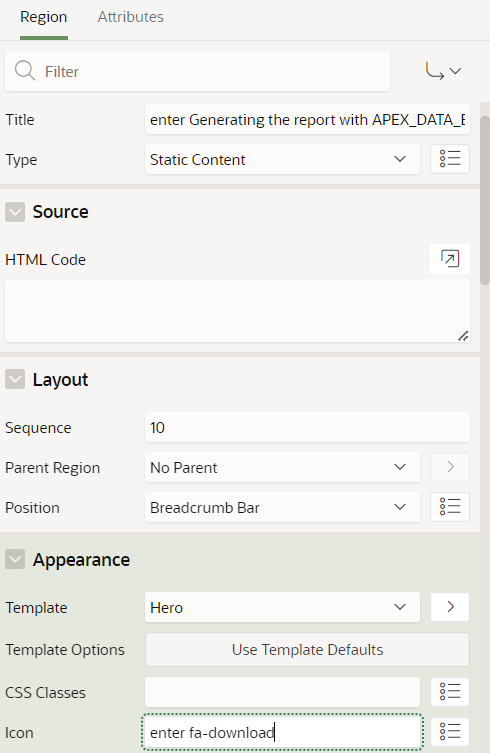
Step 3:Create a new region on the page. In the Property Editor, apply the following changes
Under Identification:
For Title – enter Generating the report with APEX_DATA_EXPORT
Under Layout:
For Position – select Breadcrumb Bar
Under Appearance:
For Template – Hero
For Icon – enter fa-download
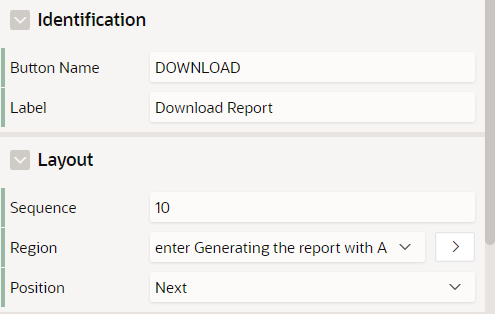
Step 4: Navigate to that Region and right-click Create Button. In the Property Editor, apply the following changes
Under Identification:
For Button Name – DOWNLOAD
For Label – Download Report
Under Layout:
For Region – select Generating the report with APEX_DATA_EXPORT
For Position – select Next
Under Appearance:
For Button Template – select Text with Icon
Enable Hot button
For Template Option – Set Style Simple
For Icon – enter fa-download
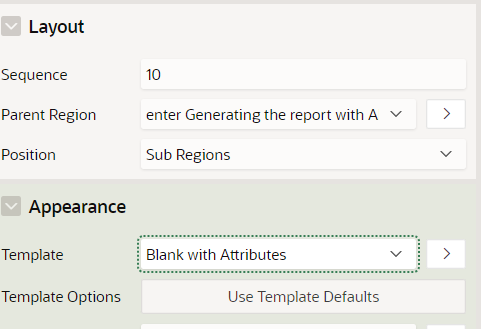
Step 5: Create a sub region on the parent region (Generating the report with APEX_DATA_EXPORT) . In the Property Editor, apply the following changes
Under Identification:
For Title – Report Format
Under Layout:
For Parent Region – select Generating the report with APEX_DATA_EXPORT
For Position – select Sub Regions
Under Appearance:
For Template – Blank with Attributes
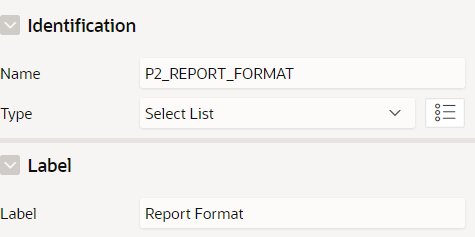
Step 6: Create a select list on the sub region (Report Format). In the Property Editor, apply the following changes
Under Identification:
For Name – enter P2_REPORT_FORMAT
For Type – Select List
Under Label:
For Label – enter Report Format
Under Layout:
For Region – select Report Format
Under Appearance:
For Template – Hidden
For Template Options – set Size as Large and Right Margin as Small
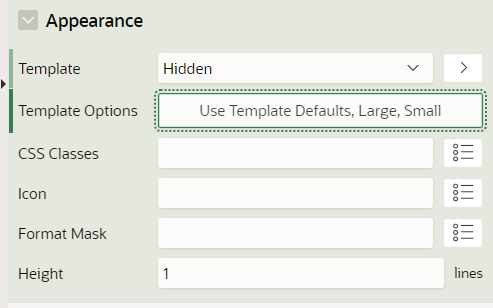
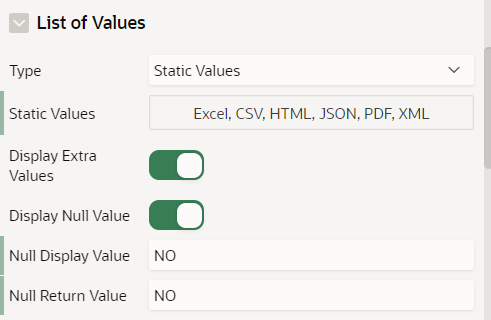
Under List of Values:
For Type – Static Values
For Static Values – Excel:E; PDF:P; CSV:C; HTML:H; JSON:J; XML:X;
Display Extra Values – No
Display Null Values – No
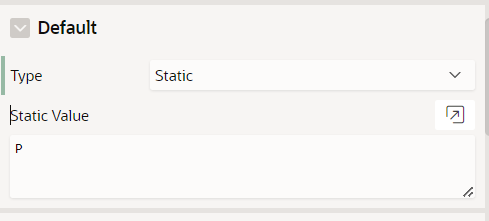
Under Default:
For Type – Static
For Static Value – P
Step 7: To view the data from the emp table, create an interactive report region.
Step 8: To download the report, create a PL/SQL process.
1) Navigate to Rendering Tree and click on Processing Tab.
2) Right-click on Processing and click Create Process.
3) In the Property Editor, apply the following changes
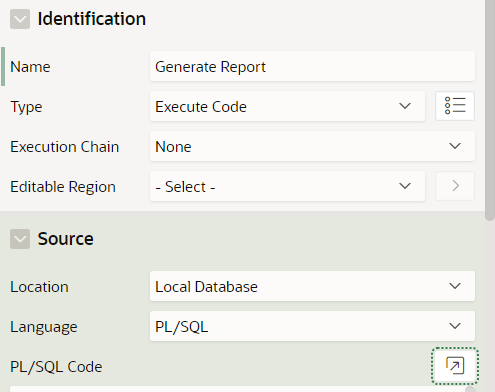
Under Identification:
For Name – Generate Report
Under Source:
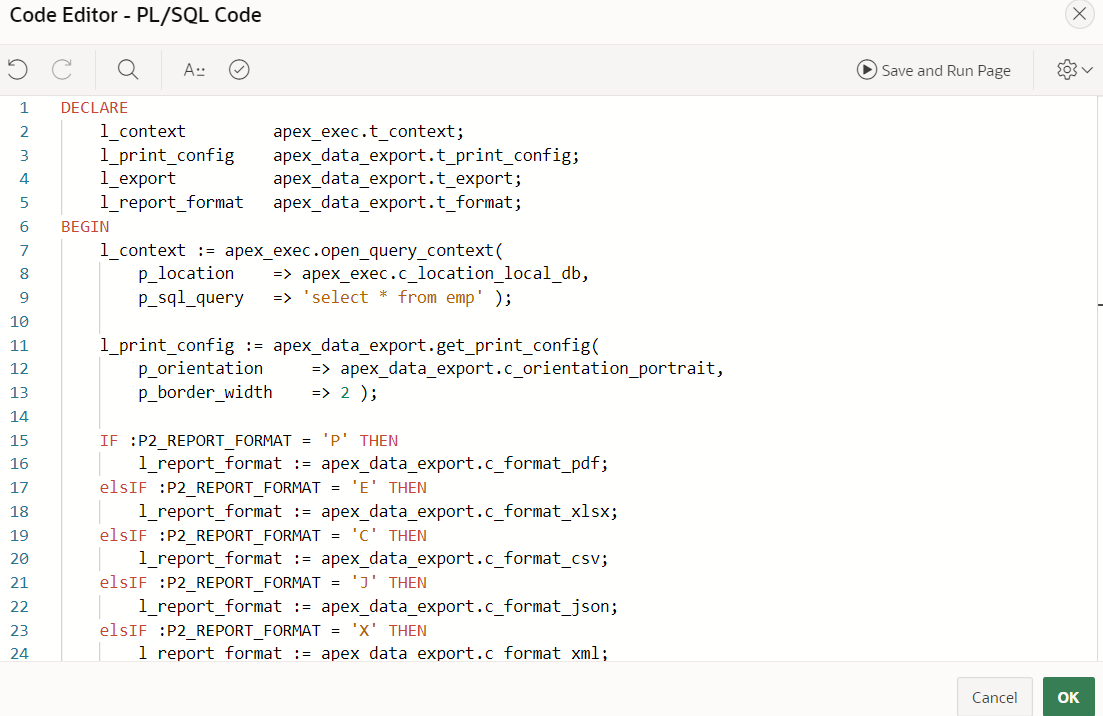
For PL/SQL Code enter the following code
CODE :
DECLARE
l_context apex_exec.t_context;
l_print_config apex_data_export.t_print_config;
l_export apex_data_export.t_export;
l_report_format apex_data_export.t_format;
BEGIN
l_context := apex_exec.open_query_context(
p_location => apex_exec.c_location_local_db,
p_sql_query => ‘select * from emp‘ );
l_print_config := apex_data_export.get_print_config(
p_orientation => apex_data_export.c_orientation_portrait,
p_border_width => 2 );
IF :P2_REPORT_FORMAT = ‘P’ THEN
l_report_format := apex_data_export.c_format_pdf;
elsIF :P2_REPORT_FORMAT = ‘E’ THEN
l_report_format := apex_data_export.c_format_xlsx;
elsIF :P2_REPORT_FORMAT = ‘C’ THEN
l_report_format := apex_data_export.c_format_csv;
elsIF :P2_REPORT_FORMAT = ‘J’ THEN
l_report_format := apex_data_export.c_format_json;
elsIF :P2_REPORT_FORMAT = ‘X’ THEN
l_report_format := apex_data_export.c_format_xml;
elsIF :P2_REPORT_FORMAT = ‘H’ THEN
l_report_format := apex_data_export.c_format_html;
END IF;
l_export := apex_data_export.export (
p_context => l_context,
p_print_config => l_print_config,
p_format => l_report_format);
apex_exec.close( l_context );
apex_data_export.download( p_export => l_export );
EXCEPTION
when others THEN
apex_exec.close( l_context );
raise;
END;
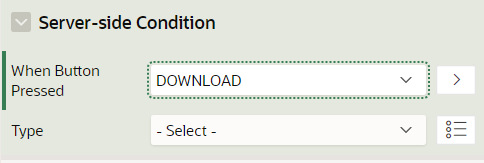
Under Server-side condition:
For When Button pressed – DOWNLOAD
Step 9: Navigate to Rendering Tree and click on Page (No. 2). In the Property Editor, apply the following changes
Under Advanced
For Reload on Submit – select Always.
Step 10: Click Save and Run Page.
Step 11: Output

CONCLUSION :
By Using the above steps now you can programmatically generate the report by selecting the Report Format and clicking on the Generate Report button you can get the generated report.

