INTRODUCTION:
The Mini Calendar Plug-In and the Sticky Notes Plug-In are two handy and adaptable Oracle APEX plug-ins that will be introduced in this article. These plug-ins provide intuitive and interactive features that help improve the user interface and general usability of APEX applications.
- The Mini Calendar plug-in provides a smooth integration experience, allowing developers to set and customize the calendar to meet the unique needs of their application.
- The Sticky Notes Plug-In adds an interactive element to APEX applications by letting users scribble down brief notes, reminders, or suggestions. These virtual sticky notes serve as visual indicators that users may place on relevant application pages, improving user experience and promoting better organization.
WHY WE NEED TO DO / CAUSES:
Mini-Calendar Plug-in:
- Drag-and-drop functionality: Users may easily create, update, and reschedule calendar events.
- Customizable styles: Developers may customize the calendar’s design to match the theme and branding of their application.
- Tooltips for the event: For rapid previews, show event details in tooltips.
- Database table integration: Connect the calendar to your data sources to handle events in real-time.
Sticky Notes Plug-in:
- Users have the ability to make new sticky notes, alter their colors, and add text to them.
- Drag-and-drop capabilities: Sticky notes may be placed and moved anywhere on the application’s pages.
- Support for collaboration: The application’s sticky notes feature allows users to work together.
- Reminders and alerts: To remain on top of critical tasks, users may set reminders on notes.
HOW DO WE SOLVE:
Step 1: In Oracle Apex, Upload and run the script with the SQL script option. From, SQL Workshop -> SQL Script. As you can see, all statements were processed correctly with no mistakes.
Let’s look at this table name JOHNSONS_DATA and its associated data stored in the object browser now.
Inside SQL script of JOHNSONS_DATA as stated below:
Create table JOHNSONS_DATA
( “ID” NUMBER NOT NULL ENABLE,
“TASK_NAME” VARCHAR2(255),
“TASK_DESCRIPTION” VARCHAR2(4000),
“START_DATE” DATE,
“END_DATE” DATE,
“STATUS” VARCHAR2(30),
“USERID” NUMBER,
“PROJECT_ID” VARCHAR2(10),
“SDLCNO” NUMBER(2,0),
“PROJECT_ICON” VARCHAR2(25)
);
insert into JOHNSONS_DATA values (1, Create a detailed Report of Johnson Project ‘, Description of J&J Reports of Project (John Deer)’, to_date(’08-01-2023′,’mm-dd-yyyy’), to_date(’08-05-2023′,’mm-dd-yyyy’), ‘Closed’, 1, ‘PRJ-123’, 10, ‘fa fa-calendar-edit’);
STEP 2: Create a new page in this application as an Interactive Report, Select the table name as ‘JOHNSONS_DATA and select the primary key as ID, and a new report page has been created and named J&J Report.
STEP 3: In J&J Report we added a breadcrumb to allow users to simply navigate between the report and form pages. Then create a button named Create to generate a new task and the button will be positioned at the ‘Right of the Interactive Report at Search bar’ and save it.
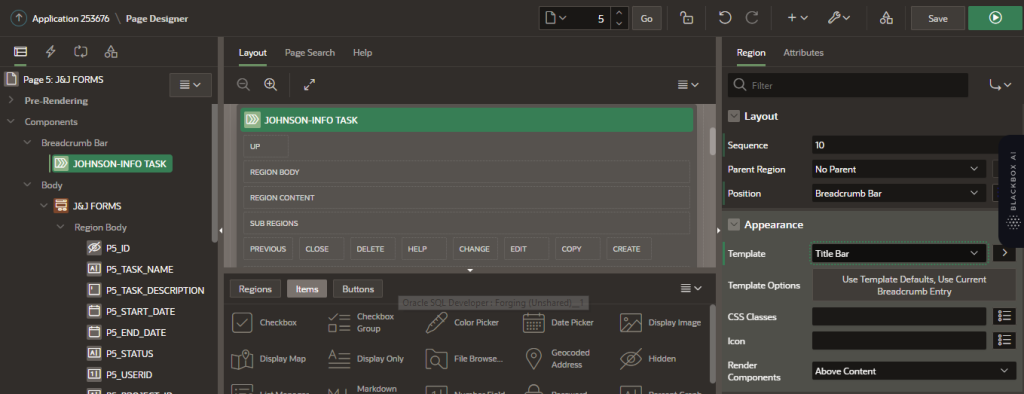
STEP 4: Again, create a new page in this application as a Form and name it J&J Forms. Add a Breadcrumb in this form and name it J&J Task. This breadcrumb section was to allow users to simply navigate between the report and form pages and Then, Change its template into Title Bar.
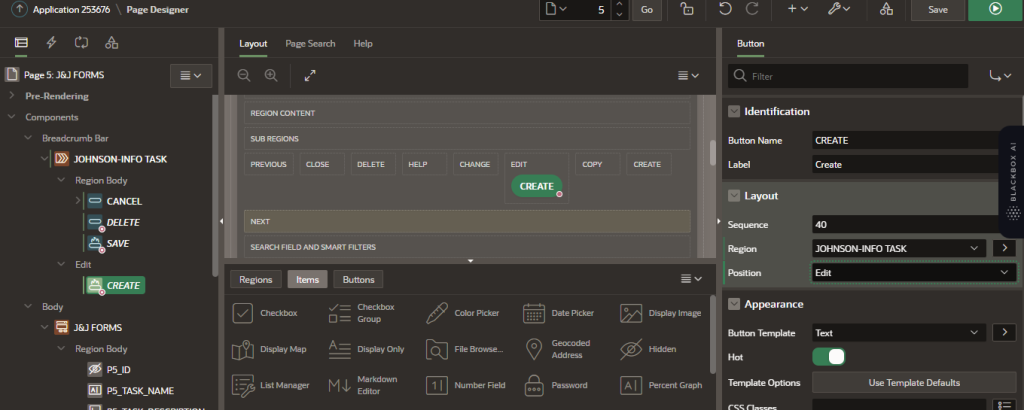
STEP 5: I created four buttons Save, Cancel, Delete & Create in this form. By changing the region attribute of the save, cancel, delete, and create buttons to “info-tech tasks,” the four-page buttons may be moved to the breadcrumb region. The four-page buttons may be moved to the breadcrumb region. Also, set the button position property of these buttons to edit.
STEP 6: Create a new region and give it the following properties on the form page. The following characteristics should be set for the additional area. This area will display greater activity.
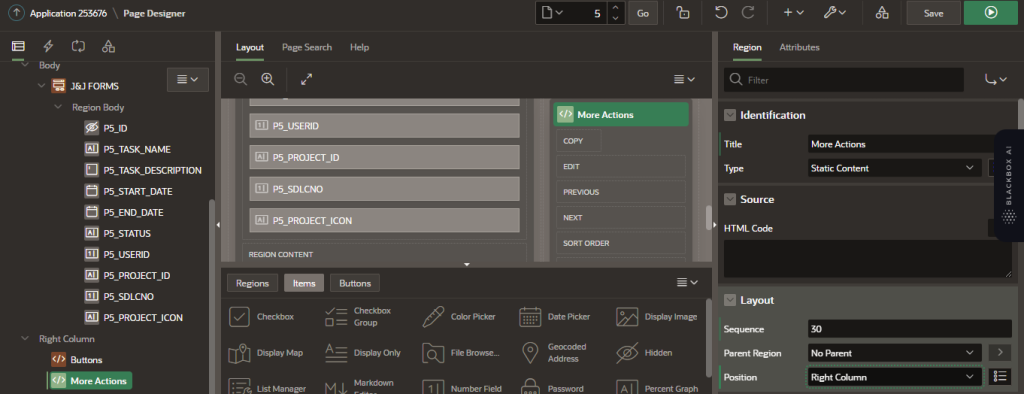
STEP 7: Click the form region under the content body, and change its template from standard to blank with attributes. Go to shared components. Click the list option. Create a static list named ‘More actions’ with the following values. Since we are going through the page template Eg, I’m not setting targets for these list items.

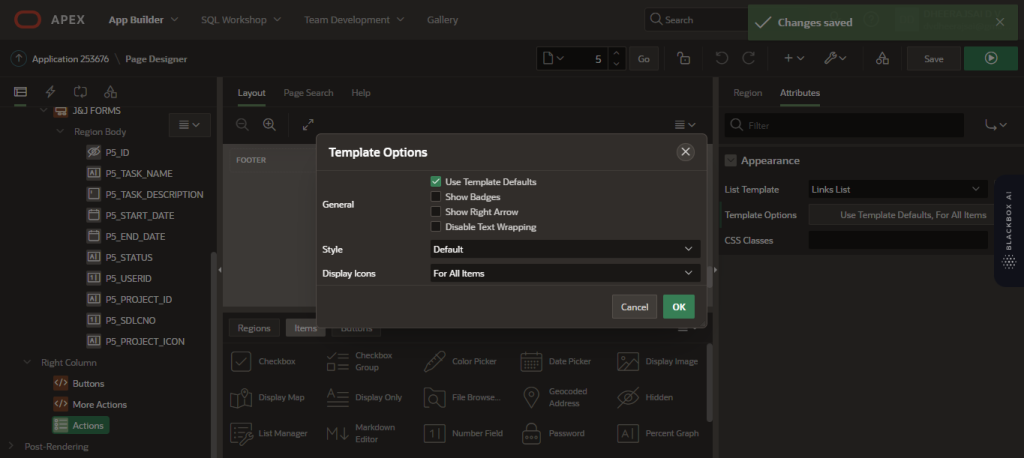
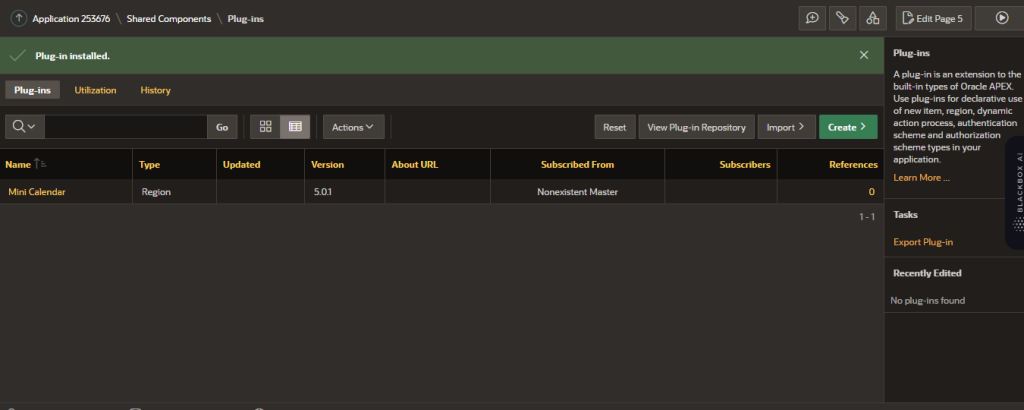
STEP 8: Go to Shared Components. Click the Plugins option. Import the mini-calendar plug-in from the right-column page template folder. The plug-in displays a small calendar with the specified date highlighted.
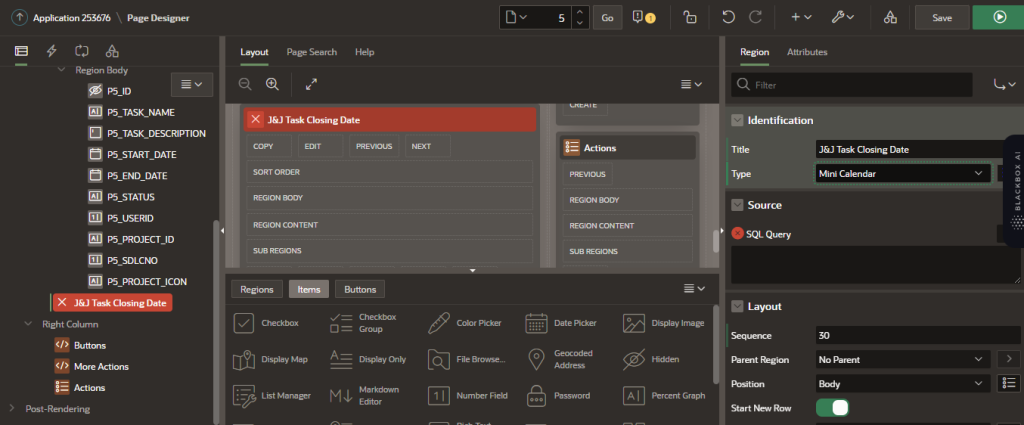
STEP 9: Add a new region and it’s named ‘J&J Task Closing Date’ to the page under the actions region and set the following attributes. In this example, with the help of this region, we are going to display the end date column from the JOHNSONS_DATA table. I created a query to replace these two cross-signs with your page number.
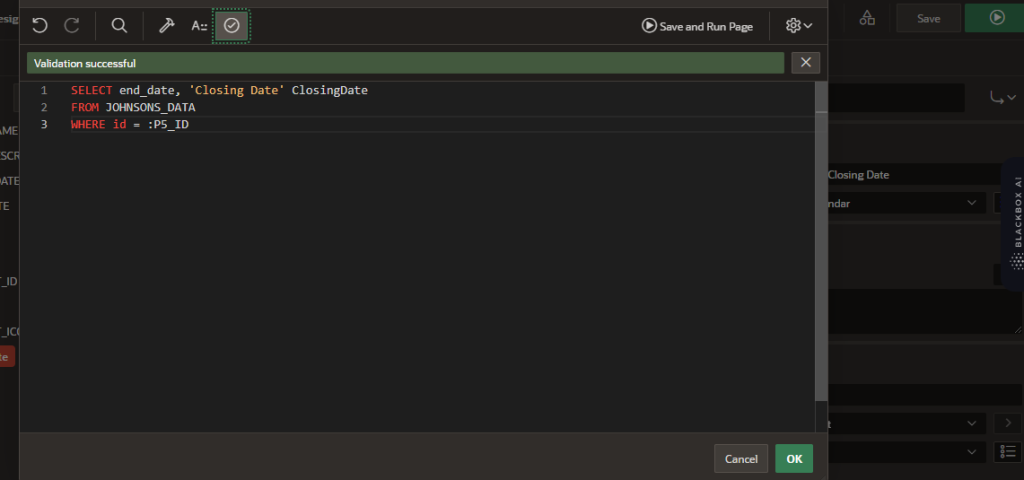
SQL Query for Closing Date:
SELECT end_date, ‘Closing Date’ ClosingDate
FROM JOHNSONS_DATA
WHERE id = :P5_ID
STEP 10: Add a new region and its name as ‘Sticky Notes’ to the page under the actions region and set the following attributes. This region will hold a sticky note at runtime, in which we will show contents from the task description and start date columns in the JOHNSONS_DATA table in the current scenario. Replace these two cross-signs with your page number as we did previously.
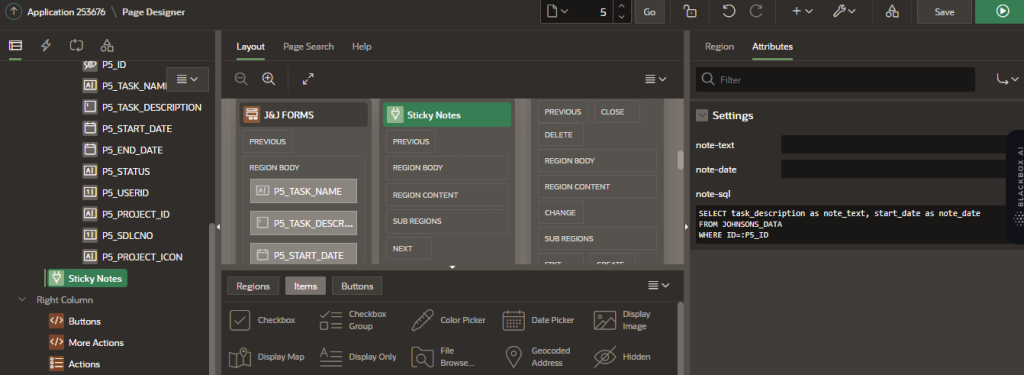
SQL Query for Sticky Notes:
SELECT task_description as note_text, start_date as note_date
FROM JOHNSONS_DATA
WHERE ID=:P5_ID
STEP 11: After this process and kindly save this change in page designer and run this application.
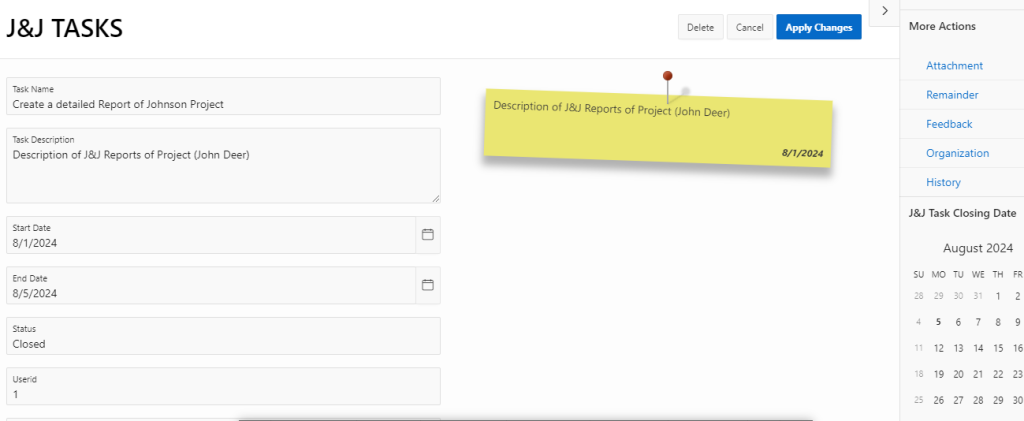
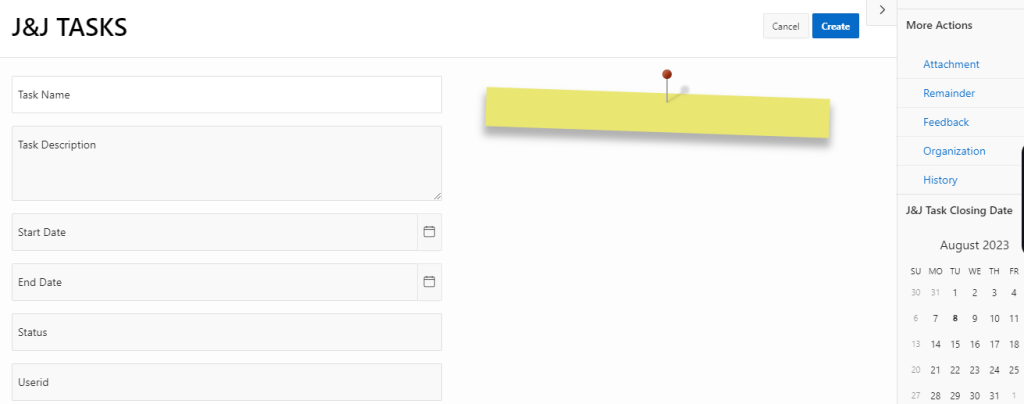
STEP 12: Our report page is here. On this screen, click the Create button to start a new task. Enter the mentioned details in this form. The date on the Post-it note we put is reflected in the start date column on the left. This is the runtime view of the static list we constructed called More Actions, which can be seen in the right side column. Enter the notes in the task description and it will save in this sticky note.
Conclusion:
Finally, the entered details can be seen on the J&J Report page click the pencil mark of the first one to view the entered details and thus the creation of a Mini Calendar and Sticky Notes into a form.

