INTRODUCTION:
TinyMCE is a web-based WYSIWYG (What You See Is What You Get) editor that allows users to create and edit HTML content in a browser. It is a popular open-source editor that is used in many web-based applications, including content management systems (CMS) and web-based email clients.
In this blog, we are going to learn how to use Rich Text Editor.
WHY WE NEED TO DO:
It provides a range of features such as rich text formatting, image insertion, table creation, and the ability to insert and edit HTML code directly. It is highly customizable.
HOW DO WE SOLVE:
Step 1:
Create a table with ID and blog text.
Create table asp_tbl ( ID NUMBER(4) GENERATED BY DEFAULT ON NULL AS IDENTITY MINVALUE 1 MAXVALUE 90000 INCREMENT BY 1 START WITH 8000.
NO CACHE
Blog_text varchar2(4000),
CONSTRAINT “asp_tbl_ID” PRIMARY KEY (“ID”)
USING INDEX ENABLE
);
Step 2:
Create an application
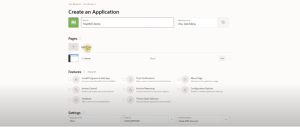
Step 3:
Create interactive report and select the table asp_tbl.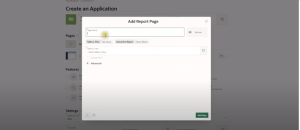
Step 4:
Click the checkbox “Include Form”.
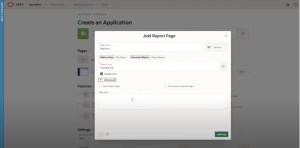
Step 5:
The page has been created and change the library in settings to TinyMCE Editor.

Change the type to Rich Text Editor and the appearance to theme default. Also the markdown to HTML. Then run the application.
Step 6:
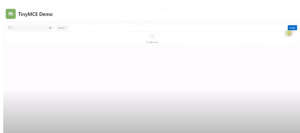
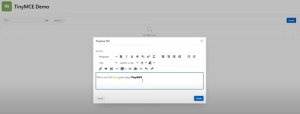
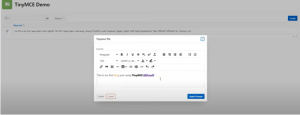
Click the create button and the page appears with Rich text editor.
Step 7:
Now type any text and you can make the changes such as making it Bold and underline text as whatever you want.
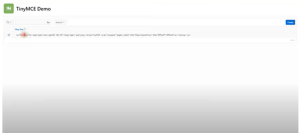
Step 8:
When you click the source code , you are able to see the HTML code in the backend whereas the text will be displayed in the code editor. This is what the TinyMCE WYSIWYG.
CONCLUSION:
Everything is made simple and easy in Rich text editor.
