Introduction
Oracle APEX Tree Regions are excellent for displaying hierarchical data like employee-manager relationships. In this blog post, we’ll explore how to capture the selected employee’s name and their hierarchical level within the organization and store these values in APEX page items for further processing.
Technologies and Tools Used
The following technology has been used to achieve the expected output.
- JavaScript
- Oracle Apex
Why we need to do
Imagine you’re working with an organizational hierarchy where you want to display employees and their managers in a Tree region. When a user selects an employee from this tree, you need to capture the employee’s name and their level within the hierarchy. These details will then be stored in APEX page items for use in further logic or display.
How do we solve
Following steps explains in detail,
Step 1:
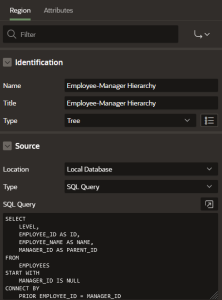
First, you need to create the Tree region in Oracle APEX. Below is an example SQL query that you might use to populate the Tree region with employee-manager relationships:
SELECT
LEVEL,
EMPLOYEE_ID AS ID,
EMPLOYEE_NAME AS NAME,
MANAGER_ID AS PARENT_ID
FROM
EMPLOYEES
START WITH
MANAGER_ID IS NULL
CONNECT BY
PRIOR EMPLOYEE_ID = MANAGER_ID
ORDER SIBLINGS BY
EMPLOYEE_NAME;
– LEVEL: Indicates the hierarchical level in the tree.
– EMPLOYEE_ID: Unique identifier for each employee.
– EMPLOYEE_NAME: The name of the employee, which will be displayed in the Tree.
– MANAGER_ID: Indicates the parent node (manager) for each employee.
This query builds a hierarchical structure starting with employees who have no managers (typically the top-level executives) and connects each employee to their respective manager.
Step 2:
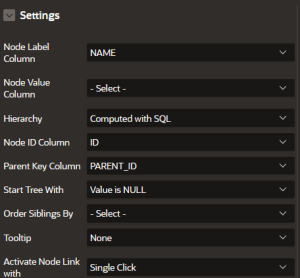
Set the attributes as below for the tree region.
Step 3:
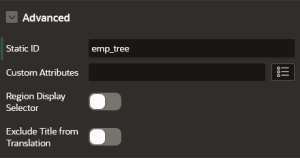
Set a static id for this Tree region
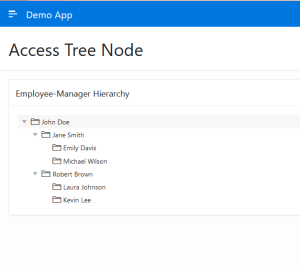
You will get a tree in your page now.
Step 4:
Step Create a page item for storing the captured value
Here created, P70_NAME
Step 5:
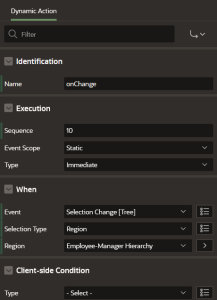
Step: Create a dynamic action on Selection Change (Tree).
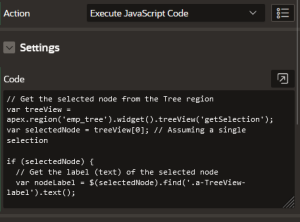
Create a true action with Execute JavaScript code and Place the code below
// Get the selected node from the Tree region
var treeView = apex.region(’emp_tree’).widget().treeView(‘getSelection’);
var selectedNode = treeView[0]; // Assuming a single selection
if (selectedNode) {
// Get the label (text) of the selected node
var nodeLabel = $(selectedNode).find(‘.a-TreeView-label’).text();
// Set the label value to the APEX item P70_NAME
apex.item(‘P70_NAME’).setValue(nodeLabel);
}
Step 6:
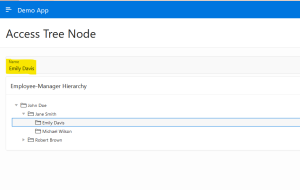
Save and Run
Conclusion
By using the above method, we can access the tree node label and see the value in the page item. It can be used for your further logic

