Introduction :
Maintaining the security and performance of your Oracle Database is crucial, and applying patches is a key aspect of this maintenance.
Oracle Cloud Infrastructure (OCI) simplifies the process of applying and rolling back patches through its intuitive console, allowing database administrators to manage updates with confidence.
In this blog post, we will walk you through the essential steps to apply and,if necessary, roll back patches using the OCI console.
Whether you’re looking to enhance security, fix bugs, or improve performance, understanding these procedures will help ensure your database remains up-to-date and resilient.
| S.No | Display of content |
| A. | Steps to apply the patch. |
| 1. | Verify the current version of the database |
| 2. | Run the pre-check for the patch |
| 3. | Monitor the work request for the pre-check of patch |
| 4. | Apply the patch |
| 5. | Monitor the work request for applying the patch |
| 6. | Verify the patch status in the update history once the patch completes |
| 7. | Login to the server and verify the database home |
| B. | Steps to rollback the patch. |
| 1. | Use the below command to rollback the database to previous version |
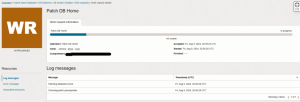
| 2. | Monitor the status of the job |
| 3. | Verify the database version once the rollback completes |
A. Steps to apply the patch
Step 1: Verify the current version of the database.
1.1 – From the console
![]()
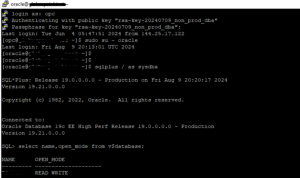
1.2 – From the putty session

Step 2: Run the pre-check for the patch.

Step 3: Monitor the work request for the pre-check of patch.


Step 4: Apply the patch.

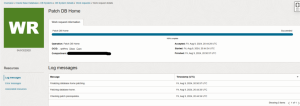
Step 5: Monitor the work request for applying the patch.

Step 6: Verify the patch status in the update history once the patch completes.

Step 7: Login to the server and verify the database home.
[root@######## ~]# dbcli list-dbhomesID Name DB Version Home Location Status
—————————————- ——————– —————————————- ——————————————— ———-
09cf1bda-610f-4c38-bd19-9686306685d5 OraDB19000_home1 19.24.0.0.0 /u01/app/oracle/product/19.0.0.0/dbhome_1 Configured
[root@######## ~]# dbcli list-databases -j | grep “dbHomeId”“dbHomeId” : “09cf1bda-610f-4c38-bd19-9686306685d5”,
B. Steps to rollback the patch
Step 1: Use the below command to rollback the database to previous version.
[root@######## ~]# dbcli update-dbhome -i 09cf1bda-610f-4c38-bd19-9686306685d5 -r{
“jobId” : “cd6f7d7e-fa13-4404-b54f-a4fea9dae4c4”,
“status” : “Created”,
“message” : null,
“errorCode” : “”,
“reports” : [ ],
“createTimestamp” : “August 10, 2024 03:37:55 AM UTC”,
“resourceList” : [ ],
“description” : “Rollback database inplace image patching with dbhomeId : 09cf1bda-610f-4c38-bd19-9686306685d5”,
“updatedTime” : “August 10, 2024 03:37:56 AM UTC”,
“percentageProgress” : “0%”,
“cause” : null,
“action” : null
}
Step 2: Monitor the status of the job.

Step 3: Verify the database version once the rollback completes.


