This blog provides a step-by-step guide to setting up a Snowflake environment for loading data from AWS S3.
Prerequisites:
Snowflake Account-> Ensure you have access to a Snowflake account.
AWS S3 Bucket-> Have your data stored in an S3 bucket, with appropriate permissions.
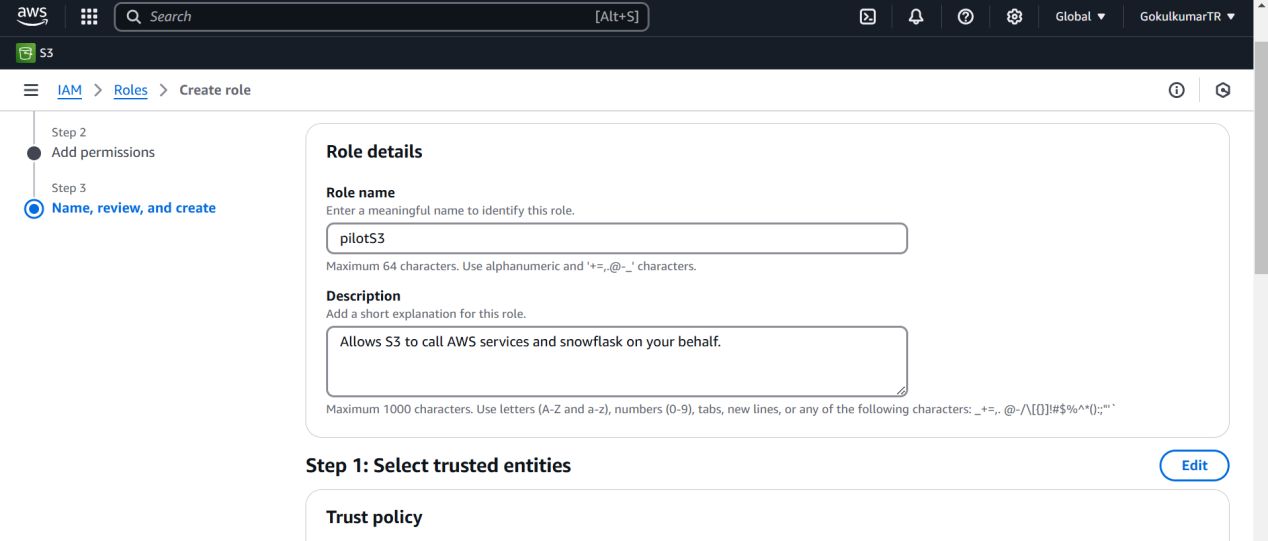
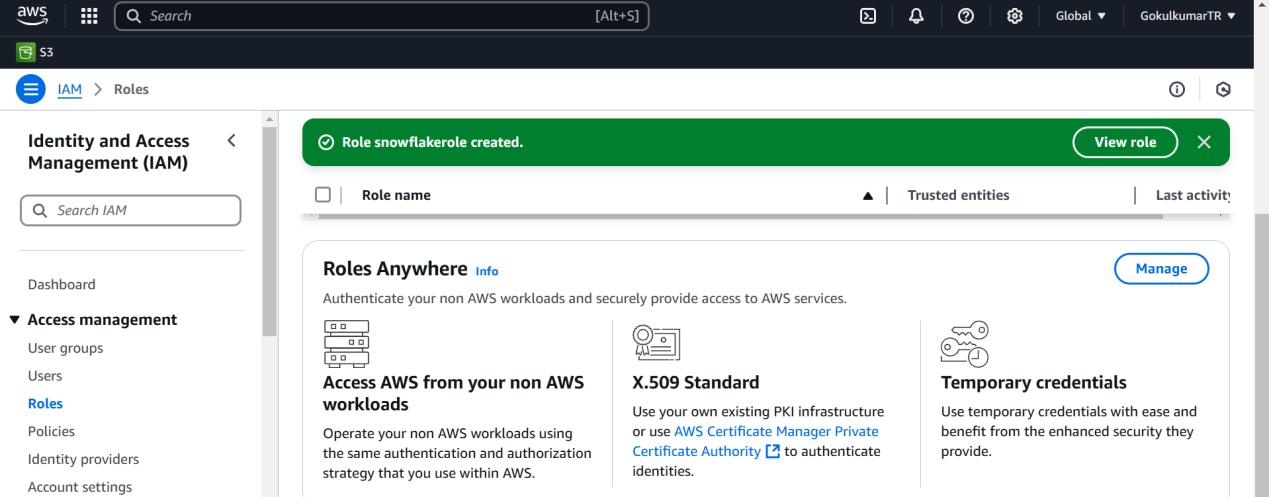
AWS IAM Role->Create an IAM role for Snowflake to access your S3 bucket.
Step 1:
Create and enable permissions the S3 Bucket


Configure AWS IAM Role:
Update the S3 bucket policy to allow access from Snowflake using your Snowflake account’s AWS region.
Step 2:
Setup snowflake environment for loading the data from AWS S3 bucket
A warehouse in Snowflake supplies the necessary resources, including CPU, memory, and temporary storage, to execute DML operations effectively. Also create database and schema as part of testing.
create warehouse pilot24;
create database demo;
create schema garden;
Step 3:
Execute the below command to create storage object, this object help you to connect to the AWS bucket.
create or replace storage integration aws_s3
type = external_stage
storage_provider = s3
enabled = true
storage_aws_role_arn = ‘arn:aws:iam::940482408934:role/snowflakerole’
storage_allowed_locations = (‘s3://pilot24/’);
Step 4:
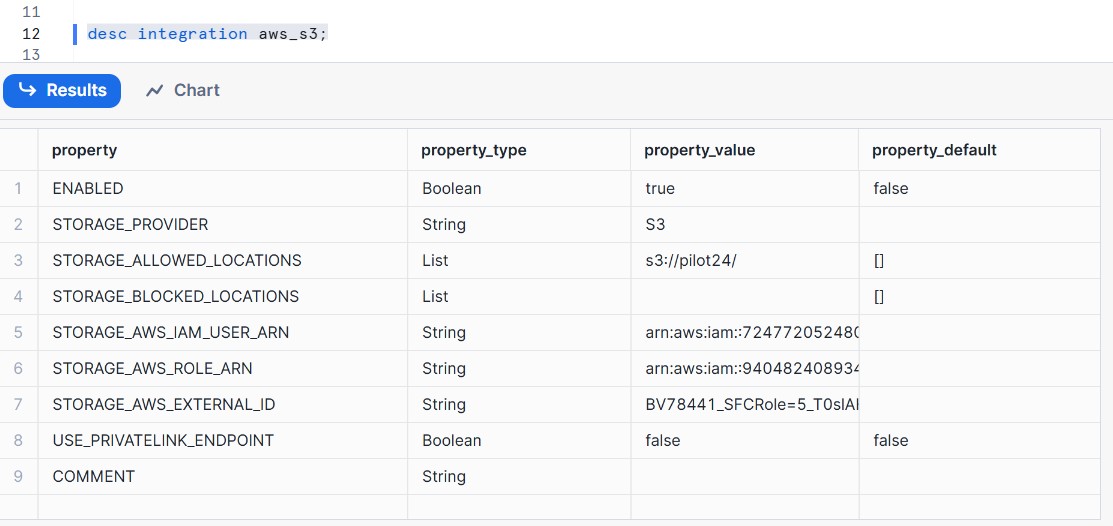
The below describe command helps you get the Amazon resource name ARN.Amazon resource names (ARN) uniquely identify AWS resources.
desc integration aws_s3;
Step 5:
Create a named file format that describes a set of staged data to access or load into Snowflake tables.
create or replace file format csv_format type = csv field_delimiter = ‘,’ skip_header = 1 null_if=(‘NULL’,’null’) empty_field_as_null=true;
Step 6:
Creates a stage to use for loading data from files into Snowflake tables and unloading data from tables into files:
create or replace stage aws_stage_pilot24 storage_integration = aws_s3 url = ‘s3://pilot24/’ file_format = csv_format;
Step 7:
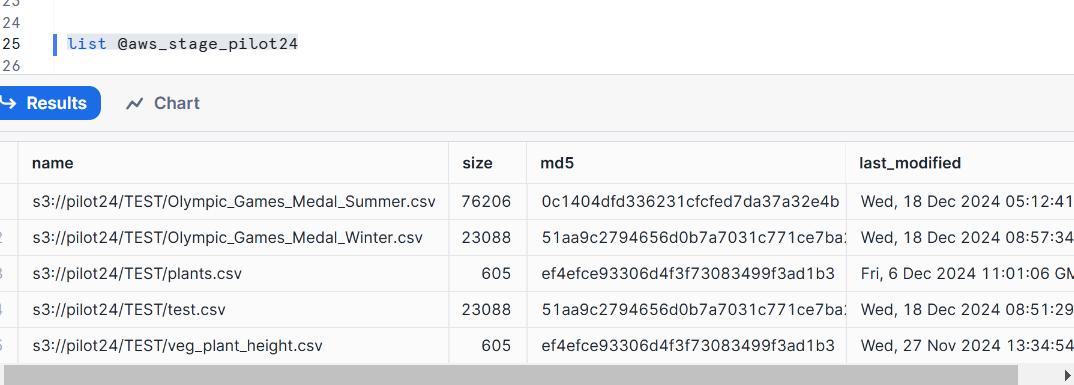
List command will list the files that have been staged in amazon S3
list @aws_stage_pilot24
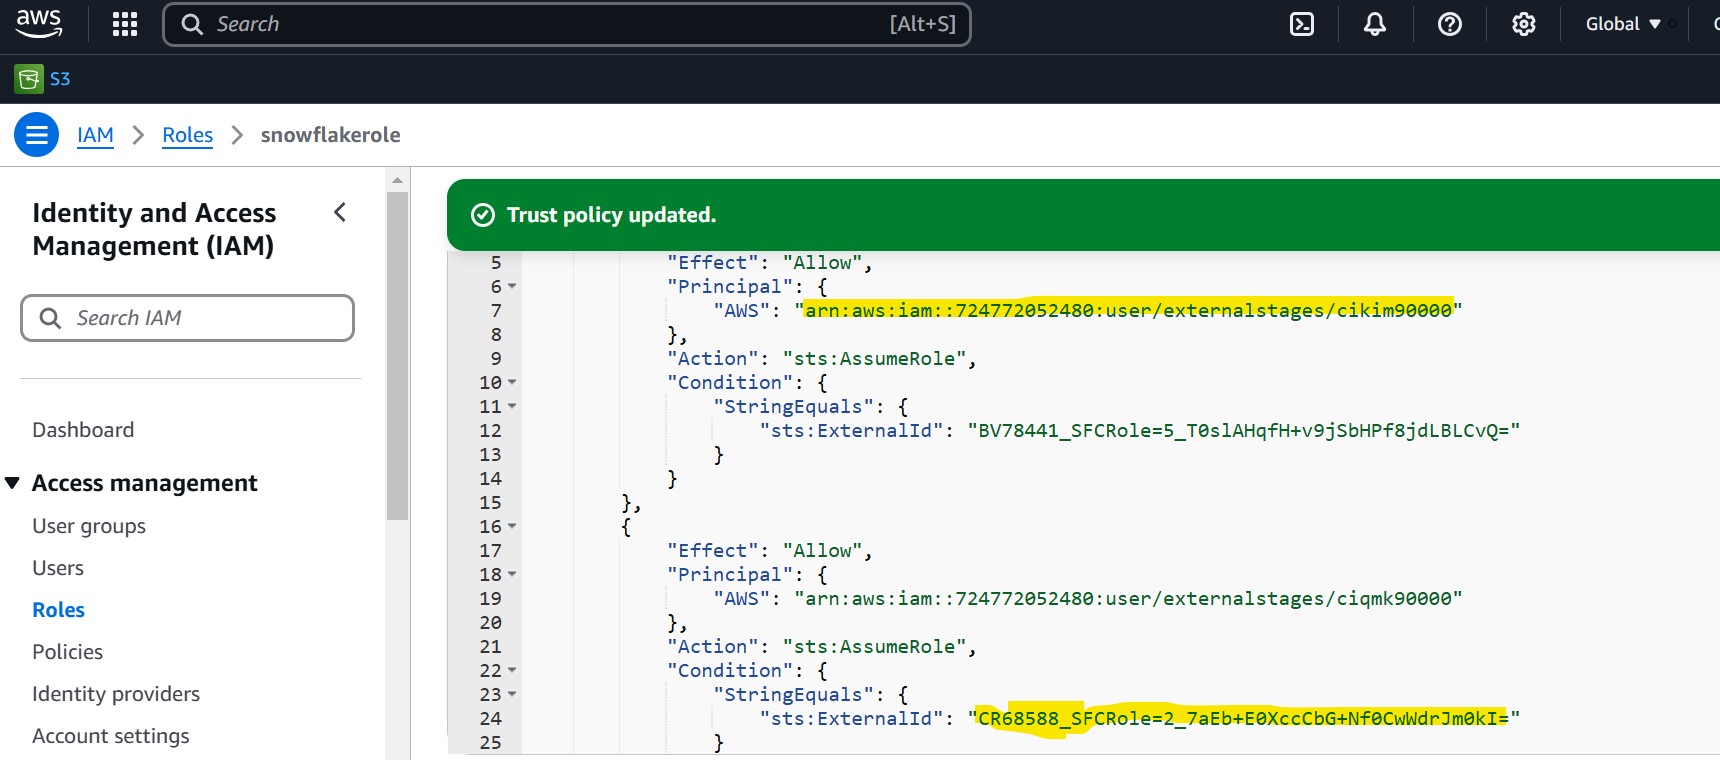
Add Snowflake as a trusted entity by attaching the following trust policy in AWS role as follows
Step 8:
Create the table as plant_details for load testing.
CREATE TABLE plant_details (
plant_name VARCHAR(100) NOT NULL, — Assuming plant_name is a text field
UOM CHAR(1) NOT NULL, — UOM as a single character
Low_End_of_Range INT NOT NULL, — Integer for the low end of range
High_End_of_Range INT NOT NULL — Integer for the high end of range);
Step 9:
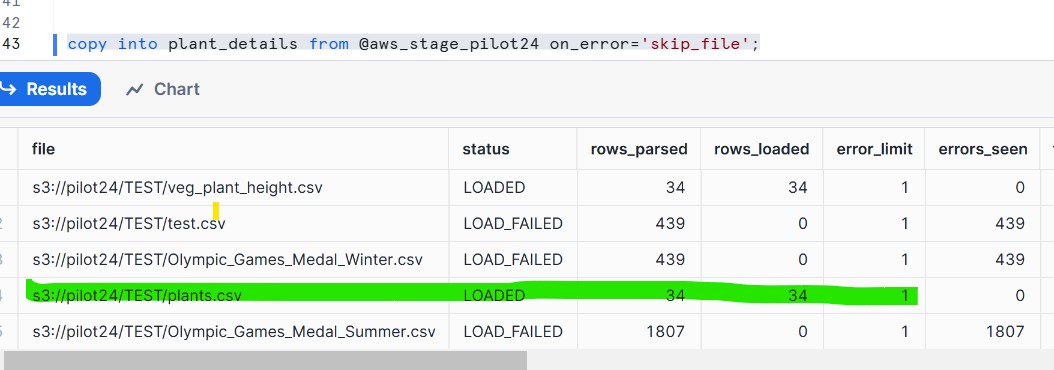
Copy Data into Snowflake tables
copy into plant_details from @aws_stage_pilot24 on_error=’skip_file’;
Step 10:
Validate Your Data
select * from plant_details;


Conclusion:
Upon completing the aforementioned steps, you have effectively established a Snowflake environment for importing data from AWS S3. Snowflake’s integration features facilitate a smooth and efficient process for handling S3 data.

