Introduction:
This blog provides a step-by-step guide to install Jaspersoft Community Edition on an Ubuntu machine. Jaspersoft is a widely used business intelligence tool that allows users to create, view, and schedule reports, dashboards, and analytics.
Objective:
The purpose of this setup is to deploy the Jaspersoft reporting server on an Ubuntu environment for internal development and reporting needs. Once installed, users will be able to access a web interface to build and view reports from various data sources.
High-Level Steps Overview
- Download Jaspersoft installer (.run file) from the official site
- Install Chromium as a required dependency
- Create a working directory and move the installer
- Run the installer and accept the license agreement
- Install JDK (if not already installed)
- Start Jaspersoft services using the control script
- Access the Jaspersoft console via web browser
Detailed Installation Steps
Step 1: Download Jaspersoft Installer
- Visit the Jaspersoft Community Downloads Page
- Download the .run file for the Jaspersoft Community Edition.
Step 2: Install Chromium (Pre-requisite)
Jaspersoft uses headless Chromium for exporting reports to certain formats like PDF.
Install it using:
sudo apt update
sudo apt install chromium-browser -y
Step 3: Prepare Directory and Move the Installer
Create a directory for Jaspersoft:
mkdir ~/jasperhome
mv jasperreports-server-cp-xx.x.run ~/jasperhome/
cd ~/jasperhome
Step 4: Run the Installer
Make the installer executable:
chmod +x jasperreports-server-cp-xx.x.run
Run the installer:
./jasperreports-server-cp-xx.x.run
Follow the on-screen instructions and accept the license agreement when prompted. The installer will guide you through basic configuration and deployment.
Step 5: Install JDK (If Not Already Installed)
If Java is not already installed,
use:
sudo apt install openjdk-11-jdk -y
Verify:
java -version
Step 6: Start Jaspersoft Services
Navigate to the Jaspersoft installation home directory:
cd ~/jasperhome/<jasper_install_dir>
Start the services:
./ctlscript.sh start
This will initialize the database, web server (Tomcat), and other required components.
Post-Installation Verification
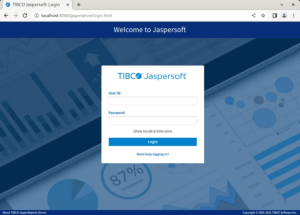
Once the services are running, access the Jaspersoft login screen using your browser:
http://<your-server-ip>:<port>/jasperserver
Use the default credentials to login, You should now see the Jaspersoft dashboard.
Conclusion
Jaspersoft was successfully installed on Ubuntu using the .run installer provided by TIBCO. This method simplifies the setup by bundling required services and dependencies. The Jaspersoft server is now ready for creating, scheduling, and managing reports via the web interface.
