How to create a cost estimate with the AWS Pricing Calculator?
Concepts:
- Create a logical pricing group.
- Create weekly, monthly, and yearly estimates for Amazon EC2 instances.
Step 1:
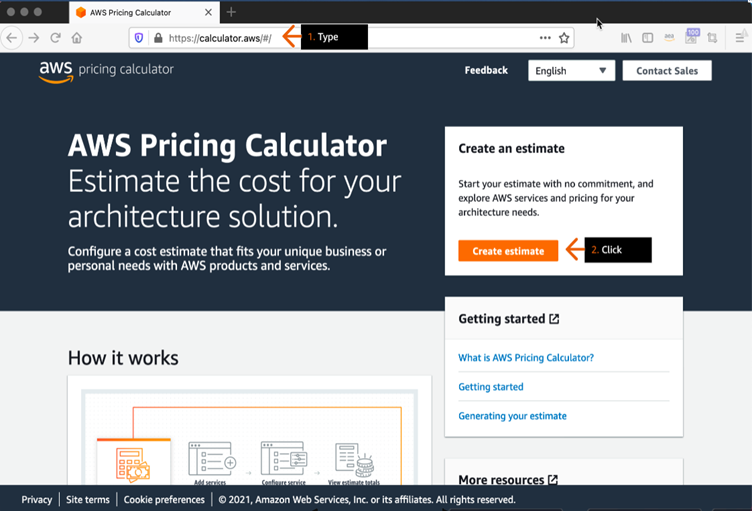
- Open a new browser tab, and then, in the address bar, type:
https://calculator.aws and press Enter.
- On the AWS Pricing Calculator home page, click Create estimate.
- Go to the next step.
Steps 2:
- On the top breadcrumb menu, click My Estimate.
- Go to the next step.
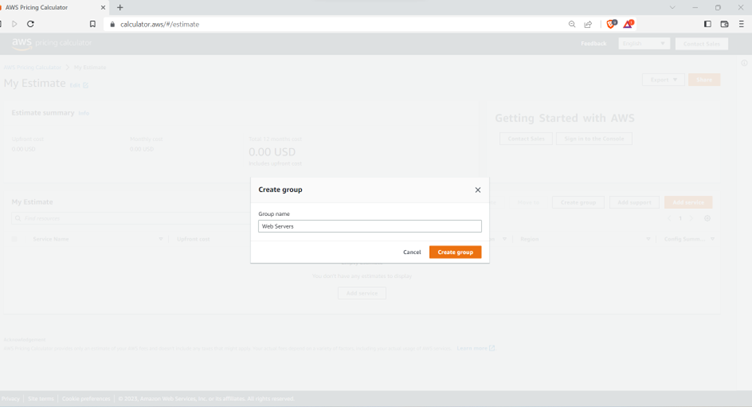
- In the pop-up box, for Group name, type:
Web Servers
- Click Create group.
- Go to the next step.
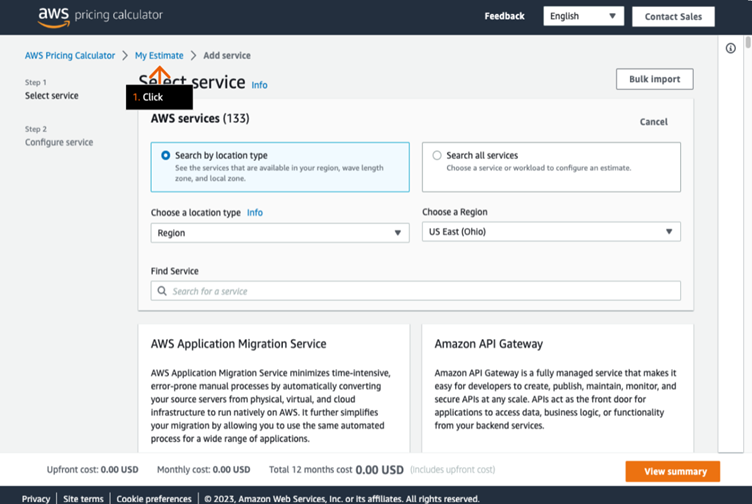
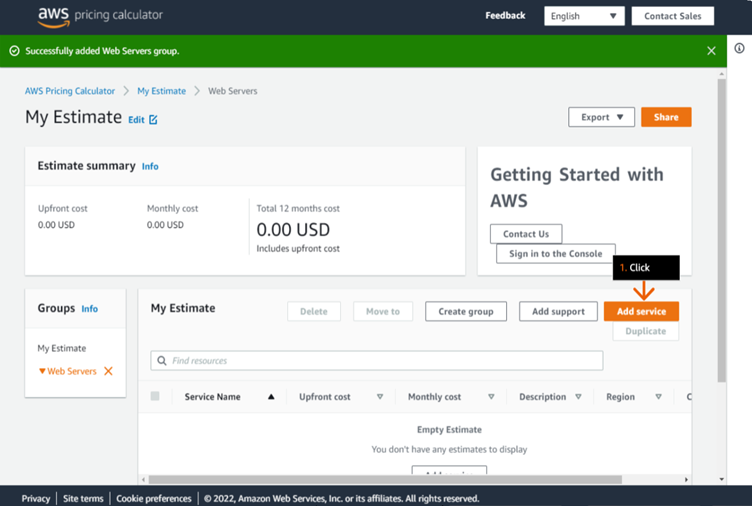
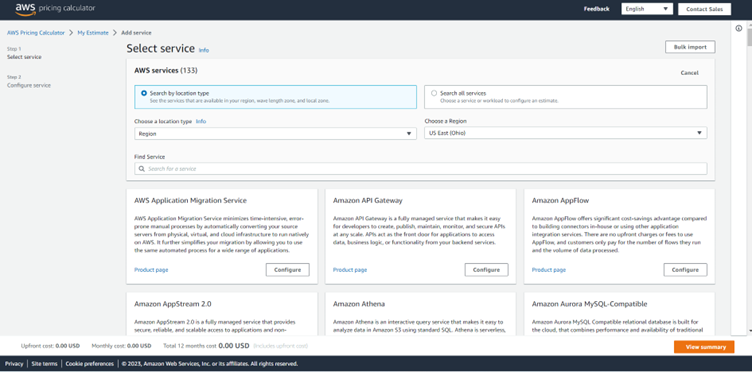
- Click Add service.
- Go to the next step.
- In the AWS services section, for Find Service, type: ec2
- On the Amazon EC2 card, click Configure.
- Go to the next step.
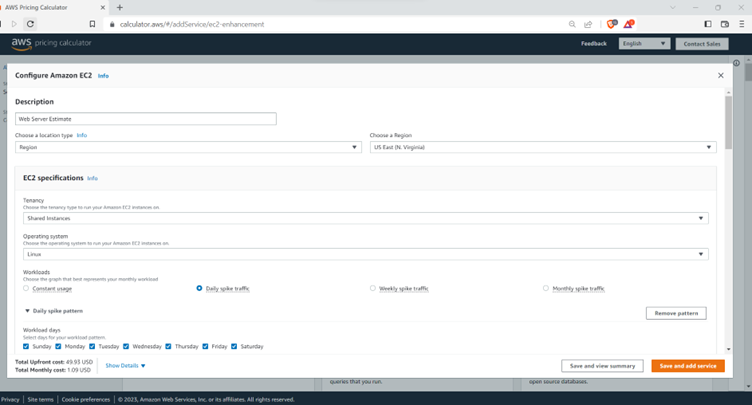
- In the pop-up box, for Description, type:
Web Server Estimate
- For Choose a location type, on the dropdown menu, choose Region.
- For Choose a Region, choose US East (N. Virginia).
- Go to the next step.
In the next step,
- Scroll down to EC2 specifications.
- For the Operating system, choose Linux.
- For Workloads, choose Daily spike traffic.
- For Workload days, choose the seven checkboxes to select all days (Sunday through Saturday).
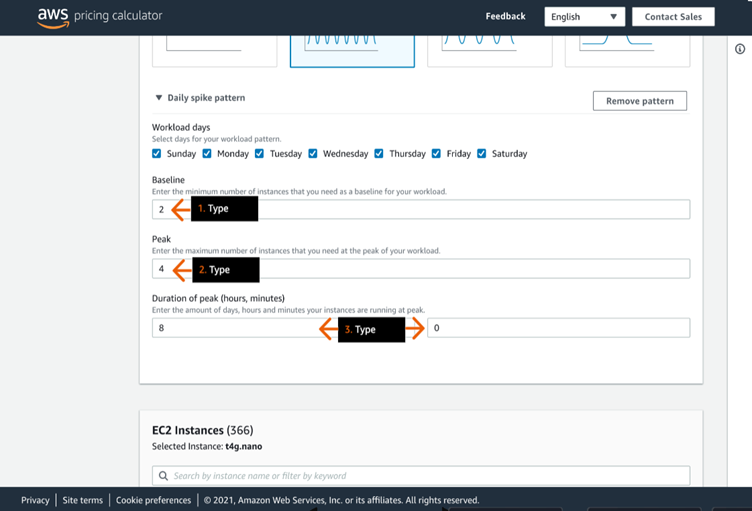
- Scroll down to Baseline.
- Go to the next step.
- For Baseline, type: 2
- For Peak, type: 4
- For the Duration of the peak, in the two text boxes, type: 8 (for hours) and 0 (for minutes)
- Go to the next step.
- Scroll down to EC2 Instances.
- For Any Instance family, for vCPUs, choose 2.
- For Memory (GiB), choose 4 GiB.
- For Network performance, choose Any Network Performance.
- In the instances list, choose the radio button to select t2.medium.
- Go to the next step.
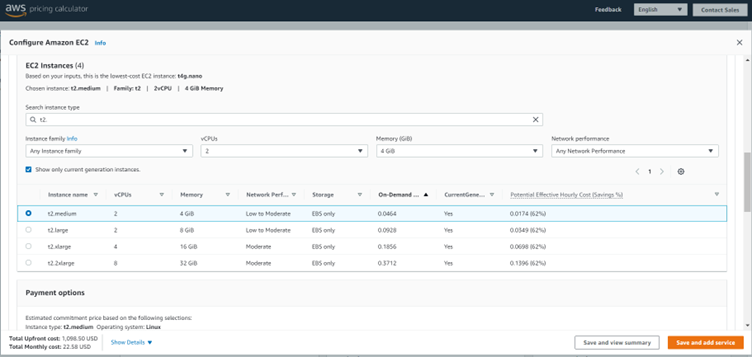
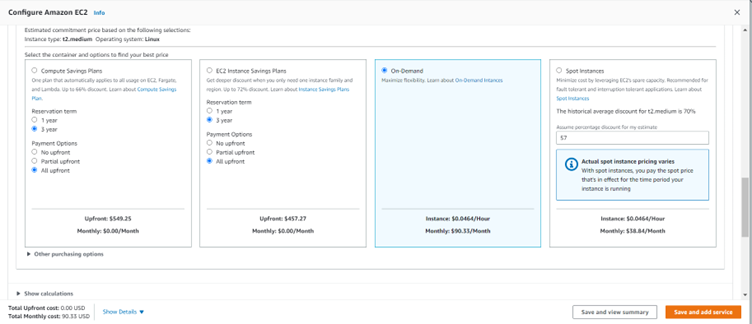
- Scroll down to Payment options.
- Choose On-Demand.
- Scroll down to Show calculations.
- Go to the next step.
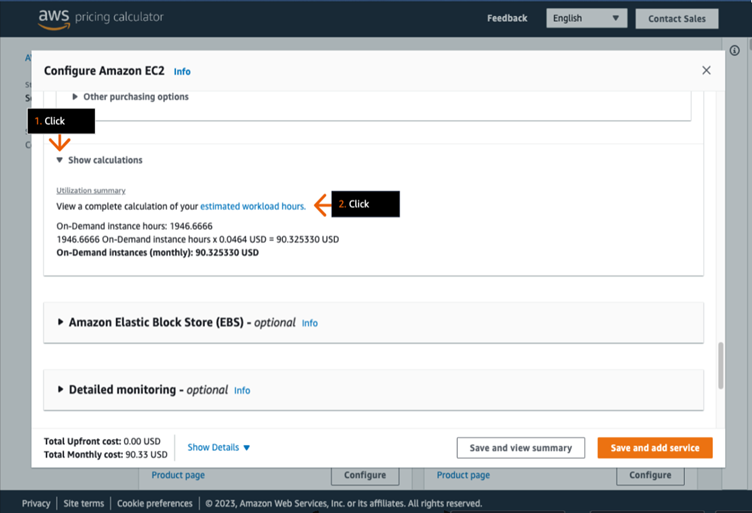
- Click to expand Show calculations.
- Click estimated workload hours.
- Go to the next step.
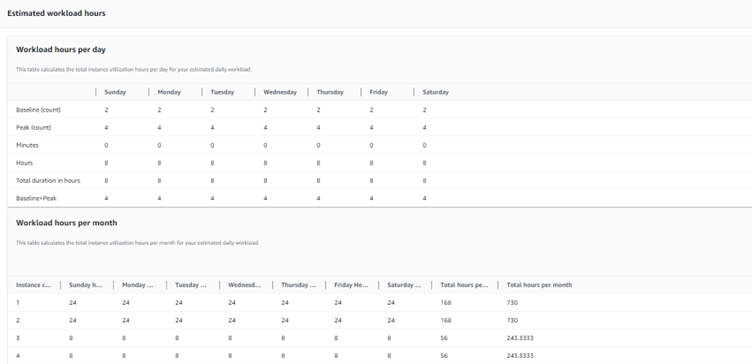
- In the pop-up box, scroll down to Workload hours per month.
- Review how your workload hours are broken down per day.
- Review to see that instances 3 and 4 are being charged for only 8 hours per day while instances 1 and 2 are being charged for 24 hours per day.
- Under Utilization summary, review the Total On-Demand instance hours per month.
- Click Close.
- Go to the next step.
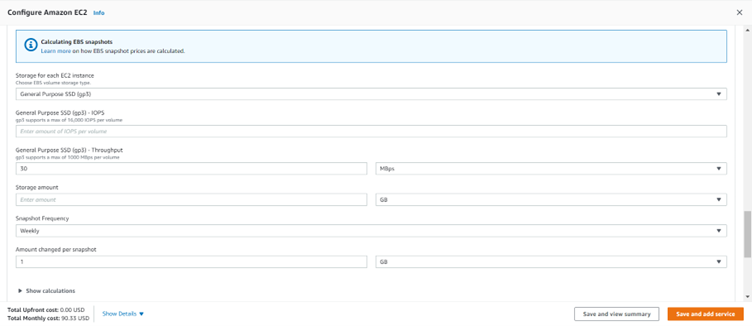
- Click to expand the Amazon Elastic Block Store (EBS) section.
- For Storage for each EC2 Instance, choose General Purpose SSD (gp3).
- For General Purpose SSD (gp3) – IOPS, type: 30
- Scroll down to Snapshot Frequency.
- Go to the next step.
Next step,
- For Snapshot Frequency, choose Weekly.
- For the Amount changed per snapshot, type: 1
- On the right dropdown menu, choose GB.
- Scroll down to Data transfer.
- Go to the next step.
- Click to expand Data transfer.
- For Inbound Data Transfer, choose Internet (free).
- In the middle text box, for Enter amount, type: 1
- On the right dropdown menu, choose TB per month.
- For Outbound Data Transfer, choose Internet.
- In the middle text box, for Enter amount, type: 100
- On the right dropdown menu, choose GB per month.
- Click to expand Show calculations.
- Go to the next step.
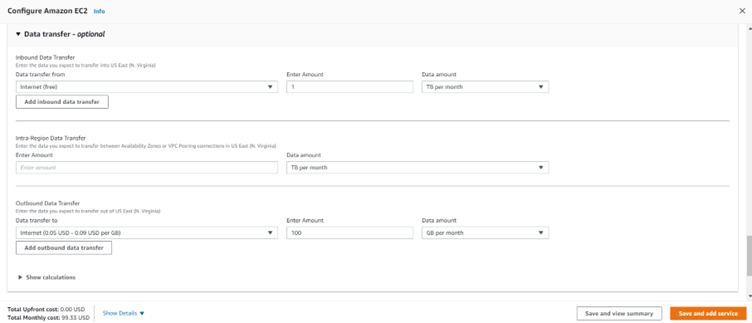
- Under Show calculations, review how your Data Transfer rates are calculated.
- Review the Total Monthly cost.
- Click Save and add service.
- Go to the next step.
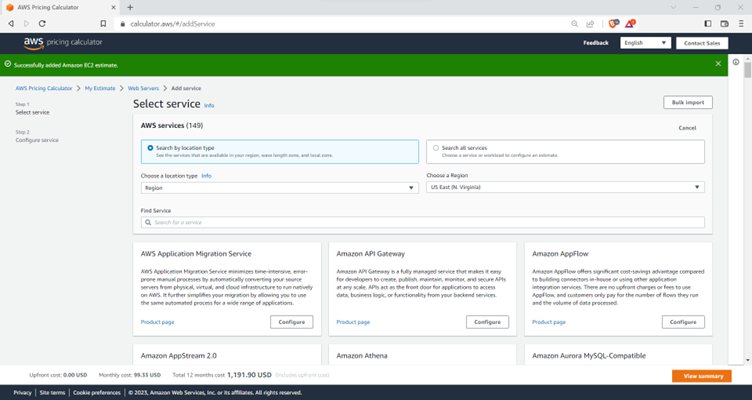
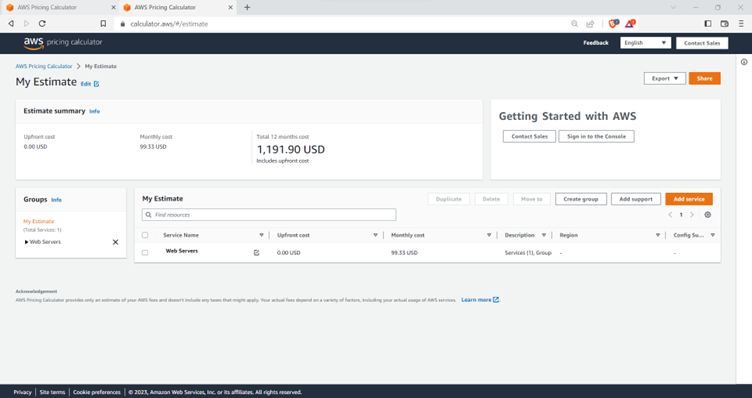
- Click View summary.
- Go to the next step.
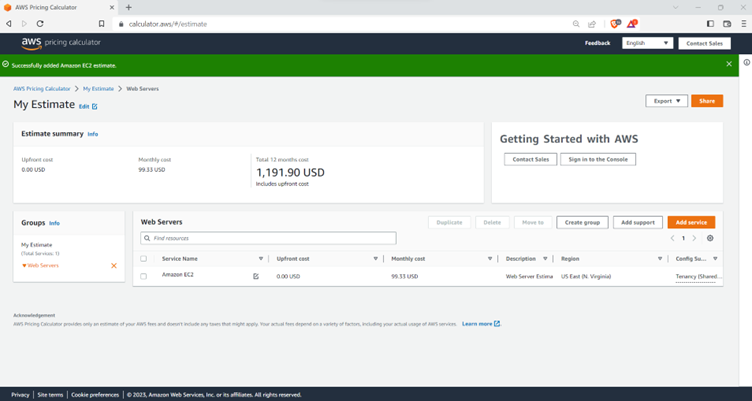
- Click Share.
- Go to the next step.
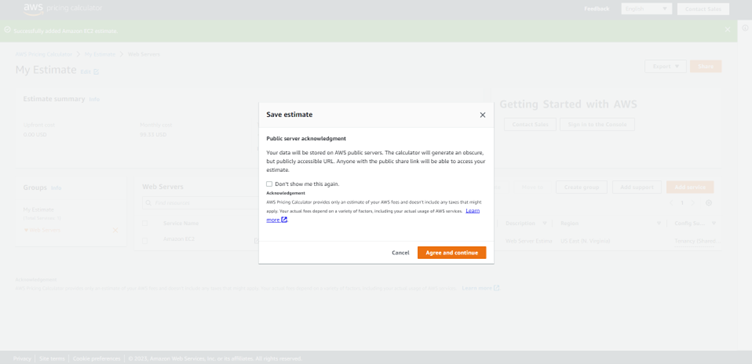
- In the pop-up box, click Agree and continue.
- Go to the next step.
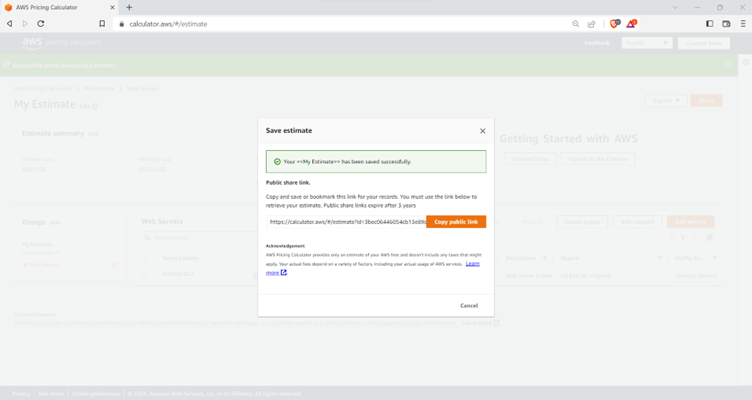
- In the pop-up box, click Copy public link.
– You can paste this link into a text editor for future reference.
- Go to the next step.
Recent Posts