To use SQL Server, you need a login. You can log in using a regular Windows account or a special SQL Server account.
SQL Server Supports two Authentication Modes:
- Windows Authentication
- SQL Server Authentication
Steps to create a SQL Server login:
Step 1: In Object Explorer, select the server instance on which you want to create the new login.
Step 2: Right-click on Security, then New–>Login.

Step 3:
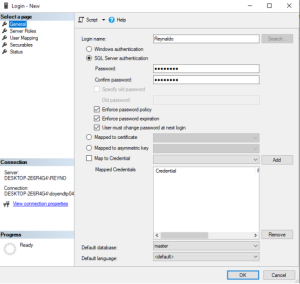
General option gives login name and select the SQL server authentication option SQL SERVER login.

Step 4:
Server Roles: Select the role and assign it to the new login.

Step 5:
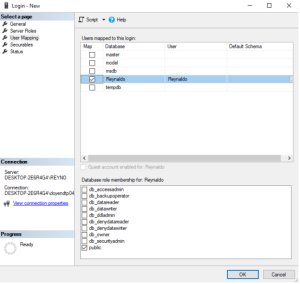
User Mapping: On the User Mapping page, you’ll see a list of all the databases and the roles that a login can have in those databases. The roles available for the login depend on the databases you choose.
Select the database that the login can access.

Step 6:
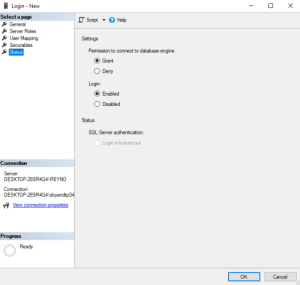
Status: The Status page provides a list of some of the authentication and permission settings that can be changed for the specified SQL Server login.
Select Grant to grant CONNECT SQL permission to login.

In Security->Login, verify the newly created login.

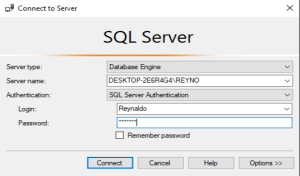
Select SQL Server Authentication and use the newly created login to connect.

