Introduction: –
In the modern era of web applications, designing a visually appealing and interactive user interface is crucial. One such element that adds elegance to Oracle APEX applications is customizable cards. These cards not only enhance the UI but also make it easier for users to navigate data-rich content. In this blog, I’ll guide you through creating a customized card in Oracle APEX, styling it with CSS, and adding functionality to the card’s button to integrate with Outlook for seamless communication.
The following technologies has been used to achieve the same.
- Oracle APEX
- Java script
- CSS
Why we need to do: –
Oracle APEX’s default card design provides a decent layout but may not always suit specific user requirements or match the desired aesthetic. Customizing these cards allows us to:
- Personalize the appearance to align with organizational branding.
- Enhance usability by adding functionality like hover effectsor clickable buttons.
- Improve productivity by integrating features such as email links that directly open Outlook with pre-filled recipient details.
By achieving these, we can elevate the user experience, making the application more engaging and intuitive.
How do we solve:
To customize Oracle APEX cards, we will implement the following steps:
Step:1 – Creating the Card Region
- Add a region in Oracle APEX and set it as Cards.
- Fetch details from the database, such as employee name, designation, and email address.
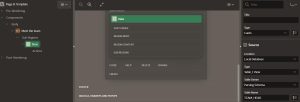
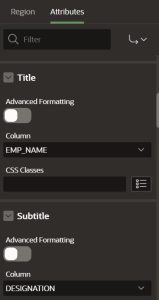
Configure card attributes:
- Title: Employee Name
- Subtitle: Employee Designation
- Body: Employee Email ID
- Secondary Body: Add a custom button using HTML.
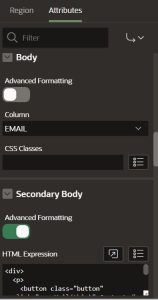
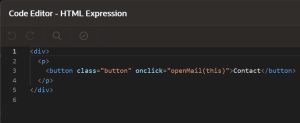
HTML Code for Button:
<div>
<p>
<button class=”button” onclick=”openMail(this)”>Contact</button>
</p>
</div>
Step:2 – Styling the Cards:
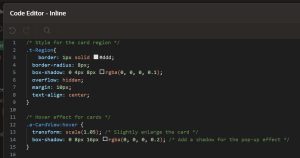
We’ll use CSS to enhance the design and add hover effects to make the cards more dynamic. Below is the styling added via the Inline CSS section in Oracle APEX:
/* Style for the card region */
.t-Region {
border: 1px solid #ddd;
border-radius: 8px;
box-shadow: 0 4px 8px rgba(0, 0, 0, 0.1);
overflow: hidden;
margin: 10px;
text-align: center;
}
/* Hover effect for cards */
.a-CardView:hover {
transform: scale(1.05); /* Slightly enlarge the card */
box-shadow: 0 8px 16px rgba(0, 0, 0, 0.2); /* Add a shadow for the pop-up effect */
}
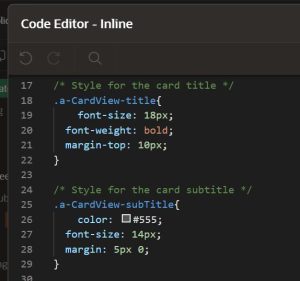
/* Style for the card title */
.a-CardView-title {
font-size: 18px;
font-weight: bold;
margin-top: 10px;
}
/* Style for the card subtitle */
.a-CardView-subTitle {
color: #555;
font-size: 14px;
margin: 5px 0;
}
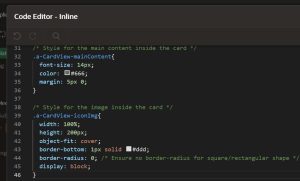
/* Style for the main content inside the card */
.a-CardView-mainContent {
font-size: 14px;
color: #666;
margin: 5px 0;
}
/* Style for the image inside the card */
.a-CardView-iconImg {
width: 100%;
height: 200px;
object-fit: cover;
border-bottom: 1px solid #ddd;
}
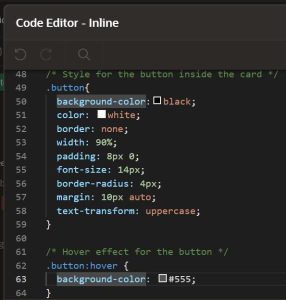
/* Style for the button inside the card */
.button {
background-color: black;
color: white;
border: none;
width: 90%;
padding: 8px 0;
font-size: 14px;
border-radius: 4px;
margin: 10px auto;
text-transform: uppercase;
}
/* Hover effect for the button */
.button:hover {
background-color: #555;
}
Cards Customization Final Output:
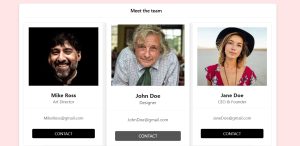
Step:3 – Adding Functionality with JavaScript:
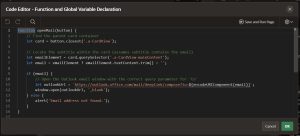
To make the Contact button functional, we wrote JavaScript to open Outlook in a new window with the employee’s email pre-filled. Below is the JavaScript code:
function openMail(button) {
// Find the parent card container
let card = button.closest(‘.a-CardView’);
// Locate the subtitle within the card (assumes subtitle contains the email)
let emailElement = card.querySelector(‘.a-CardView-mainContent’);
let email = emailElement ? emailElement.textContent.trim() : ”;
if (email) {
// Open the Outlook email window with the correct query parameter for ‘to’
let outlookUrl = `https://outlook.office.com/mail/deeplink/compose?to=${encodeURIComponent(email)}`;
window.open(outlookUrl, ‘_blank’);
} else {
alert(‘Email address not found.’);
}
}
Redirect to Outlook with Pre-Filled Email:
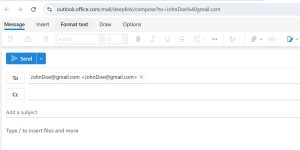
How It Works:
- The button is dynamically linked to the employee’s email fetched from the database.
- When clicked, the JavaScript identifies the main content (email) in the respective card and uses the mailto: protocol to open Outlook with the email pre-filled.
Conclusion:
Customizing cards in Oracle APEX not only enhances visual appeal but also introduces functionality that makes applications more user-friendly. With just a few lines of CSS and JavaScript, you can add features like hover effects and email integration. The steps provided above demonstrate how you can transform simple card regions into powerful tools for improved workflow and aesthetics.
