Introduction
Oracle GoldenGate is a robust and flexible data replication and integration tool widely used for real-time data replication across heterogeneous systems. This document outlines the step-by-step process for configuring both the source and target servers in an Oracle GoldenGate setup, including essential prerequisites, system configurations, and best practices to ensure seamless data replication.
1. Prerequisites
- Configure host entries on both source and target servers.
- Verify connectivity between the servers by testing ping responses.
- Add the source and target server details to the /etc/hosts file on both machines. This ensures proper name resolution for replication.
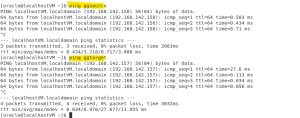
- Ping on both source and target

Check you can able to ping the both source and target entries

3. Source Configuration
- Enable archive log mode and verify supplemental logging and force logging on the source database.
- Update database parameters to support GoldenGate replication.
- Create a dedicated user and tablespace for GoldenGate administration.
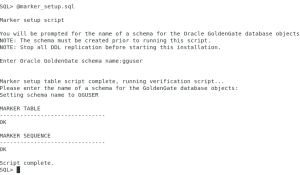
- Install necessary scripts (@marker_setup, @ddl_setup) to support DDL replication.

- Enable Supplemental and Force Logging
Enable supplemental and force logging on the source database to capture all changes required for replication. Verify using v$database.
– enable supplemental logging and force logging
-alter database force logging;
-ALTER DATABASE ADD SUPPLEMENTAL LOG DATA;
SQL> select SUPPLEMENTAL_LOG_DATA_MIN,FORCE_LOGGING from v$database;
SUPPLEME FORCE_LOGGING
——– —————————————
YES YES
- Change the parameter on source and target database
Update Database Parameters
Set the ENABLE_GOLDENGATE_REPLICATION parameter to TRUE on both source and target databases. This allows GoldenGate to capture and apply changes.
SQL> conn / as sysdba
Connected.
SQL> ALTER SYSTEM SET ENABLE_GOLDENGATE_REPLICATION=TRUE SCOPE=BOTH;
System altered.
SQL> show parameter ENABLE_GOLDENGATE_REPLICATION;
NAME TYPE VALUE
———————————— ———– ——————————
enable_goldengate_replication boolean TRUE
SQL>
- Create a administration user on both source and target and exec the stored procedure, create new tablespace for goldengate
Create Administration User and Tablespace
Create a dedicated user and tablespace for GoldenGate operations. Grant the necessary privileges and roles for replication management.
SQL> CREATE TABLESPACE goldengate DATAFILE ‘/u01/app/oracle/oradata/ORACLE/gg_1.dbf’ SIZE 2G AUTOEXTEND ON NEXT 20M;
Tablespace created.
SQL> SQL> alter user gguser default tablespace GOLDENGATE quota unlimited on GOLDENGATE;
User altered.SQL> grant create session,connect,resource,alter system to gguser;
Grant succeeded.
SQL> EXEC DBMS_GOLDENGATE_AUTH.GRANT_ADMIN_PRIVILEGE(grantee => ‘gguser’, privilege_type => ‘CAPTURE’, grant_optional_privileges => ‘*’);
PL/SQL procedure successfully completed.
- Move to the gg home and to install some package to support the necessary DDL replication
Run the GoldenGate DDL support scripts (@marker_setup, @ddl_setup, @role_setup.sql) to enable DDL replication on the source.
@marker_setup
@ddl_setup
@role_setup.sql
GRANT GGS_GGSUSER_ROLE TO gguser;
@ddl_enable.sql
exec like

- Start GGSCI and login into database using dblogin command.
Start GGSCI and log in to the database using the dblogin command. Ensure successful connectivity as the GoldenGate user.
[oracle@localhostVM gg]$ ./ggsci
Oracle GoldenGate Command Interpreter for Oracle
Version 19.1.0.0.4 OGGCORE_19.1.0.0.0_PLATFORMS_191017.1054_FBOLinux, x64, 64bit (optimized), Oracle 19c on Oct 17 2019 21:16:29
Operating system character set identified as UTF-8.
Copyright (C) 1995, 2019, Oracle and/or its affiliates. All rights reserved.
GGSCI (localhostVM.localdomain) 1> dblogin userid gguser, password gguser
Successfully logged into database.
GGSCI (localhostVM.localdomain as gguser@oracle) 2>
- By default manager parameter has created while installing the goldengate software we just add the user information to manager parameter file.
Configure the manager parameter file with the port number and user details. Start the manager process and verify it is running.
GGSCI (localhostVM.localdomain as gguser@oracle) 2> Edit param mgr
add this parameter
GGSCI (localhostVM.localdomain as gguser@oracle) 4> view param mgr
PORT 7811
USERIDALAIS gguser
- Check manage parameter status
-start mgr, stop mgr
- Here we can see the status is running

10- Source side add trandata for particular table which we wants to replicate the data to target database.
Add trandata schema.table or add trandata schema.*
- Add Trandata on Source
Enable trandata for the source tables to capture changes. Use add trandata schema.table or add trandata schema.* for multiple tables.

11 – Create Primary Extract Process
Define the extract process to capture changes from the source database. Configure the exttrail file for writing the captured data.
GGSCI (localhostVM.localdomain as gguser@oracle) 53> ADD EXTRACT ext1, TRANLOG, BEGIN NOW
EXTRACT added.
GGSCI (localhostVM.localdomain as gguser@oracle) 54> EDIT PARAMS ext1
inside ext1 – EXTRACT ext1 USERID gguser@ggsource, PASSWORD gguser EXTTRAIL /u01/gghome/dirdat/aa DDL INCLUDE ALL TABLE test1.emp;
GGSCI (localhostVM.localdomain as gguser@oracle) 55> ADD EXTTRAIL /u01/gghome/dirdat/aa, EXTRACT ext1
EXTTRAIL added.
GGSCI (localhostVM.localdomain as gguser@oracle) 56> START EXTRACT ext1
Sending START request to MANAGER …
EXTRACT EXT1 starting
12 – Validate Extract Process
Start the extract process and verify its status. Ensure it is capturing changes and writing them to the trail file correctly.

Add Replicat Process on Target
Define the replicat process to apply changes to the target database. Specify the checkpoint table for consistency.
Move to the target server
- Conn to the db login
GGSCI (localhostVM.localdomain) 1> dblogin userid gguser password gguser
Successfully logged into database.
GGSCI (localhostVM.localdomain as gguser@oracle) 2> view param mgr
PORT 7809
GGSCI (localhostVM.localdomain as gguser@oracle) 3> info mgr
Manager is running (IP port TCP:localhostVM.localdomain.7809, Process ID 20290).
14-Start and Monitor Replicat
Start the replicat process and monitor its status using info replicat. Ensure that changes are being applied without errors.
GGSCI (localhostVM.localdomain as gguser@oracle) 4> ADD REPLICAT rep1, EXTTRAIL /home/product/gg/dirdat/aa
ERROR: No checkpoint table specified for ADD REPLICAT. àerror
GGSCI (localhostVM.localdomain as gguser@oracle) 5> add checkpointtable gguser.chkpt
Successfully created checkpoint table gguser.chkpt.
GGSCI (localhostVM.localdomain as gguser@oracle) 6>
GGSCI (localhostVM.localdomain as gguser@oracle) 6> info checkpointtable gguser.chkpt
Checkpoint table gguser.chkpt created 2024-09-20 13:35:40.
15 – add the params rep1 content
GGSCI (localhostVM.localdomain as gguser@oracle) 7> edit params rep1
GGSCI (localhostVM.localdomain as gguser@oracle) 8> view params rep1
REPLICAT rep1
USERID gguser@ggtarget, PASSWORD gguser
DDL INCLUDE ALL
DDLERROR DEFAULT IGNORE
MAP test1.emp, TARGET test1.emp;
checkpointtable gguser.chkpt
16- create and start the replicate process
GGSCI (localhostVM.localdomain as gguser@oracle) 9> add replicat rep1 exttrail /home/product/gg/dirdat/ab checkpointtable gguser.chkpt
REPLICAT added.
GGSCI (localhostVM.localdomain as gguser@oracle) 10> info rep1
REPLICAT REP1 Initialized 2024-09-20 13:45 Status STOPPED
Checkpoint Lag 00:00:00 (updated 00:01:08 ago)
Log Read Checkpoint File /home/product/gg/dirdat/ab000000000
First Record RBA 0
Conclusion
This document serves as a comprehensive guide for configuring Oracle GoldenGate on both source and target servers. By following these steps, organizations can achieve real-time, reliable, and high-performance data replication. Proper setup of the extract, pump, and replicat processes ensures data consistency across systems, providing the foundation for scalable and fault-tolerant database environments.
