Introduction
Oracle APEX Interactive Grids offer a versatile way to manage and display data, but sometimes the default configuration might not fully meet your application’s needs. One common customization is adding a “Rows Per Page” selector to the toolbar, giving users control over how many rows are displayed in the grid at a time. This customization is particularly important when users need flexibility in managing large datasets or prefer a specific view for their workflow.
The following technology are involved to done this.
- Oracle APEX
- JavaScript
Why we need to do
Adding a “Rows Per Page” selector to the toolbar enhances the user experience in several ways:
- User Preference: It allows users to choose the optimal number of rows that suit their workflow, whether they prefer to see more data at once or focus on a smaller set of rows.
- Performance Improvement: Displaying fewer rows can lead to faster load times and more responsive grids, especially with large datasets.
- Enhanced Usability: It gives users the flexibility to adjust the grid’s view dynamically without having to reload the page or navigate to different pages.
How do we solve
To implement the “Rows Per Page” selector in an Oracle APEX Interactive Grid, you’ll need to utilize JavaScript to modify the grid’s toolbar. The solution involves:
- Ensuring the Pagination Type is Set to “Page”: This is crucial because other pagination types may not support dynamic row changes or could lead to unexpected behavior.
- Adding JavaScript Code: This code customizes the toolbar by adding a “Rows Per Page” selector and an optional static “Rows” label for context.
- Testing and Adjusting: After adding the code, you’ll need to test the grid to ensure everything works as expected.
Step-by-Step Guide to Adding a “Rows Per Page” Selector
Here’s a detailed guide to implementing this customization in your Oracle APEX Interactive Grid.
Step 1: Set Pagination Type to “Page”
Before adding the JavaScript code, make sure your Interactive Grid’s pagination type is set to “Page”:
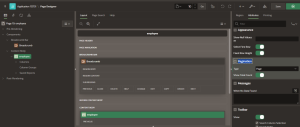
- Open Oracle APEX and navigate to the Interactive Grid’s page.
- In the Attributes tab, ensure that Pagination Type is set to Page. This step is essential for the functionality of the “Rows Per Page” selector.

Step 2: Add the JavaScript Code
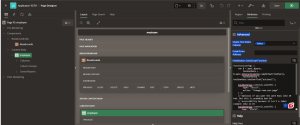
Use the following JavaScript function to customize your Interactive Grid toolbar. This code adds a “Rows Per Page” selector to the toolbar along with an optional static “Rows” label.
Code:
function(config) {
var $ = apex.jQuery; // Oracle APEX’s jQuery instance
var toolbarData = $.apex.interactiveGrid.copyDefaultToolbar(); // Copy the default toolbar
var toolbarGroup = toolbarData.toolbarFind(“actions2”); // Find the ‘actions2’ toolbar group
// Add the “Rows Per Page” selector
toolbarGroup.controls.unshift({
type: “SELECT”,
action: “change-rows-per-page” // Action to change rows per page
});
// Optional: Add a static “Rows” label for additional context
toolbarGroup.controls.unshift({
type: “STATIC”,
label: “Rows”
});
config.toolbarData = toolbarData; // Update the toolbar configuration
return config; // Return the modified configuration
}
Step 3: Apply the Customization
- Paste the Code: Navigate to the Initialization Codesection in the Interactive Grid’s Advanced settings and paste the above JavaScript code.
- Test the Grid: Run the page to ensure the “Rows Per Page” selector and the static “Rows” label appear in the toolbar. Test the selector to confirm that it changes the number of rows displayed in the grid as expected.

Conclusion
Adding a “Rows Per Page” selector to the Oracle APEX Interactive Grid toolbar can significantly enhance the user experience by offering more control over how data is displayed. This simple JavaScript-based customization allows users to adjust the grid’s row count on the fly, improving both usability and performance. By following the steps outlined in this article, you can implement this feature in your Oracle APEX application and provide a more flexible interface for your users.

