Introduction:
This blog explains about L2 (Layer 2) Vlans in the Local Area Network. This document reveals how to create/delete/modify and verification of L2 vlan in Cisco Switch.
Why We need L2 Vlans?
In the initial days there was a big broadcast domain and large collision domain which was causing high collisions on the Local Area Network in an Enterprise. To overcome this, the Trunking protocol came into picture which can support multiple L2 vlans in the same physical link. This made to split the large broadcast domain into smaller broadcast domains and smaller collision domains.
How do we solve?
This part will explain about the L2 vlan creation/modification/deletion of L2 vlans.
Creation of L2 Vlan:
- Login to the respective Cisco Core switch.
- Go to Global configuration mode.
- Use the following syntax.
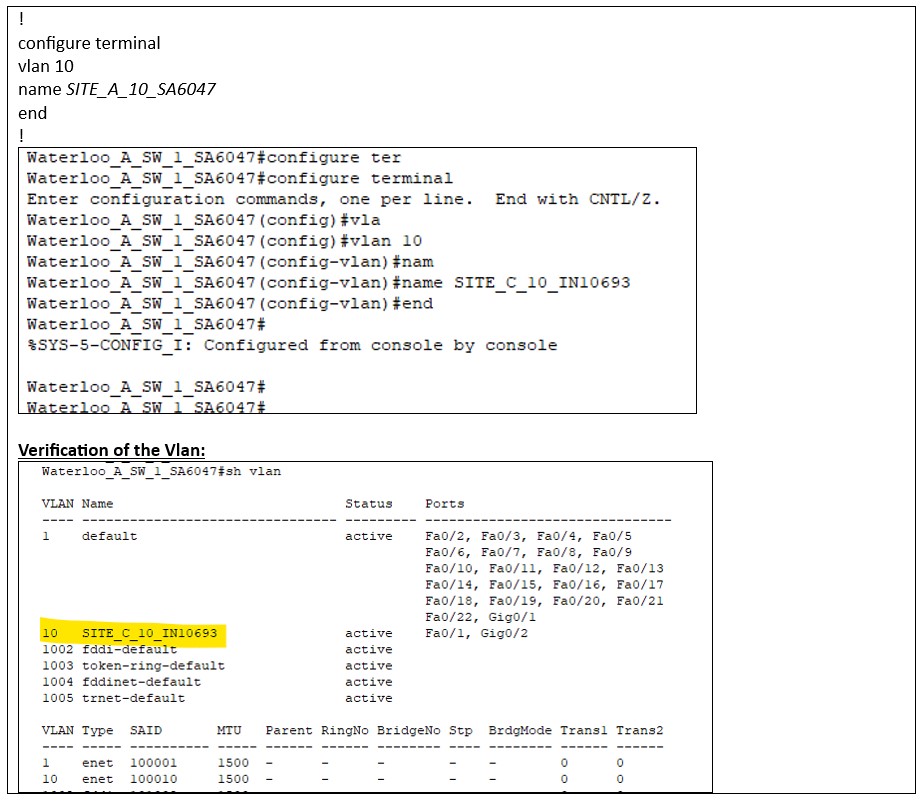
- In this example, we will create Vlan ID 10 and name it as “SITE_A_10_SA6047”

Modification of L2 Vlan:
- Now, we will modify the vlan name as “SITE_C_10_IN10693”

Conclusion
We hope this document explained about the basic steps of creating L2 vlans in the Cisco Switch.
