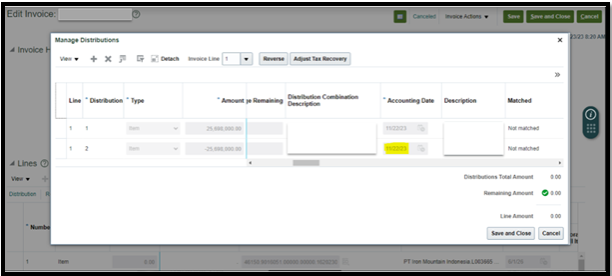
To update the invoice distribution accounting date.
- The business mistakenly entered the GL accounting date Jun-26 instead of Nov-23 and the invoice is cancelled. We are updating the invoice distribution accounting date.
Steps
- Go to setup and Maintenance > Financials > Global Search Task > Manage Administrator Profile Values
- Follow the below steps to fix the invoice distribution accounting date.
STEP 1: Use the below action plan to un-account the invoice.
- Create profile option with name AP_SHBYIV_ENABLE
Navigate to: Setup and Maintenance -> Manage Profile Options -> New ->
Create Profile Option as:
– Profile Option Code: AP_SHBYIV_ENABLE
– Profile Display Name: AP_SHBYIV_ENABLE
– Application: Payables
– Module: Invoices
– Description: Self Healing Profile
– Start Date: 01/01/2000
– End Date: Leave Blank
Save and close.
- Set Profile Option Level for the profile option:
User level: Enable and Updatable checked
Save and close.

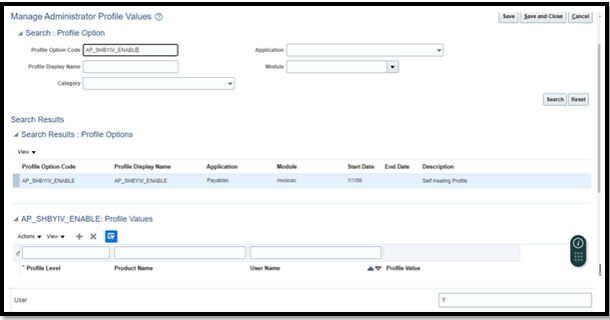
- Set the profile value:
Navigate to: Setup and Maintenance -> Manage Administrator Profile Values
Search for Profile Option Code: AP_SHBYIV_ENABLE
Set Profile Value as:
Profile Level = User
* Username = <Choose the user who has Accounts Payable Manager or equivalent role>
* Profile Value = Y
- Create profile option with name AP_SHBYIV_UNDO_INVOICE_ACCOUNTING
Navigate to: Setup and Maintenance -> Manage Profile Options -> New ->
Create Profile Option as:
– Profile Option Code: AP_SHBYIV_UNDO_INVOICE_ACCOUNTING
– Profile Display Name: AP_SHBYIV_UNDO_INVOICE_ACCOUNTING
– Application: Payables
– Module: Invoices
– Description: Self Healing Profile
– Start Date: 01/01/2000
– End Date: Leave Blank
Save and close.
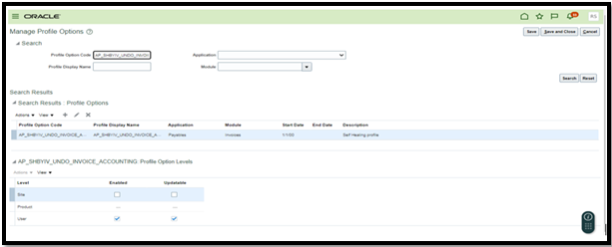
- Set Profile Option Level for the profile option:
User level: Enable and Updatable checked
Save and close.
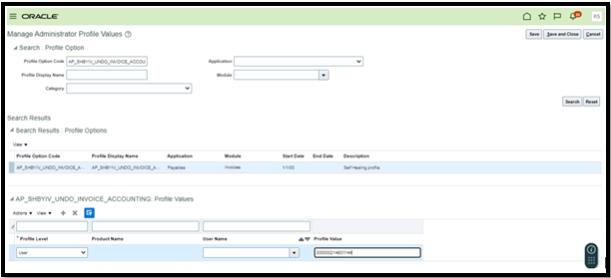
- Set the profile value:
Navigate to: Setup and Maintenance -> Manage Administrator Profile Values
Search for Profile Option Code: AP_SHBYIV_UNDO_INVOICE_ACCOUNTING
Set Profile Value as:
* Profile Level = User
* Username = <Choose the user who has Accounts Payable Manager or equivalent role>
* Profile Value = <Invoice ID>
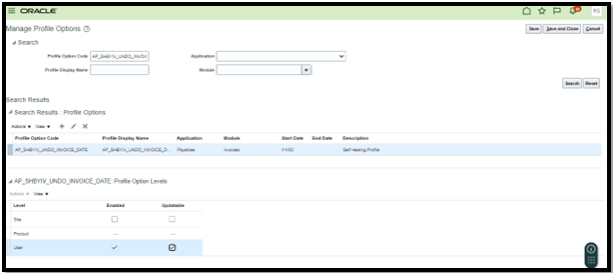
- Create profile option with name AP_SHBYIV_UNDO_INVOICE_DATE
Navigate to: Setup and Maintenance -> Manage Profile Options -> New ->
Create Profile Option as:
– Profile Option Code: AP_SHBYIV_UNDO_INVOICE_DATE
– Profile Display Name: AP_SHBYIV_UNDO_INVOICE_DATE
– Application: Payables
– Module: Invoices
– Description: Self Healing Profile
– Start Date: 01/01/2000
– End Date: Leave Blank
Save and close.
- Set Profile Option Level for the profile option:
User level: Enable and Updatable checked
Save and close.
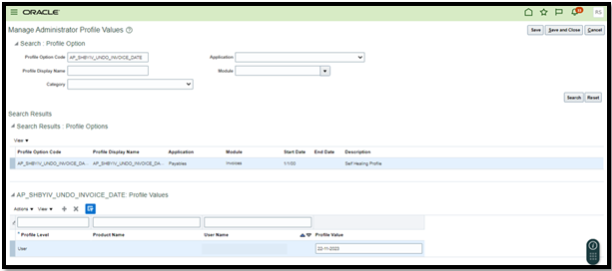
9. Set the profile value:
Navigate to: Setup and Maintenance -> Manage Administrator Profile Values
Search for Profile Option Code: AP_SHBYIV_UNDO_INVOICE_DATE
Set Profile Value as:
* Profile Level = User
* Username = <Choose the user who has Accounts Payable Manager or equivalent role>
* Profile Value = <Undo date in DD-MON-YYYY format> (Make sure date is for open period in AP and GL and provide a date where you want the reversal of the invoice)
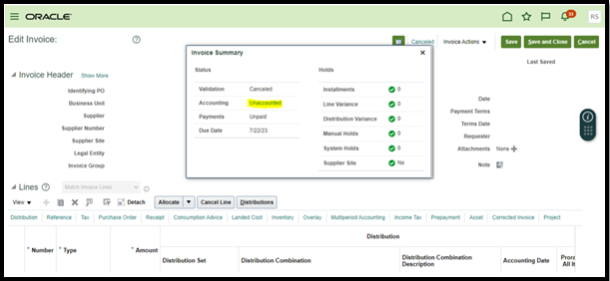
- Login as the user for whom the profile was set. Navigate to Tools > Scheduled Processes. Submit the ‘Validate Payables Invoice’ ESS job by passing Invoice Num: <Invoice num> as Input Parameter.
- Verify the invoice shows as “Unaccounted”.
- Disable the Profile options created above (Go to Manage Profile Options and Uncheck Enable and Updatable)
STEP 2: ( Since the invoice is already cancelled and un-accounted after step-1, we will mark the events as NU (Not required) and account them again, so that there is no impact in GL)
- Create profile option with code and name as AP_SHBYIV_ENABLE.
- Set profile option value as Y for User
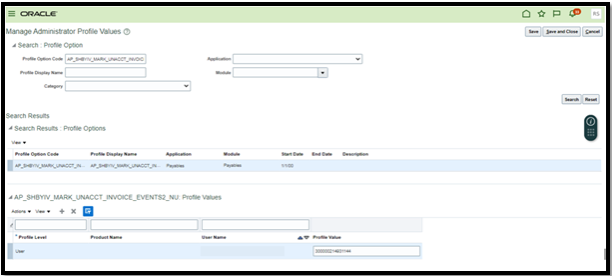
- Create profile option with code and name as AP_SHBYIV_MARK_UNACCT_INVOICE_EVENTS2_NU
And Set profile option value as invoice_id for User
- Login with same user and Run Invoice Validation ESS Job by passing Invoice
Number as input parameter.
- Run Create Accounting to complete the fix. The Create Accounting process will update the event status to P/P and posted flags to Y. (There will be no impact as the invoice is already cancelled.)
- Delete the Profile option AP_SHBYIV_ENABLE and AP_SHBYIV_MARK_UNACCT_INVOICE_EVENTS2_NU
After transaction is corrected.
Output: