1. Introduction
Allowing users to delete records through icons provides a simple and intuitive way to manage data within the application.
The use of icons for common actions like delete can improve the user experience by making the application more user-friendly and visually appealing. Having a dedicated delete icon for each record in a Data Table or List allows users to delete specific records directly from the main data view without the need to open a separate page or form.
At same time Users can want to delete all recorders simultaneously is also possible in Outsystem. This document will refer delete particular record in entity through icon and delete all record with one click.
2. Technology & Tools Used
The following technology has been used to Delete single record as well as all records
- OUTSYSTEMS
- SERVER ACTIONS
- ENTITY
3. Server Actions
In OutSystems, a Server Action is a fundamental building block used to define reusable logic on the server-side of an application. It is a collection of one or more actions (a sequence of steps) that can perform operations, such as data retrieval, data manipulation, business rules, and integration with external systems. Server Actions help keep the application’s logic organized, maintainable, and reusable across different screens and modules within the application
4. Entities
In OutSystems, entities are a core concept that represents the data model of application. They define the structure of your application’s data and how that data is stored in the underlying database. Entities are similar to database tables in traditional database design but with additional capabilities provided by the OutSystems platform.
5. Delete Record With Icon Implementation (Steps With Screen shot)
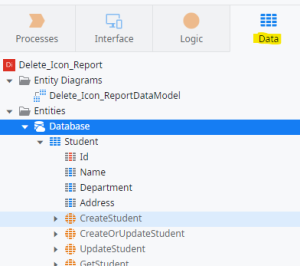
Step-1: Create one Entity (Student) with Attributes (Name, Department, and Address)
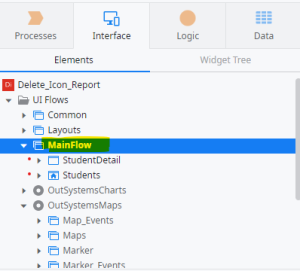
Step-2: Drag and Drop Student Entity in Main flow (It Automatically creates Report and Form page)
Step-3: Add new column to student Report. Click add column button from top of the window
![]()
Step-4: Go to Report Page and search icon tool item from tool panel then
drag and drop delete bin icon into the report.

Step-5: Right click on the delete icon and select new client action (Link on click). In client action
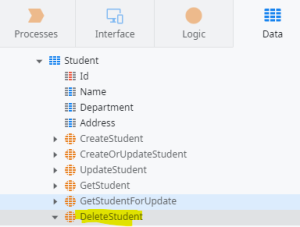
drag and drop delete student action from student entity data base.
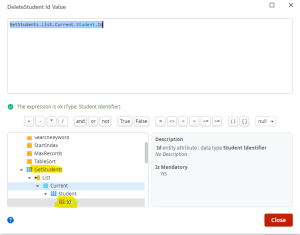
Step-6: Set Id for delete action property. “GetStudents.List.Current.Student.Id”
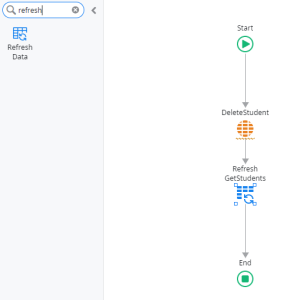
Step-7: Drag and drop refresh tool from tool list and select get student data from
data source of refresh
Step-8: Drag and Drop Message icon and set text=”Delete Successfully” in text
for acknowledge And publish for output.
6. OUTPUT
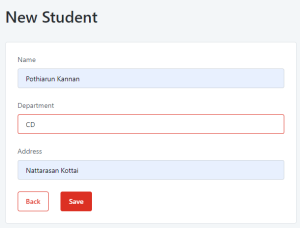
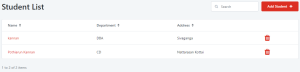
Add student <—- add some records
![]()
Student Form
Report Page After Insert Record

Delete First Record Through Icon
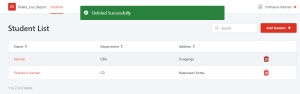
After Delete First Record to the Report
7. DELETE ALL IMPLEMENTATION (Steps With Screen Shots)
Step-1: Drag and drop Button from tool box and set text = ‘Delete ALL’
Step-2: Double Click of the delete all button it creates button on click event automatically.
Step-3: In that event add Server Action and named Delete_All Action
Step-4: Add Refresh Data tool from tool pane and select entity name for refresh(Student)
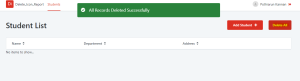
Step-5: Now add Message tool in the action and set message=”All Records Deleted Successfully”
Button_On_Click Event
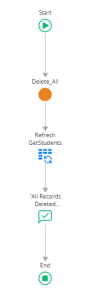
Step-6: Now we specify server action details, so double click server action we enter
into new flow of execution.
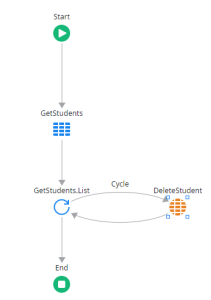
Step-7: First we need add student list so drag and drop GetStudent Aggregation in execution flow
Step-8: we need to fetch every record, so add For Each tool from
left side tool pane and set property Record List = “GetStudents.List”
Step-9: Now we need to specify which action want perform so add Delete Student action and
set property Id=”GetStudents.List.Current.Student.Id”, then create a cycles between For Each and Delete action.
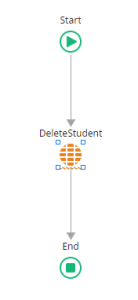
Delete_All Server Action Execution Flow
Step-10: Now give in publish for output.
OUTPUT
Report Screen
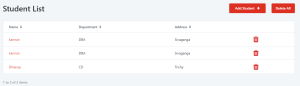
Delete Action
CONCLUSION
Icons are easily recognizable and can provide a clear indication of their purpose, making it simple for users to identify the delete action. Deleting all records with a single click reduces the number of steps required, streamlining the user experience and making the application more efficient. I hope this documents will find you well and clear understanding of delete operations in Outsystems.