1. Overview
This document talks about how to install Apache Kafka for windows.
[Note: Steps included in this document will only works windows server]
2. Technologies and Tools Used
The following technologies have been used for installing Apache Kafka on windows server.
- Apache Kafka 2.13-3.6.1
- Java 8 or above
3. Use Case
Assuming there is a requirement to use Apache Kafka on a Windows server for performing NoSQL tasks and huge no of data transaction for various projects.
4. Architecture
Following steps explains in detail, and make sure before installing Apache Kafka into the window system have java sdk software and if not please installed it JAVA sdk latest version.
Installation for Apache Kafka 2.13-3.6.1 version
Step 1: Apache Kafka official website: https://kafka.apache.org/downloads
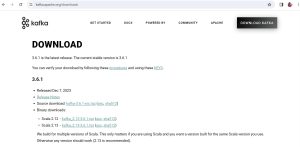
Or just search like Apache Kafka in google you will get the Apache Kafka website link. And click download you will redirect to https://kafka.apache.org/downloads


Step 2 : Click on Get Started menu in the top of the website it will show the sub menu list as below.

Step 3: In the submenu list of the Get Started main menu click on QUICKSTART sub menu the page will go to below page and click download link.

And the page will redirect to another page and find below link.

Click above link the Apache Kafka file will be downloaded into your system and it’s available in the download folder.
Step 4: Once file downloaded, please extract all file based on windows power shell command code like tar –xzf kafka_2.13-3.5.0.tgz or window command cd kafka_2.13-3.5.0 make sure your directory path must be downloaded folder path as below.
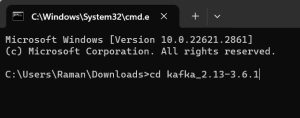
Step 5: Once file extracted rename the folder into Kafka and copy that file and paste into “D” Directory, the path will look like “D:\Kafka\”
Step 6: Set below properties code in server properties file.
log.dirs=/Bigdata/tmp/kafka-logs
zookeeper.connection.timeout.ms=36000
log.retention.hours=8760
This server properties available in D:\kafka\config
Step 7: Set below properties code in zookeeper properties file
tickTime=2000
initLimit=10
syncLimit=5
dataDir=/Bigdata/tmp/zookeeper/data
This zookeeper properties available in D:\kafka\config
Step 8: Create folder in D folder like D:/Bigdata/tmp/kafka-logs and create folder D:/Bigdata/tmp/zookeeper/data in zookeeper properties files.
Step 9: Open the command prompt and open this directory “D:\Kafka\” and type below commands.
.\bin\windows\zookeeper-server-start.bat .\config\zookeeper.properties
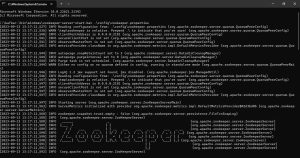
After executing above code in command prompt we can see the zookeeper server installation messages like below.
Note: – Before installing Kafka server, we need to run the zookeeper server its mandatory for Kafka server.
Step 10: Minimize the zookeeper command prompt screen and open the new command prompt screen again with the same path as “D: \Kafka\” and type below code and execute for Kafka server installation.
.\bin\windows\kafka-server-start.bat .\config\server.properties
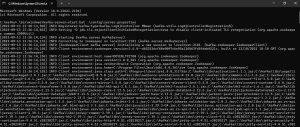
Now we are successfully installed the Apache Kafka server in our windows system.
Note: For every zookeeper server and Kafka server we need to run separate command prompt.
5. Conclusion
Installing Apache Kafka on Windows involves a series of steps that require attention to detail. By following the outlined process, you can successfully set up Kafka on your Windows environment and leverage its powerful capabilities for distributed data streaming.