Oracle APEX (Application Express) empowers developers to build robust web applications with ease. JavaScript, being an integral part of modern web development, can be seamlessly integrated into Oracle APEX applications to enhance user experiences. In this blog post, we’ll see how to redirect to a popup screen using JavaScript within Oracle APEX. Oracle APEX simplifies the process of incorporating JavaScript functionalities through Dynamic Actions. Dynamic Actions enable developers to define declarative rules that trigger JavaScript events, making it an ideal choice for redirecting to a popup screen
Use Case
Suppose there is a scenario for redirecting to a Popup screen when a specific event occurs, Like Change value, on focus, focus out etc. Also you can pass the values to the target page.
This document explains how to redirect to a popup screen when an event triggered.
Technologies and Tools Used
The following technology has been used to achieve the expected output.
- JavaScript
- Oracle Apex
Architecture
Following steps explains in detail,
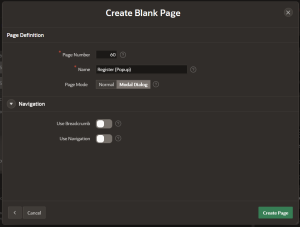
Step 1:
Create a Modal Dialog page
Create 2 Page Items.
Step 2:
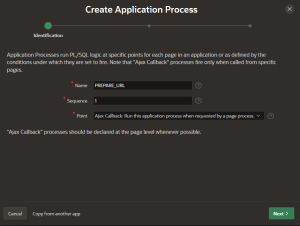
Go to shared components and create Application process.
Opt point of execution as Ajax Callback.
Place the code below in the Code section.
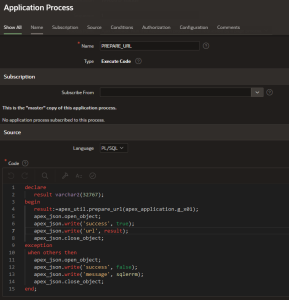
declare
result varchar2(32767);
begin
result:=apex_util.prepare_url(apex_application.g_x01);
apex_json.open_object;
apex_json.write(‘success’, true);
apex_json.write(‘url’, result);
apex_json.close_object;
exception
when others then
apex_json.open_object;
apex_json.write(‘success’, false);
apex_json.write(‘message’, sqlerrm);
apex_json.close_object;
end;
Step 3:
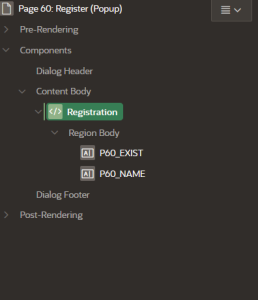
Create another page.
Create 2 page Items.
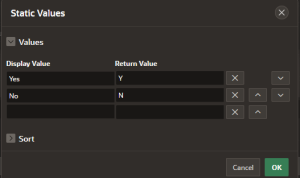
Name as Text field and Exist as select list field.
Add Static values for the select list as Yes and No.
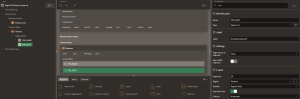
Step 4:
Create a dynamic action on change of Exist.
Give client side condition Item = Value. (P58_EXIST = N).
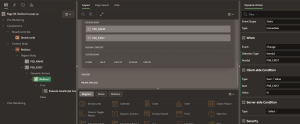
Create a True action with Execute JavaScript option.
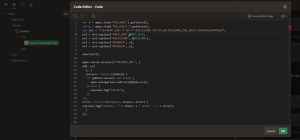
var x = apex.item(‘P58_NAME’).getValue();
var y = apex.item(‘P58_EXIST’).getValue();
var url = “f?p=#APP_ID#:”+’60’+”:#SESSION#::NO:RP,60:P60_NAME,P60_EXIST:#PARA1#,#PARA2#”;
url = url.replace(“#APP_ID#”,&APP_ID.);
url = url.replace(“#SESSION#”, &SESSION.);
url = url.replace(“#PARA1#”, x);
url = url.replace(“#PARA2#”, y);
apex.server.process(“PREPARE_URL”, {
x01: url
}, {
success: function(pData) {
if (pData.success === true) {
apex.navigation.redirect(pData.url);
} else {
console.log(“FALSE”);
}
},
error: function(request, status, error) {
console.log(“status—” + status + ” error—-” + error);
}
});
Note: Here We are passing two parameter values to the pop up screen through URL.(Name and Exist)
60 Stands for the page number of redirected Page.
Step 5:
Save and Run.
Screen Shot
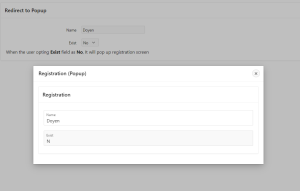
Output:
When the user opting ‘No’ as the Exist field then it will pop up registration screen.