Overview
This overview outlines the steps to implement voice recording in Oracle APEX applications, including capturing audio from the user’s microphone, storing it in the database using Oracle APEX and Web Source Modules, and adding error handling for recording failures. Security measures are considered to protect user privacy, and rigorous testing is performed to ensure functionality across various environments and devices.
Technologies and Tools Used
The following technology has been used to achieve the expected output.
- Oracle Apex
- SQL/PL SQL
- Javascript
Use Case
In this use case, you can enhance your task management application in Oracle APEX by allowing users to add voice notes to their tasks. Users can record voice memos related to specific tasks, providing an additional way to communicate and document information. This feature can be particularly helpful for tasks that require verbal explanations or those that involve field work.
Architecture
Step 1:
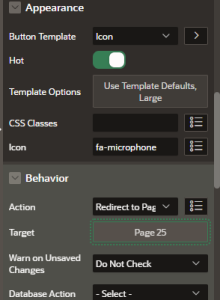
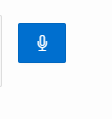
First, we need to create a button that redirects to the voice recording page with a microphone image, as shown below:
Step 2:
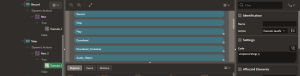
Next, we need to create a new modal dialog page for voice recording. The modal should include buttons for record, stop, preview audio, and download audio. Additionally, we need to create a new region with static content containing the following HTML and JavaScript code:
<!DOCTYPE html>
<html>
<head>
<style>
.hidden {
display: none;
}
</style>
<link rel=”stylesheet” href=”https://cdnjs.cloudflare.com/ajax/libs/font-awesome/5.15.3/css/all.min.css”>
</head>
<body>
<button id=”b3-Record” style=”border: none; background: none;”>
<i class=”fas fa-microphone” style=”padding: 15px; color:#056ac8;”></i>
</button>
<button id=”b3-Stop” style=”border: none; background: none;”>
<i class=”fas fa-stop” style=”padding: 15px; color: red;”></i>
</button>
<button id=”b3-Play” class=”hidden” style=”border: none; background: none;”>
<i class=”fas fa-play” style=”padding: 15px; color:#056ac8;”></i>
</button>
<a id=”b3-audioobject” href=”#” download>
<i class=”fas fa-download”></i>
</a>
<!– <button id=”b3-Download”><i class=”fas fa-download”></i></button> –>
<div id=”b3-downloadContainer” class=”hidden”></div>
<script>
// JavaScript code goes here
let recorder, audio_stream, audioBlob;
const recordButton = document.getElementById(“b3-Record”);
const stopButton = document.getElementById(“b3-Stop”);
const playButton = document.getElementById(“b3-Play”);
const audioobject = document.getElementById(“b3-audioobject”);
const downloadButton = document.getElementById(“b3-Download”);
const downloadContainer = document.getElementById(“b3-downloadContainer”);
stopButton.addEventListener(“click”, stopRecording);
stopButton.disabled = true;
function startRecording() {
// Button settings
recordButton.disabled = true;
stopButton.classList.remove(“inactive”);
stopButton.disabled = false;
recordButton.classList.add(“button-animate”);
if (!stopButton.classList.contains(“text-cyan”)) {
stopButton.classList.add(“text-cyan”);
stopButton.classList.remove(“text-cyan-lighter”);
}
playButton.classList.add(“hidden”);
downloadContainer.classList.add(“hidden”);
navigator.mediaDevices.getUserMedia({ audio: true })
.then(function (stream) {
audio_stream = stream;
recorder = new MediaRecorder(stream);
// When there is data, compile into an object for preview src
const chunks = [];
recorder.ondataavailable = function (e) {
chunks.push(e.data);
};
recorder.onstop = function () {
audioBlob = new Blob(chunks, { type: ‘audio/wav’ });
const url = URL.createObjectURL(audioBlob);
playButton.classList.remove(“hidden”);
const reader = new FileReader();
reader.readAsDataURL(audioBlob);
reader.onloadend = function () {
const base64data = reader.result;
audioobject.href = base64data;
// Set hidden page item values
$s(‘P25_AUDIO_BLOB’, base64data);
$s(‘P25_MIME_TYPE’, ‘audio/wav’); // Replace with the appropriate MIME type
};
// Set link href as blob URL, replaced instantly if re-recorded
downloadButton.href = url;
};
recorder.start();
timeout_status = setTimeout(function () {
console.log(“20 min timeout”);
stopRecording();
}, 1200000);
});
}
function stopRecording() {
recorder.stop();
audio_stream.getTracks()[0].stop();
// Button reset
recordButton.disabled = false;
recordButton.classList.remove(“button-animate”);
stopButton.classList.add(“inactive”);
stopButton.disabled = true;
stopButton.classList.remove(“text-cyan”);
stopButton.classList.add(“text-cyan-lighter”);
downloadContainer.classList.remove(“hidden”);
}
playButton.addEventListener(“click”, function (event) {
event.preventDefault(); // Prevent the default behavior of the play button
const audio = new Audio();
audio.src = URL.createObjectURL(audioBlob);
audio.controls = true;
audio.autoplay = true;
audioobject.appendChild(audio);
});
recordButton.addEventListener(“click”, function () {
if (audioBlob) {
URL.revokeObjectURL(audioBlob);
audioobject.href = “#”;
audioobject.innerHTML = “Audio Object”;
audioobject.removeAttribute(“download”);
audioobject.innerHTML = “”;
audioBlob = null;
}
//startRecording();
});
// Call the startRecording function to initiate the recording
//startRecording();
</script>
</body>
</html>
Step 3:
Then, we need to create hidden page items and buttons as follows:
- Page items : P25_AUDIO_BLOB
- Page items : P25_MIME_TYPE
These page items are used to store the recording and their mime type temporarily.
| Button name | Static ID |
| Record | b3-Record |
| Stop | b3-Stop |
| Play | b3-Play |
| Audio_Object | b3-audioobject |
| Download_Container | b3-downloadContainer |
Step 4:
create dynamic actions with “Execute JavaScript Code” for the record and stop buttons, follow the steps below:
- Select the “Record” button (b3-Record) and add a new dynamic action for the “Click” event.
- Choose “Execute JavaScript Code” as the action.
- In the JavaScript code section, call the startRecording() function when the “Record” button is clicked.
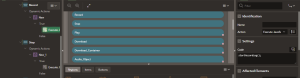
- Now, select the “Stop” button (b3-Stop) and add another dynamic action for the “Click” event.
- Again, choose “Execute JavaScript Code” as the action.
- In the JavaScript code section, call the stopRecording() function when the “Stop” button is clicked:
Step 5:
Finally, we need to add the following PL/SQL code to store the recording and its MIME type
DECLARE
L_AUDIO_BLOB BLOB;
L_MIME_TYPE VARCHAR2 (100);
V_MAX NUMBER;
BEGIN
INSERT INTO AUDIO_T (TRX_ID,
AUDIO_FILE,
CREATED_BY,
CREATED_DATE)
VALUES (SRX.NEXTVAL,
:P25_AUDIO_BLOB,
:APP_USER,
SYSDATE);
END;
Output:
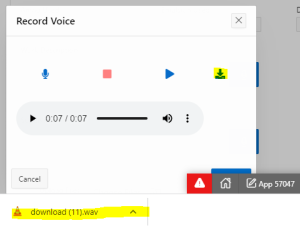
When we click the voice recording button, it will redirect to the voice recording modal dialog page.
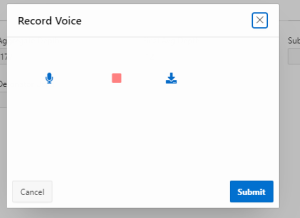
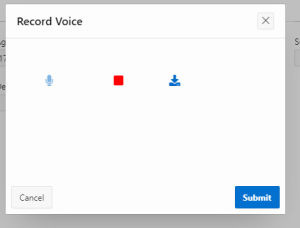
When we click the record button, the recording will start.
When we stop our recording, the preview button will appear. Clicking the preview button will play the recorded audio.
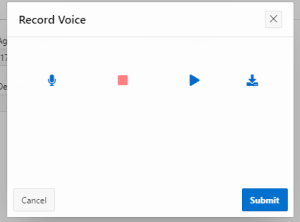
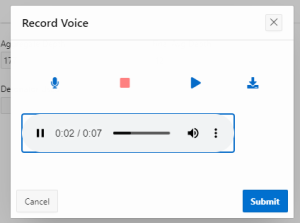
When we click the download container button, the audio will be downloaded.