MANUAL DATABASE CREATION IN ORACLE LINUX
In this blog describe the installation of Oracle database 12c release 2 on Oracle Linux 6 as manual method.
First, you should have installed oracle Linux in your personal system and also you need to complete the pre-installation of oracle 12c software.
For the Pre – Installation of Oracle 12c software please refer below link.
https://oracle-base.com/articles/12c/oracle-db-12cr2-installation-on-oracle-linux-6-and-7
To this software installation we needs the basic software requirements,
i.e,
Download the Oracle database 12c from this https://www.oracle.com/database/technologies/oracle-database-software-downloads.html
OS – Oracle Linux 6 (OL6) ISO file.
If we have above Requirements or installed software and then follow next Steps are mentioned.
STEP 1:
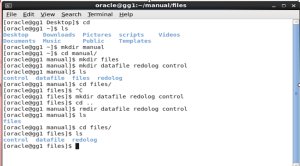
Create a directory for database files. For an example please see the image below.
Step 2:
Now, we should create the Parameter file(PFILE) manually.
Go to the $ORACLE_HOME/dbs location.
In that path create the pfile by using the below command.
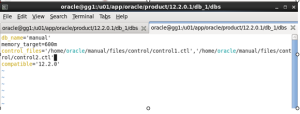
$vi initmanual.ora
In this file, you should mention the db_name, control filename and location, memory target size,diagnostic destinationpath.
Step 3:
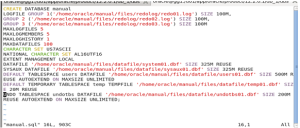
Next, you have to create the .sql file(manual.sql). This file contains the details about log file location, datafile location, default tablespace, and temporary tablespace along with undo tablespace location. For your clarification see the below image.
Step 4:
BASH PROFILE:
# .bash_profile
# Get the aliases and functions
if [ -f ~/.bashrc ]; then
. ~/.bashrc
fi
export ORACLE_SID=manual
export ORACLE_BASE=/u01/app/oracle
export ORACLE_HOME=/u01/app/oracle/product/12.2.0.1/db_1
export PATH=$PATH:$ORACLE_HOME/bin
PATH=$PATH:$ORACLE_HOME/bin
export PATH
Step 5:
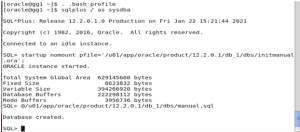
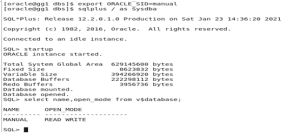
Now run the bash_profile and then initiate to connect the database, in the manual database creation initially you have to run the newly created pfile as nomount stage with file path location.
After successfully enter to the nomount stage, now want to run the script file (.sql) file, it is the script file only to create a database manually and also use to assign a control file. Then only we could open the mount stage and database too. To run this file in the mount stage have to mention a @<path-location>manual.sql.
Step 6:
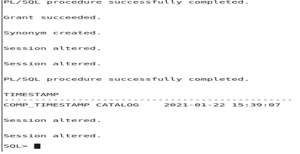
Next, successfully create a database after want to run the below scripts in the particular user part.
Run these scripts on the SYS user:
Sql> @$ORACLE_HOME/rdbms/admin/catalog.sql.
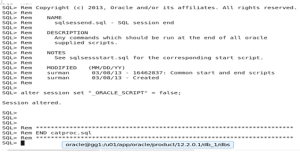
Sql>@$ORACLE_HOME/rdbms/admin/catproc.sql.
Run this scripts on the SYSTEM user:
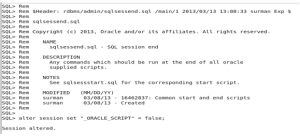
@$ORACLE_HOME/sqlplus/admin/pupbld.sql.
Sql> @$ORACLE_HOME/rdbms/admin/catalog.sql.
As SYS user,
Sql>@$ORACLE_HOME/rdbms/admin/catproc.sql
As a SYS user,
@$ORACLE_HOME/sqlplus/admin/pupbld.sql
As a SYSTEM user,
Finally, we successfully created Oracle 12c database as manual.
NOTE:- Same steps we should follow for oracle 19c installation also.