OEM 13.4 INSTALLATION AND CONFIGURATION
OEM OVERVIEW:
Oracle Enterprise Manager is management tool, which is used to integrated solution for managing your heterogeneous environment.
It Includes, Graphical console, Agents, Common Services and Tools to provide an integrated, comprehensive systems management platform for managing Oracle products.
From OEM Console, you can do any of the following tasks:-
- Administer, diagnose, and tune multiple databases
- Distribute software to multiple servers and clients
- Schedule jobs on multiple nodes at varying time intervals
- Monitor objects and events throughout the network
- Customize your display using multiple graphic maps and groups of network objects, such as nodes and databases
- Administer Real Application Clusters
STEP 1:- For Installation:
DOWNLOAD THE OEM SOFTWARE TEMPLATE 13.4 from below link
https://www.oracle.com/enterprise-manager/downloads/linux-x86-64-13c-rel4-downloads.html
Step2: OEM DATABASE INSTALLATION:
For the manual database creation please refer my pervious blog given below link.
http://staging.doyensys.com/blogs/manual-database-creation/
Step3:-
After database creation, we need to set following hidden parameters and bounce the database once.
NOTE:-
13.4: OMS Install/Upgrade Fails During BIP Configuration (Doc ID 2634802.1)
While in my final installation step, I got a error on above point BI Publisher configuration failed. As a oracle support says,
The installation/upgrade to 13.4 fails when the CLASSPATH variable is set. This was reported in an internal bug.
So, I have unset the CLASSPATH variable like below and started the OEM installation.
STEP 4:-
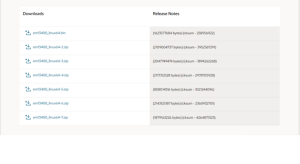
Continues from STEP 1, make a directory in your own location (here I have created the directory name with backup in /u01/app/backup) And move the downloaded software zip files to that directory.
Then run the .bin file from those files as below screenshot.
Unset the CLASSPATH variable:
$ export CLASSPATH=
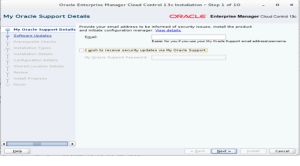
STEP 5:- Uncheck the check box for “MY ORACLE SUPPORT PASSWORD” and click next.
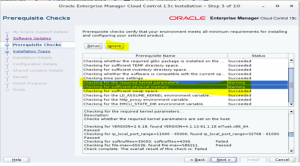
Step 7:- Choose “SKIP” check point and click next. Then pre-requisite will be run and check minimum requirements for configuration.

Here, Mentioned warnings can be ignored, It will not affect your OEM installations.
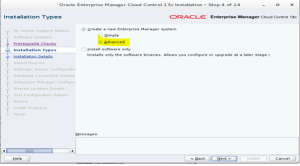
Step 8:- Here click “ADVANCED” check point option and click next.
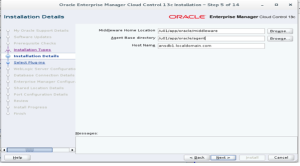
Step 9:- Then now mentioned the correct path location for “MIDDLEWARE home”, “AGENT BASE” and “HOSTNAME”.
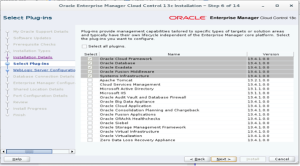
STEP 10:- Here select your own plugins for your configuration.
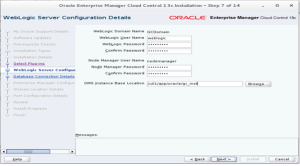
Step 11:- Set the password for WebLogic and Node Manager users. Then mentioned the your own OMS instance base location.
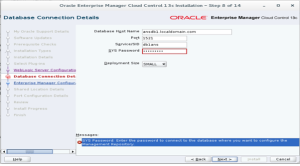
STEP 12:-
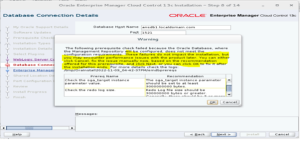
Here we need to mention, The connection details of created OEM database and click next.
Then while analysing the connection, I got the following error:
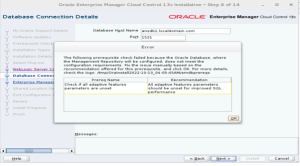
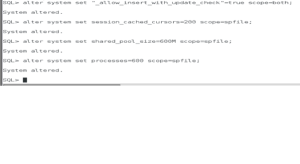
For the above error we need to set below parameters in database level and rerun the analysis.
I’m using Oracle 19c as repository database. The solution for this is please alter below parameters.
alter system set “_allow_insert_with_update_check”=true scope=both;
alter system set session_cached_cursors=200 scope=spfile;
alter system set sga_target=800M scope=both;
alter system set pga_aggregate_target=450M scope=both;
alter system set “_optimizer_nlj_hj_adaptive_join”= FALSE scope=both;
alter system set “_optimizer_strans_adaptive_pruning” = FALSE scope=both;
alter system set “_px_adaptive_dist_method” = OFF scope=both;
alter system set “_sql_plan_directive_mgmt_control” = 0 scope=both;
alter system set “_optimizer_dsdir_usage_control” = 0 scope=both;
alter system set “_optimizer_use_feedback” = FALSE scope=both;
alter system set “_optimizer_gather_feedback” = FALSE scope=both;
alter system set “_optimizer_performance_feedback” = OFF scope=both;
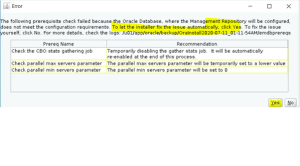
Step 13:-
We can ignore the following two screenshots with error because it will resolve automatically while installation.
Just click “YES”.
Here just click “OK”.
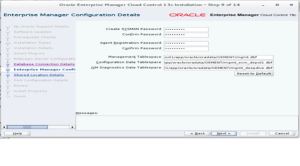
STEP 14:-
Now we need to set the OEM SYSMAN user password and Agent registration password.
And Create a tablespaces for OEM and click next.
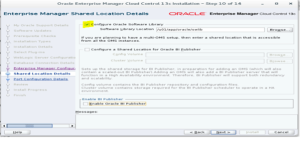
STEP 15:- Here we need to mentioned the path location for software library.
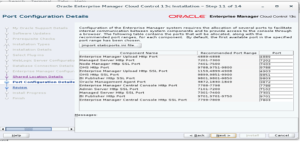
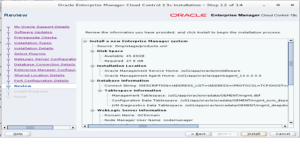
Step 16: Review the port numbers and click next and it will show the summary of configuration, review and click next.
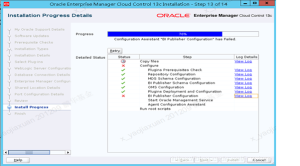
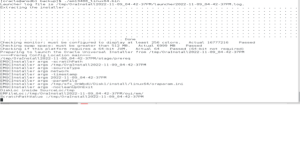
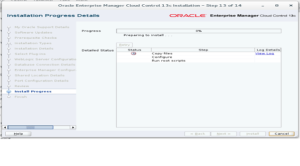
Step 17:- Monitor the installation progress.
Step 18:- After installation completed, It will show the information of front end login links and connecting ports. We need to note it or copy it for your reference.
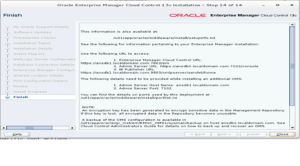
- Enterprise Manager Cloud Control URL: https://ansdb1.localdomain.com:7803/em
- Admin Server URL: https://ansdb1.localdomain.com:7102/console
- BI Publisher URL: https://ansdb1.localdomain.com:9803/xmlpserver/servlet/home
The following details need to be provided while installing an additional OMS:
- Admin Server Host Name: ansdb1.localdomain.com
- Admin Server Port: 7102
Finally, We have successfully completed the installation and login into the localhost OEM in front end as below.

THANK YOU… !!!