Prerequisite:
- 100GB size is required for OEM, Agent.
- Below parameters to be updated on DB.
- Alter system set “_allow_insert_with_update_check”=true scope=both;
- Alter system set session_cached_cursors=200 scope=spfile;
- Alter system set shared_pool_size=600M scope=spfile;
- Alter system set processes=600 scope=spfile
- Create OEM directory in your desired path and create Middleware, Agent and Backup directories under that and give 777 permission to those folders
- Download the OEM zip files from the Oracle site and move those files to Backup directory.
- URL : https://www.oracle.com/enterprise-manager/downloads/linux-x86-64-13c-rel5-downloads.html
- Files to be downloaded from the site (em13500_linux64.bin, em13500_linux64-2.zip, em13500_linux64-3.zip, em13500_linux64-4.zip and em13500_linux64-5.zip)
Steps to open the GUI workflow of OEM setup
- Run the em13500_linux64.bin in terminal to begin the OEM installation workflow.
Syntax : ./ em13500_linux64.bin #which is under the Backup directory.
- GUI Workflow appears like below.
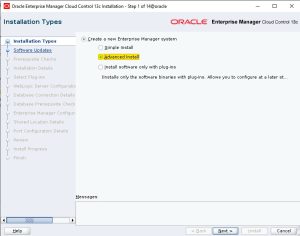
- In Step 1 of 14@oracle, select Advanced install as shows in above screen and click next to Skip (Step 2 of 14) for Software update and then click next to Prerequisites Checks (Step 3 of 14) and ensure the prerequisites are passed in step 3 of 14.
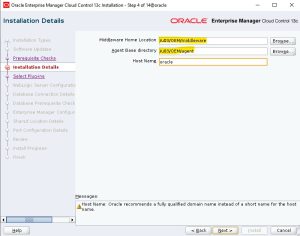
- Enter the Path for Middleware and Agent and then mention the hostname in Step 4 of 14.
- Below snip for reference.
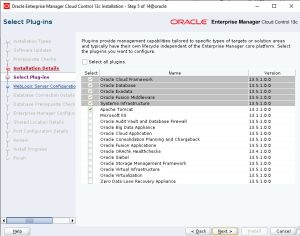
- And select the list of services we want to connect with OEM in Step 5 of 14.
- Below snip for reference.
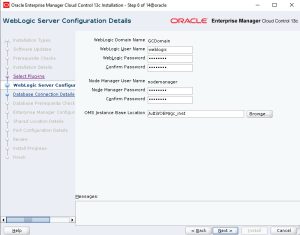
- Enter the Weblogic and Node Manager username and password in Step 6 of 14.
- Below snip for reference.
- Enter the DB hostname, Port number, SID and SYS password details in Step 7 of 14.
- Click next to run the DB prerequisites checks in Step 8 of 14.
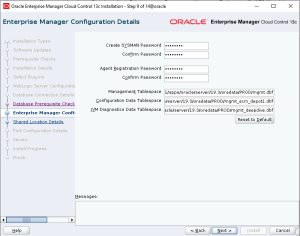
- Fill the Enterprise Manager Configuration details in Step 9 of 14.
- Below snip for reference.
- Mention the Software library location in Step 10 of 14.
- Configure the OEM ports in Step 11 of 14, we can leave the ports as it is if no changes required on them.
- Review the configuration details in Step 12 of 14 and click “Install” to begin the installation.
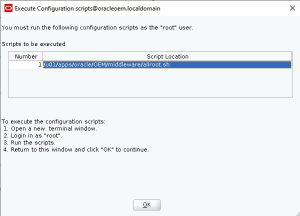
- During the installation, you will be prompted to run one script in terminal by root user.
- Below snip for reference.
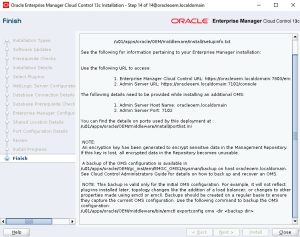
- Once the script executed in terminal, Installation will be finished and it will show the OEM details like URL, port details location and etc.,
- Below snip for reference.
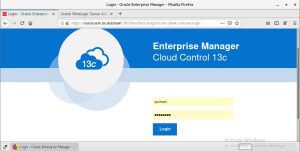
- Now we can access the OEM in browser.
- Below browser view snip for reference.
Recent Posts