
Introduction / Issue
Organizations migrating from on-premises SQL Server environments to Microsoft Azure SQL Database often encounter challenges because Azure SQL Database does not support traditional SQL Server migration methods such as BACKUP/RESTORE, CREATE DATABASE FOR ATTACH, or the Copy Database Wizard. As a result, an alternative migration approach is required. This blog demonstrates how to migrate an on-premises SQL Server database to Azure SQL Database using a BACPAC file through SQL Server Management Studio (SSMS).
Why We Need to Do / Cause of the Issue
When moving databases to Azure SQL Database, administrators cannot rely on conventional SQL Server backup and restore operations due to platform limitations. Attempting to use unsupported migration methods may result in failed deployments or compatibility issues.
Some common migration challenges include:
- Azure SQL Database does not support native SQL Server BACKUP and RESTORE commands.
- The CREATE DATABASE FOR ATTACH option is unavailable.
- The SQL Server Copy Database Wizard cannot migrate databases to Azure SQL Database.
- Unsupported database objects or features may cause export or import failures.
- Proper validation is required to ensure that applications continue to function after migration.
A BACPAC file provides a reliable solution by packaging both the database schema and data into a single compressed file that can be exported from SQL Server and imported into Azure SQL Database.
How Do We Solve
The migration process consists of two major phases:
- Export the source SQL Server database as a BACPAC file.
- Import the BACPAC file into Azure SQL Database.
Export to bacpac file in SQL Server Management Studio
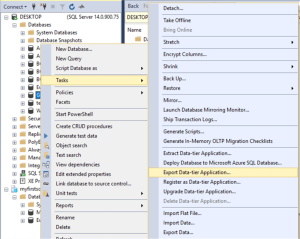
Step 1: To export a database to a bacpac file in SQL Server Management Studio (SSMS), connect to the desired SQL Server instance and in the Object Explorer pane, right-click on the name of the desired database. In the context-menu select Tasks > Export Data-tier Application:
The above option will open the respective wizard
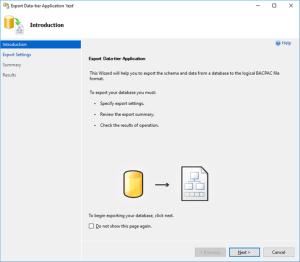
Click Next > in the Introduction page to go to the Export Settings:
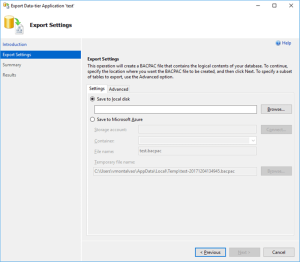
Step 2: In the Export Settings you are requested to provide the location to save the bacpac file. You can save it to the local disk or to an Azure storage account. Since I do not have an Azure storage account I will save the bacpac file to my local disk.
In the Advanced tab you can select which objects will be exported. By default, all objects are selected. Since this is what I want (migrate full database), I will go with the default and have all objects selected.
After providing the location and the bacpac file name, the Next > button will be enabled and then you can click on it to proceed. This will present the Summary page, where you can verify and confirm the provided settings:
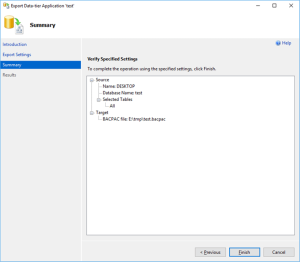
After confirming that all provided information is correct, click on the Finish button to start the Export.
Errors will be shown if the export is unsuccessful and you will need to click on the respective error to find out what went wrong (usually errors occurs when unsupported elements or external references try to be exported). The following screen shows what a successful export looks like:
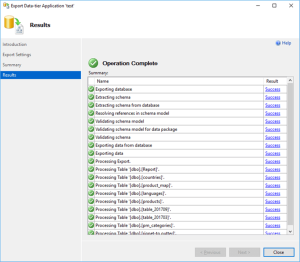
Click on the close button to exit the BACPAC export wizard
Step 3: Import a BACPAC file to SQL Azure
To create a SQL Azure database from a bacpac file in SQL Server Management Studio (SSMS), connect to the desired SQL Azure server and in the Object Explorer pane, right-click on the Databases folder. In the context-menu select Import Data-tier Application:
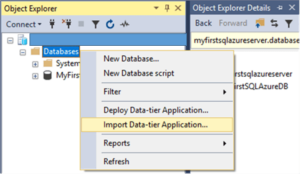
The above option will call the Import bacpac wizard and it will start by presenting the Introduction page:
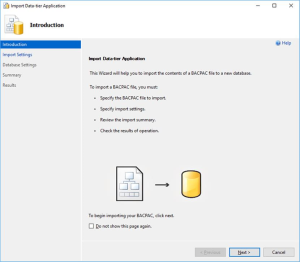
Step 4: Click on the Next > button to provide the Import Settings:
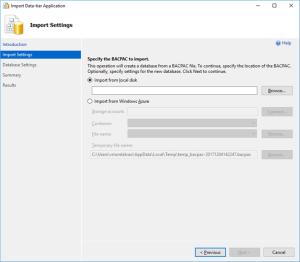
Step 5: In the Import Settings you are requested to provide the location of the bacpac file to import from. You can import from an existing bacpac file from the local disk or from an Azure storage account. Since I have exported the bacpac file to my local disk, I will import it from there.
After providing the location and the bacpac file name, the Next > button will be enabled and then you can click on it to proceed. This will move to the Database settings screen:
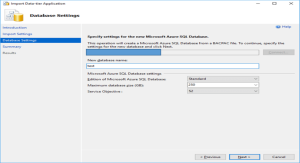
Step 6: In the Database Settings page, you are requested to configure the new SQL Azure database by providing the new database name (by default it will present the source database name) and the maximum database size (by default it will be configured with the maximum allowed size for the selected edition).
For this case I will keep the original database name, but will change to the Basic edition since the database is very small and I do not need to go for a more expensive edition.
Click on the Next > button to proceed to the Summary page:
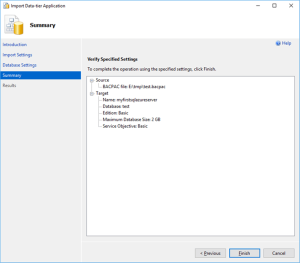
Step 7: In the Summary page, confirm that you provided the correct information. As you can see by the above screenshot, I have changed the edition to Basic. After confirming, click on the Finish button to start the Import.
An error will be shown if there is an unsuccessful import and you will need to click on the respective error to find out what went wrong. The following screen shot shows how a successful import should look:
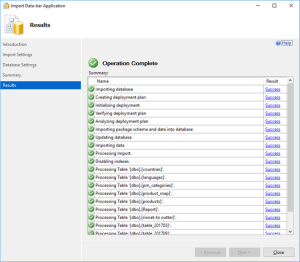
Click on the Close button to exit the BACPAC import wizard.
Step 8: Validate SQL Azure Import
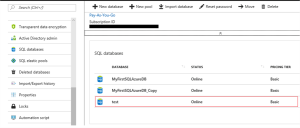
You can confirm that the new database has been created in the SQL Azure server.
In SSMS navigate to the instance:
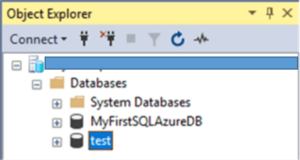
And in the Microsoft Azure Portal by checking in the respective SQL Azure server:
Conclusion
Migrating a SQL Server database to Azure SQL Database using a BACPAC file is a straightforward and reliable approach when traditional backup and restore methods are not supported. Proper planning, compatibility validation, and thorough testing throughout the migration process help ensure a smooth transition with minimal downtime and optimal database performance in the Azure environment.
