Introduction:
This document provides a step-by-step guide to installing Oracle APEX 21.2 on an Oracle 19c database running on Oracle Linux.
It covers prerequisites, setup, and configuration for APEX, ORDS, Java, and Tomcat.
The instructions aim to simplify the installation process for easy deployment.
By following these steps, you can quickly get APEX up and running in your environment.
Prerequiste:
Apex 21.2 (link)
Ords 21.2 (link)
Apache Tomcat 9.0.105 (link)
Jdk 11.0 (link)
Installation:
Create a Directory Apex in a mount point, then move the above files into that.
Create the directories for each zip files
Unzip those files into the required directories.
APEX:
After Unzipping apex files, Create a tablespace only for apex in the database.
After creating the tablespace, Execute the apex installation scripts present in the apex directory.
The command is broken down like below,
- Apexins.sql – APEX schema name
- APEX – Default tablespace for APEX application schemas
- APEX TEMP – Apex temporary tablespace for temporary segments
- /i/– For ORDS, this means you must later map /i/ to APEX static files via ORDS config.
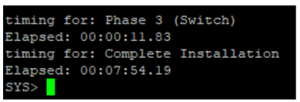
Apex has been installed and Configure the database apex restful services by running the script in the apex directory.
After execution, It asks for apex listener and apex_rest_public_user passwords.
After the execution, change the apex users APEX_LISTENER and APEX_PUBLIC_USER in the database level and set the password.
Then, set the port number as 0 as we need to set the default port 8080 while using PLSQL gateway.
JAVA and TOMCAT INSTALLATION:
After unzipping the java and tomcat zip files, Create the tomcat environment file.
After creating the tomcat environment file, navigate to $CATALINA_HOME/bin and then start the tomcat using sh startup.sh script.
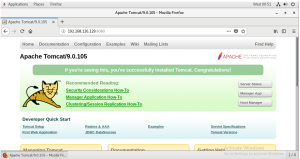
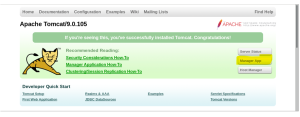
l To open the tomcat front end page, use this default link to view,
After the successful installation, The above page can be opened without any errors.
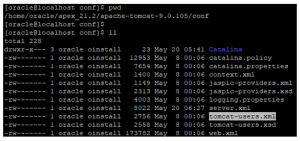
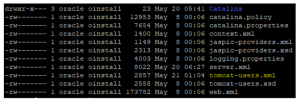
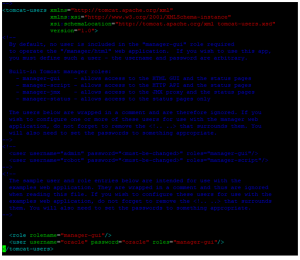
Then, we need to add an tomcat user entry in the xml file.Navigate to /home/oracle/apex_21.2/apache-tomcat-9.0.105/conf and we can find the file called tomcat-users.xml .
Open the file and add the entries at the line 55th line,
<role rolename=”manager-gui” />
<user username=”oracle” password=”oracle” roles=”manager-gui” />
ORDS Configuration:
After unzipping the ords zip file, the directory ords will be created inside that create a directory called conf.
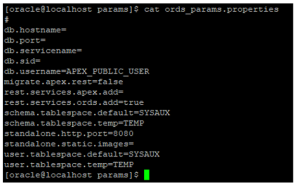
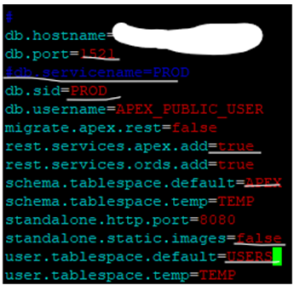
Then, we need to add the database name and domain entries into the ords_params.properties file.This file will be located inside the params folder
We need to add the hostname, port, service name and the SID in the ords_params.properties file.
Enter the following in the ords_params.properties file,
After params file configuration, then move on to apex.war file creation by navigating to /home/oracle/apex_21.2/ords where we can find the ords.war file.
- Take a backup of ords war file
- Then, rename the ords.war to apex.war.
Now, set the oracle REST database service ORDS configuration directory by using the below command (single line command inside the ords directory).
/home/oracle/apex_21.2/jdk-11.0.26/bin/java -jar apex.war configdir /home/oracle/apex_21.2/ords/conf
ORDS Installation:
After creating the apex.war file using the java then we can move to install the ORDS. To install ORDS use the single line command used to run in the ORDS directory,
/home/oracle/apex_21.2/jdk-11.0.26/bin/java -jar apex.war install advanced
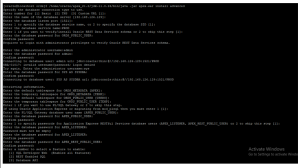
After this command, below steps will be done and we need to give the required information to it.
Make a changes in Apex.xml files to limit the number of connections allowed for the apex services. Navigate to /home/oracle/apex_21.2/ords/conf/apex/conf and we can find the Apex.xml file and add the below lines,
<entry key=”jdbc.InitialLimit”>15</entry>
<entry key=”jdbc.MinLimit”>15</entry>
<entry key=”jdbc.MaxLimit”>50</entry>
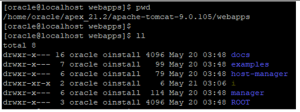
Then, Create a Image directory and copy the oracle application express images.
Create a directory i inside the $CATALINA_HOME/webappsfolder
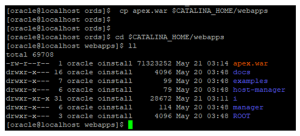
Now, copythe oracle application express images into the webapps i folder
Then, copy the apex.war file from ORDS to the webappsfolder
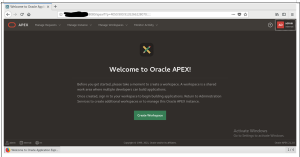
Finally, Bounce the tomcat and check apex front end is opening or not,
Finally, Apex has been installed. Now, we are going to reset the admin password by running the apxchpwd.sql script
- Navigate to apex directory which is /home/oracle/apex_21.2/apex.
- Then, connect to the database and run the script,
The username and password has been reset.
Enabling the Tomcat Manager App (Already made changes early now just enabling it to wok by removing the comments)
l The Tomcat Manager App is a web-based administration tool included with Apache Tomcat. It allows to manage Java web applications deployed on your Tomcat server. It can be used for,
- Deploy a WAR file,
- Reload an app,
- Undeploy an app,
- View server status,
- Test deployments.
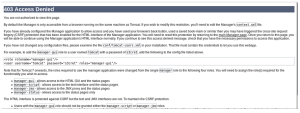
l When navigating to the Manage app in the tomcat server, we get the above permission denied message, So we need to configure the manager app.To Configure,
- First we allow the remote access to the manager app, navigate to
/home/oracle/apex_21.2/apache-tomcat-9.0.105/webapps/manager/META-INF
Here, we have a context.xmlfile, edit the below lines in the files. These change allows all IP’s to access the manager app.
Then, Navigate to the below location, we have tomcat-users.xml
/home/oracle/apex_21.2/apache-tomcat-9.0.105/conf
- Now, add the below lines to the file,
<role rolename=”manager-gui”/>
<user username=”oracle” password=”oracle” roles=”manager-gui”/>
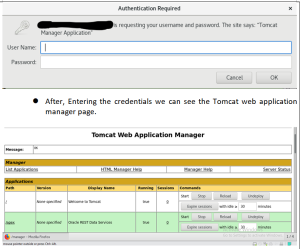
After making the above changes, when clicking the manager app button it asks the credentials like below, we can authenticate using the password added in the tomcat-users.xml file.
After, Entering the credentials we can see the Tomcat web application manager page.
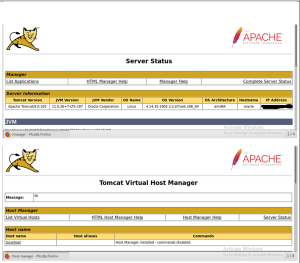
To enable Server Status and Host Manager:
Navigate to
$CATALINA_BASE/webapps/host-manager/META-INF/context.xml
Then Change the line as below to allow all the IP to access them,
l After changing those line we can access both the server status and the host manager.
Conclusion:
Following this guide ensures a smooth APEX 21.2 installation on Oracle 19c with proper ORDS and Tomcat integration.
The setup enables you to develop and manage applications efficiently.
Proper configuration also ensures better performance and accessibility.
With this, your APEX environment is ready for production or development use.


