Building a Multi-Level Approval Workflow in Oracle APEX Interactive Grid
Introduction
Many enterprise applications require data to be reviewed and approved by multiple stakeholders before it becomes final. Oracle APEX provides an excellent platform for implementing such approval workflows using Interactive Grids, JavaScript validations, and PL/SQL application processes.
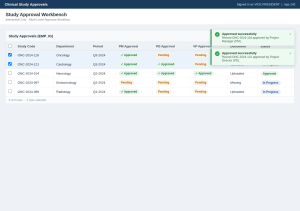
In this implementation, users update study information through an Interactive Grid. Before approving records, the application validates mandatory fields, verifies the user’s authorization, ensures required supporting documents are uploaded, and then updates the approval status based on the approver’s role.
The solution combines client-side validation for an improved user experience with server-side processing to securely update database records.
Why we need to do
A structured approval process is essential for maintaining data quality, enforcing business rules, and ensuring compliance within enterprise applications. Without proper validations and authorization checks, users may inadvertently approve incomplete, inaccurate, or unauthorized records, leading to data inconsistencies and operational risks. A well-designed approval workflow addresses these challenges by ensuring that only authorized users can approve records, enforcing the correct approval sequence, validating mandatory business information, and verifying that all required supporting documents are available before approval.
How do we solve
The approval workflow is implemented using two layers:
- Client-side validation using JavaScript.
- Server-side processing using an Oracle APEX Application Process.
The overall flow is:
User Clicks Approve
|
v
Save Interactive Grid Changes
|
v
Perform Client-side Validations
|
v
If Validation Passes
|
v
Call Application Process
|
v
Update Database
|
v
Refresh Interactive Grid
|
v
Display Success Message
Client-Side JavaScript
When the user clicks the Approve button, JavaScript first validates the selected records before invoking the server-side process.
Step 1 – Get Selected Records
function approveRecords() {

    var view = apex.region("emp_ig")

                   .widget()

                   .interactiveGrid("getCurrentView");

    var records = view.getSelectedRecords();

    if (records.length === 0) {

        apex.message.alert("Please select at least one record.");

        return;

    }

}
Step 2 – Validate Required Fields
Each selected row is checked to ensure mandatory fields contain values.
records.forEach(function(record){

    var department = model.getValue(record,"DEPARTMENT");

    var period     = model.getValue(record,"PERIOD");

    if(!period){

        errors.push("Period is mandatory.");

    }

});
Step 3 – Validate User Authorization
The application verifies whether the logged-in user is authorized to approve the selected record.
if(currentUser !== projectManager &&
currentUser !== projectDirector &&
currentUser !== vicePresident){
errors.push(“You are not authorized to approve this record.”);
}
Step 4 – Validate Supporting Documents
Some approval methods require supporting documentation before approval.
if(documentRequired && !documentUploaded){

    errors.push("Please upload the required supporting document.");

}
Step 5 – Display Validation Errors
If validation fails, the user receives meaningful error messages.
if(errors.length > 0){
    apex.message.showErrors(errors);
    return;
}
Step 6 – Call the Server-Side Process
After successful validation, JavaScript invokes the Oracle APEX Application Process.
var request = new htmldb_Get(

    null,

    $v("pFlowId"),

    "APPLICATION_PROCESS=APPROVE_RECORD",

    $v("pFlowStepId")

);

request.addParam("x01", recordId);

request.addParam("x02", approverRole);

request.get();
Step 7 – Refresh the Interactive Grid
After approval is complete, the grid is refreshed to display the updated status.
apex.region("emp_ig")

    .widget()

    .interactiveGrid("getActions")

    .invoke("refresh");
Server-Side PL/SQL
After receiving the request from JavaScript, Oracle APEX executes an Application Process to update the approval information.
Step 1 – Receive Parameters
DECLARE

    l_record_id      NUMBER;
    l_approver_role  VARCHAR2(30);

BEGIN

    l_record_id     := apex_application.g_x01;
    l_approver_role := apex_application.g_x02;
Step 2 – Update Approval Based on Role
The application updates different columns depending on the user’s approval level.
IF l_approver_role = 'PM' THEN
    UPDATE approval_table
       SET pm_approval_flag = 'Y',
           pm_approval_date = SYSDATE;
ELSIF l_approver_role = 'PD' THEN
    UPDATE approval_table
       SET pd_approval_flag = 'Y',
           pd_approval_date = SYSDATE;
ELSIF l_approver_role = 'VP' THEN
    UPDATE approval_table
       SET vp_approval_flag = 'Y',
           vp_approval_date = SYSDATE;
END IF;
Step 3 – Complete Final Approval
After all approval levels are completed, the application updates the overall approval status.
IF all_levels_completed THEN

    UPDATE approval_table

       SET approved_flag = 'Y',

           approved_date = SYSDATE;

END IF;
Step 4 – Commit the Transaction
Finally, the transaction is committed.
COMMIT;
Approval Workflow
Select Records
|
v
Save Grid Changes
|
v
Validate Business Rules
|
v
Validate User Authorization
|
v
Validate Supporting Documents
|
v
Any Validation Errors?
|
Yes –+— No
| |
v v
Show Call
Errors Application Process
|
v
Update Approval Status
|
v
Commit Transaction
|
v
Refresh Interactive Grid
|
v
Display Success Message
Conclusion
A well-designed approval workflow is essential for enterprise applications that require controlled data validation and governance. By combining Oracle APEX Interactive Grid features with JavaScript for client-side validation and PL/SQL Application Processes for secure database updates, organizations can implement a reliable, scalable, and maintainable approval solution.
This architecture ensures that only authorized users can approve records, required business validations are enforced before approval, supporting documents are verified, and complete approval history is maintained. The result is a robust workflow that enhances data integrity, improves user experience, and supports organizational compliance and audit requirements.