It is a feature that is enhanced in oracle 19c and it is mainly used to automate the upgrade process.it not only automates the database upgrade but also performs the pre-upgrade steps and the post upgrade steps automatically.it just simplifies the upgrade activity, previously we have to use dbua/manual method/datapump methods to upgrade the database now we can upgrade the number of databases using AutoUpgrade utility within the short span of time.
Note : If you are doing AutoUpgrade on same server it is not necessary to run the upgrade mode you can stop with the deploy mode, our database will be upgraded.
On the other hand if you are performing AutoUpgrade on different servers it is necessary to run all the mode till upgrade mode.(i.e. analyze, fixups, deploy, upgrade)
AutoUpgrade is available for Oracle Database Enterprise Edition, and Oracle Database Standard Edition. It is not available for Oracle Database Express Edition.
AutoUpgrade Support is available for Oracle Database 12c Release 2 (12.2) and Oracle Database 18c (18.5) target homes. For both Oracle Database 12c Release 2 (12.2) and Oracle Database 18c (18.5) target homes.
Advantages of AutoUpgrade Utility:
- Time saving method (completes the upgrade in a short time)
- can upgrade multiple Oracle Database deployments at the same time, using a single configuration file, customized as needed for each database deployment.
- preventing the issues before upgrade.
- It automatically performs the preupgrade and post upgrade steps/checks.
AUTOUPGRADE PROCESSING MODES:
Generally AutoUpgrade processes in four modes, they are ,
- Analyze
It performs a read only pre-upgrade analysis of databases before upgrade and detects any issues which may prevent the successful completion of upgradation.it should be run in the source database like normal operations.
- Fixups
In Fixups mode it checks the same as it have done in the analyze mode, so that it can identify issues that require fixing. In Fixup Mode, the AutoUpgrade utility detects and identifies both fixes that require manual intervention and AutoUpgrade utility can clear the fixduring upgrade.
- Deploy
In deploy mode it confirms that our database has been successfully upgraded and it copies the sqlnet.ora, listener.ora, tnsnames.ora from source to target home.
- Upgrade
An upgrade completes with either deploy or upgrade, after this we can run our post upgrade checks.in this we can run our custom scripts on the upgraded databases in accordance with the configuration file that we have created. After this the upgraded oracle database starts with a new oracle home.
AutoUpgrade utility jobs pass through a series of phases, called stages, during which specific actions are performed.
AutoUpgrade has the following stages,
SETUP
PREUPGRADE
PRECHECKS
GRP
PREFIXUPS
DRAIN
DBUPGRADE
POSTCHECKS
POSTFIXUPS
POSTUPGRADE
Overview steps:
Step:1 Check for the autoupgrade.jar file version which is already present in the database.($ORACLE_HOME/rdbms/admin/preupgrade.jar)
Step:2 Then we have to download the latest autoupgrade.jar version and then we have to share the file in /home/oracle location and check the version of the file.
Step:3 Our database which we are going to upgrade must be in archivelog mode and flashback should be enabled.
Step:4 Create a configuration file which consists of source Sid, log directory, start time of the upgrade, target home, source db version.
Step:5 Once we run the analyze mode it checks for any issues and also it analyses the source database, it will estimate the time when the upgrade will get completed, jobs that are running, status of the jobs ,once it is completed without any error we can run the fixups mode here also the same it detects and fixes the bugs that is either by manual or bugs that is fixed automatically during upgrade.
Step:6 After this the next stage is deploy and upgrade both are same which upgrades our database, it confirms that our database is upgraded successfully. here it transfers the listener.ora, tnsnames.ora files from source home to target’s home. Then we can start our upgraded database in the new oracle home.
Step:7 Then check time zone version of upgraded database.
Step:1 Check for the autoupgrade.jar version which is already present. The autoupgrade.jar file is available in the Oracle 19c database software in the $ORACLE_HOME/rdbms/admin directory.
Step:2 Then download the latest version of autoupgrade.jar from the oracle support.
Step:3 Create the configuration files containing the parameters where the logs should be stored, dbid, database name to be upgraded, source and target version home.
Contents present in the configuration file:
#
# Global logging directory pertains to all jobs
#
global.autoupg_log_dir=/u01/app/oracle/autoupgrade # Top level logging directory (Required)
#
# Database 1
#
upg1.dbname=chennai
upg1.source_home=/u01/app/oracle/product/12.2.0.1/dbhome_1
upg1.target_home=/u01/app/oracle/product/19.0.0/dbhome_1
upg1.sid=chennai
upg1.start_time=now
upg1.log_dir=/u01/app/oracle/autoupgrade/chennai
upg1.upgrade_node=primary.localdomain
upg1.run_utlrp=yes
upg1.timezone_upg=yes
upg1.target_version=12.2
Step:4 Enable the archive log mode in the database which is to be upgraded.
Step:5 Analyze the database to be upgraded using the analyze mode and fixups the issues by running fixups mode.
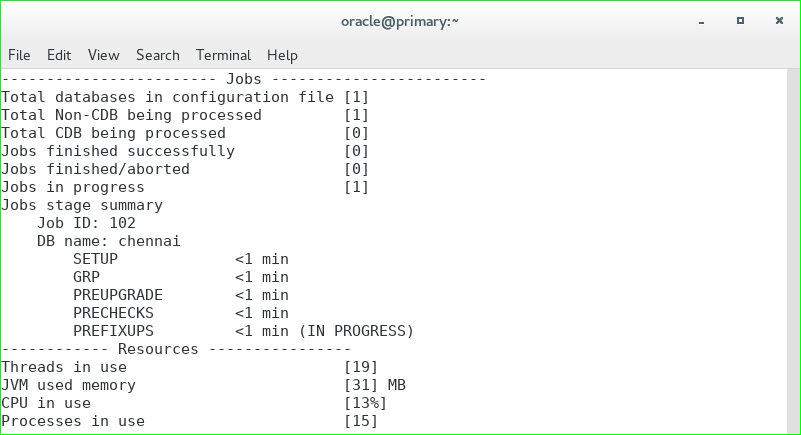
There are three main commands in this upgrade to check the status of the upgrade.
lsj – list the jobs which are running.
tasks – to see the tasks of the jobs and their status.
status – it gives an overall summary of the upgrade, here we can see the no of container and non-container databases, job finished successfully, job aborted and jobs which are in progress state.
Other than these there are some commands which helps you to perform the AutoUpgrade in a better way.
Running Analyze mode:
$ORACLE_HOME/jdk/bin/java -jar /home/oracle/autoupgrade.jar -config /tmp/config.txt -mode analyze
Running fixups mode:
$ORACLE_HOME/jdk/bin/java -jar /home/oracle/autoupgrade.jar -config /tmp/config.txt -mode fixups
Step:6 After these above steps are completed successfully we can proceed the upgrade process using deploy and upgrade modes.
Running deploy mode:
$ORACLE_HOME/jdk/bin/java -jar /home/oracle/autoupgrade.jar -config /tmp/config.txt -mode deploy
Our database is upgraded successfully from 12c to 19c using AutoUpgrade tool.
Here I am checking whether database is upgraded or not by running the 19c environment file and logging in to the database and also verify the name, open mode and timezone version.


