Description:
We can change the LOV query using form personalization. Sample provided below (Payment form).
Requirement:
We have to change the “type” field lov query for populating the custom values.
To achieve this, we have to follow the below process.
Step-1:
Login into application and switch the Payable Manager Responsibility.
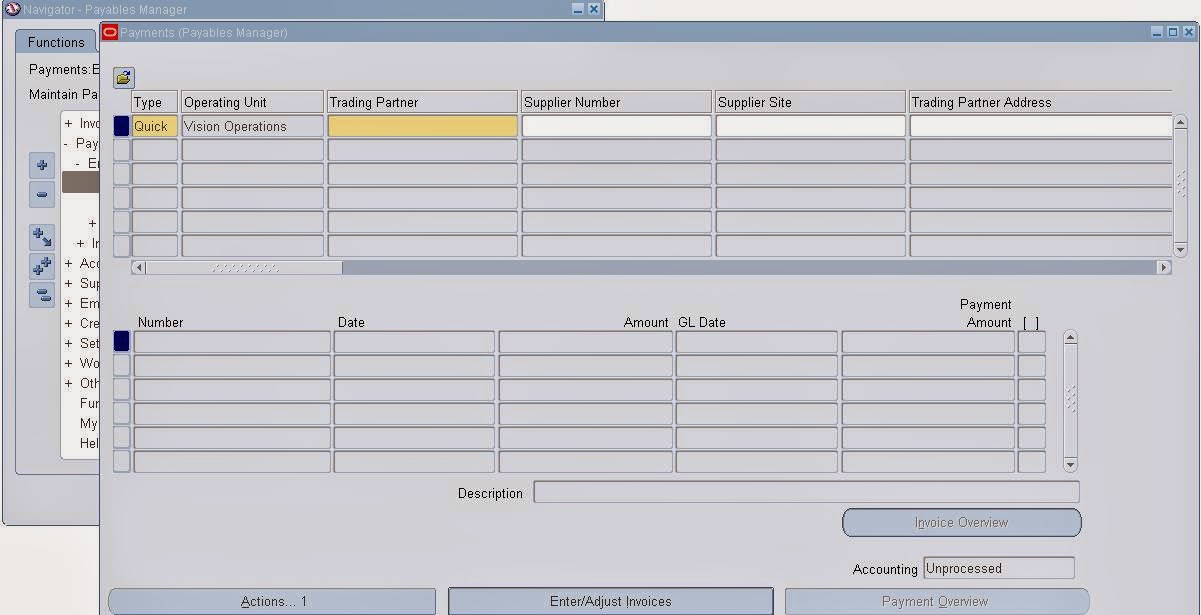
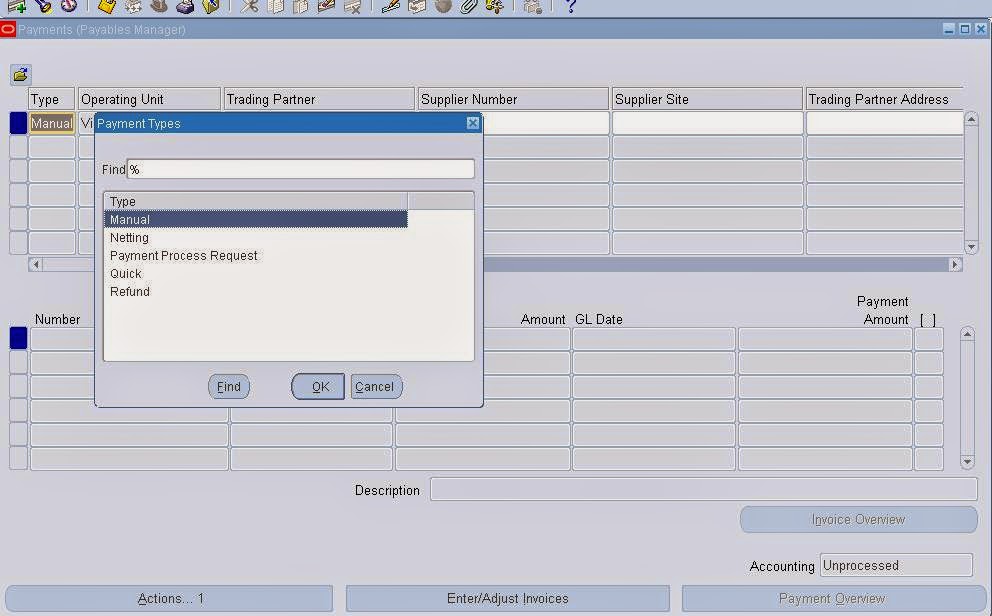
Nav->Payment->Entry->Payments.
Consider the TYPE field (PAY_SUM_FOLDER. PAYMENT_TYPE)
Here Type LOV currently shows three values. Instead, we have the requirement to populate these values in the LOV. (Manual, Netting, Payment Process Request, Quick, Refund).


Step-2: Identify the form .fmb name (NAV:- Help->about oracle Applications)

Step-3:
Connect to the application server and download the .fmb (APXPAWKB.fmb).
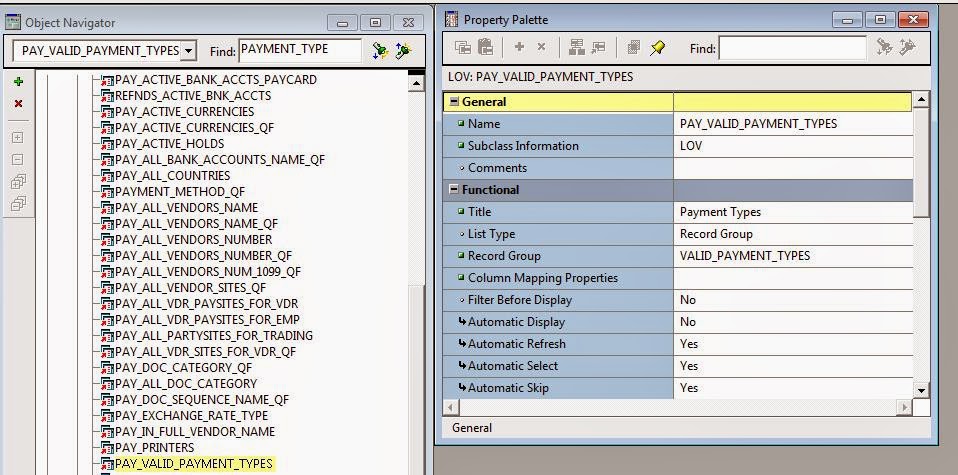
Open the form in the form builder and check the LOV name for “type” field.

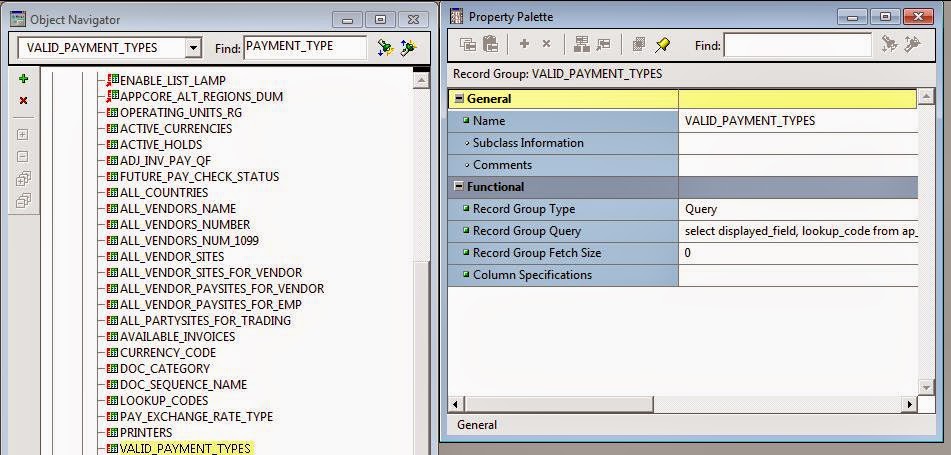
Step-4: Check the record group for the attached LOV and take the sql statement.
(select displayed_field, lookup_code from ap_lookup_codes where lookup_type = ‘PAYMENT TYPE’ and lookup_code not in (‘A’,’N’) order by upper(displayed_field))
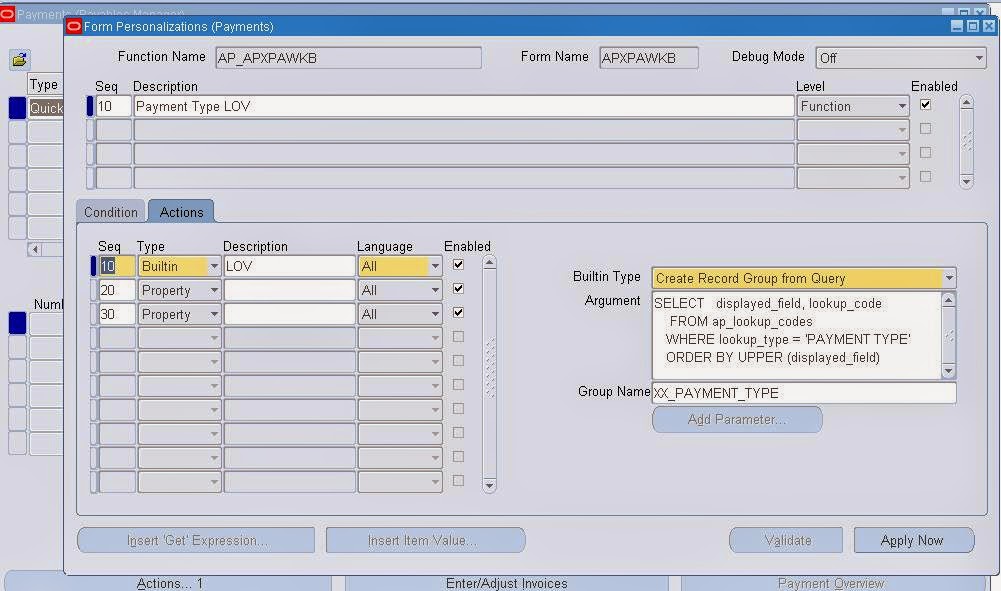
Step-5: Go to the payment form in application and navigate to form personalization form.
Nav:- help->Diagnostics-> Custom code ->Personalize
- Seq: 10
- Description: Payment Type LOV
- Level: Function
- Enabled checkbox enable
- Click on condition and assigned below properties.
- Condition: WHEN-NEW-FORM-INSTANCE
- Processing Mode: Not In Enter-Query Mode

Step-6: Click on Actions button and assigned the below properties.
- Seq: 10
- Type: Builtin
- Description : LOV (Optional)
- Builtin Type: Create Record Group from Query.
- Argument : Placed custom select statement (SELECT displayed_field , lookup_code FROM ap_lookup_codes WHERE lookup_type = ‘PAYMENT TYPE’ ORDER BY UPPER (displayed_field))
- Group Name: XX_PAYMENT_TYPE (Customer Record group name)
Step-7: Click on action and create 2nd action and assigned below values.
- Seq: 20
- Type: Property
- Language: All
- Object Type: LOV
- Target Object : PAY_VALID_PAYMENT_TYPES (lov Name)
- Property name: GROUP NAME
- Value: XX_PAYMENT_TYPE (Here assigned the custom group into existing LOV)

Step-8: Click on action and create 3rd action and assigned below values.
- Seq: 30
- Type: Property
- Language: All
- Object Type: Item
- Target Object PAY_SUM_FOLDER.PAYMENT_TYPE (Column Name)
- Property name: VALUE
- Value: Manual

Step-9: Save all work and close the form and re-open the form then check the changes.
Summary:
This Post explained what the steps should follow to create
The customer in fusion application
Queries?
Do drop a note by writing us at contact@staging.doyensys.com or use the comment section below to ask your questions.