Description:
To extend the OA Framework page, you have 2 options, extend the VO or extend/create the controller.
Extending a VO is on a global level, and you pick this option if you want to add extra columns. Extending/creating a controller can be assigned on all levels (function/site/organization/responsibility/etc).
Screen 1
Go to Project Super User Responsibility à Projects: Delivery à Project List à click any project link àgo to setup à Click Send Email to Team members.

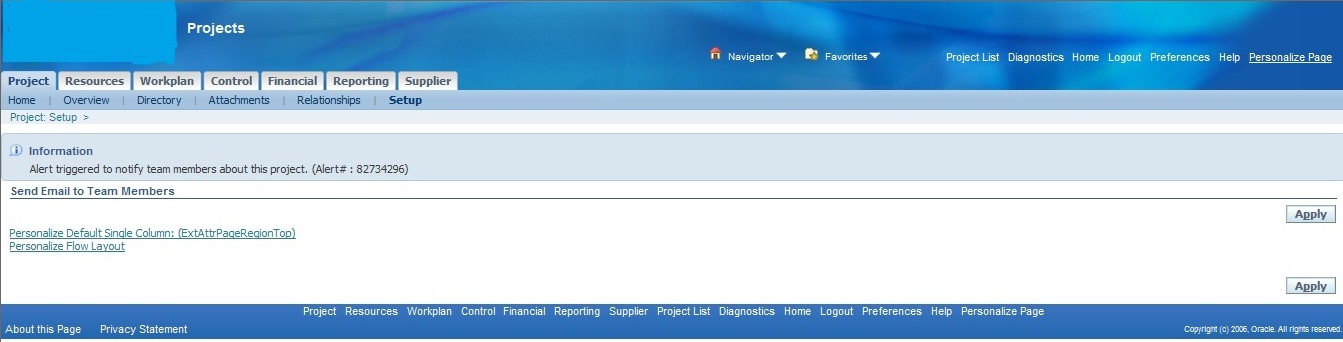
Screen 2
As per client requirement, whenever user click on Send Email to Team Members link, it should display information as“alert triggered to notify team members about this project” in the project setup page. To achieve this functionality, we need to extend the standard controller and add more business logic in the custom controller and mapped it to that page.
First step, click on About this page link at the bottom of this page.
To enable the “About this page” link at the bottom of each OA Framework-based page, there is a profile option called FND: Diagnostics (FND_DIAGNOSTICS) set to Yes at User Level.
Screen3
Under the controllers list, identify the controller (oracle.apps.pa.extensible.webui. ExtAttrPageRegionLayoutCO) which should be extended.

Screen 4
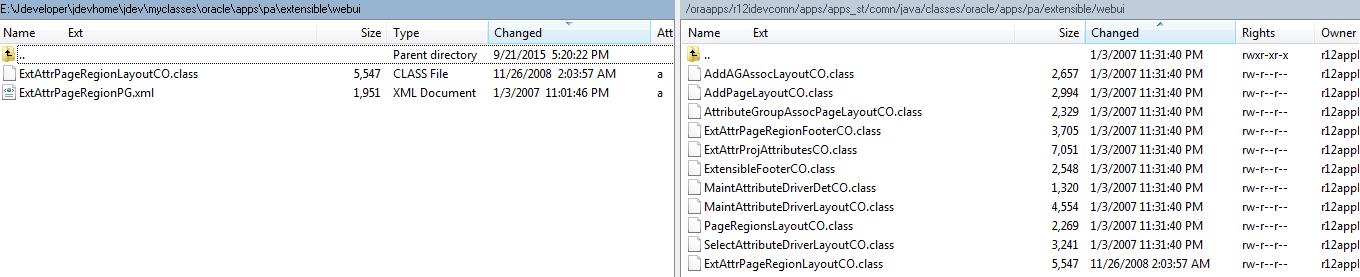
Connect the server through WINSCP, download the standard controller (ExtAttrPageRegionLayoutCO.class file) from the corresponding directory path and move it to the corresponding path in the local machine as shown below
Server: /oraapps/r12idevcomn/apps/apps_st/comn/java/classes/oracle/apps/pa/extensible/webui
Local Machine E:\Jdeveloper\jdevhome\jdev\myclasses\oracle\apps\pa\extensible\webui
Screen5
Click on Personalize Page link
To enable the above link, Personalize Self-Service Defn profile is set to Y at user level

Screen 6
To do personalization of layout, click on personalize pencil button is marked as circle

Screen7
Instead of calling the standard controller, the system should call the custom controller at site level as shown below

Screen8
To extend a standard controller(ExtAttrPageRegionLayoutCO) in the Jdeveloper, create a new custom controller named as XxExtAttrPageRegionLayoutCO
Go to Application Sources àright click on WebUI àGeneral àSimple Files à Java Class and click OK.

Screen 9
In create a java class window, named as XxExtAttrPageRegionLayoutCO, provided the package directory on which this file is going to be located. Click the browse button and attach the seeded controller with path at extends.

Screen 10
Open the controller code in JDeveloper by double click on XXExtAttrPageRegionLayoutCO.java under its directory path. Once the controller code opens, it will say its directory path of which this file is being located, which seeded controller it should be extended from; we can import some of the predefined class files in this class to get access to methods.
And it has two important methods called as Process Request and Process Form Request.
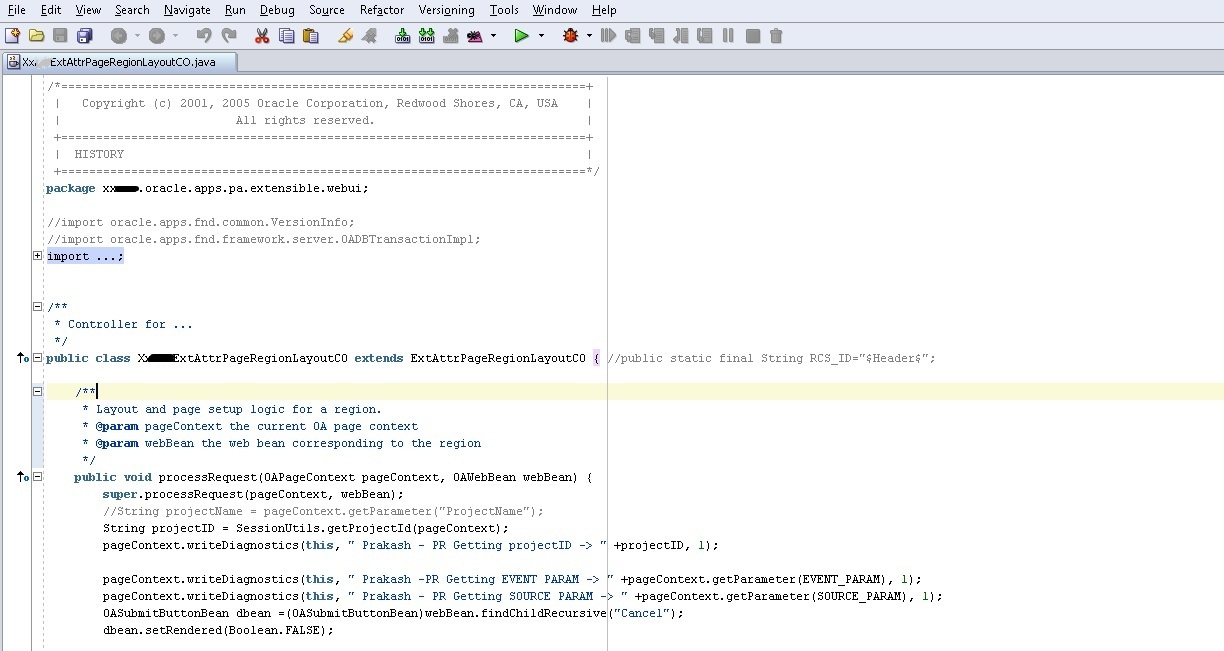
Screen11
While loading the page, the public method should be called in the process request method of this controller
Screen 12
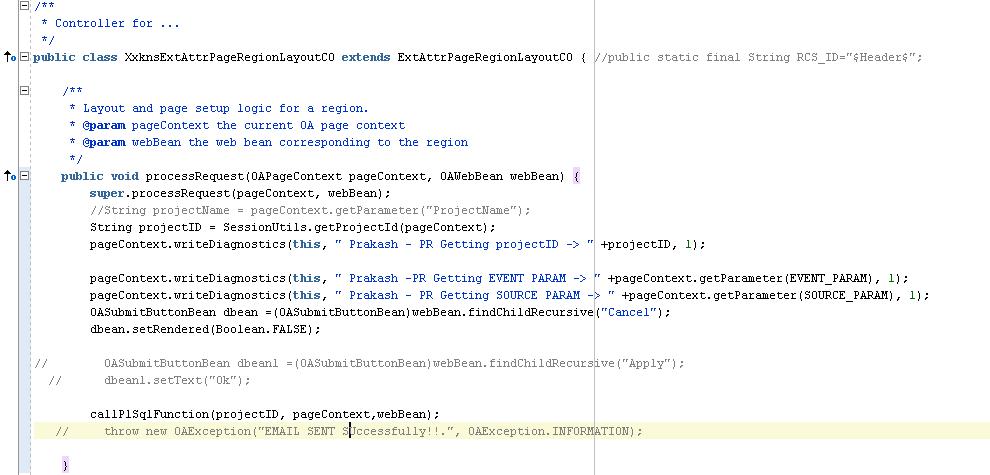
A new public method can be defined, and a callable statement class is used to connect the database.
it can be called in the process request of this controller.

Screen 13
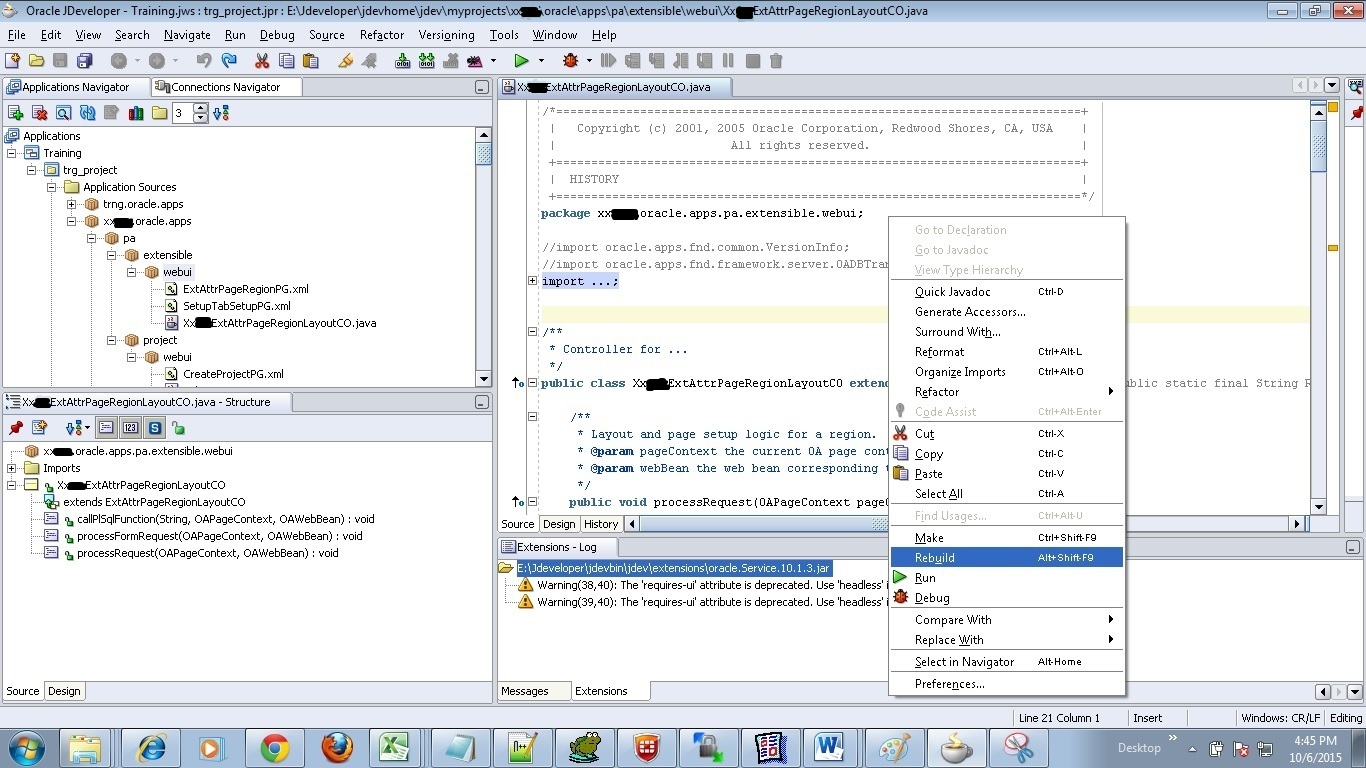
Compile the java file in Jdeveloper by right click on controller and click rebuild, which generates a class file under the directory
E:\Jdeveloper\jdevhome\jdev\myclasses\xx\oracle\apps\pa\extensible\webui\XxExtAttrPageRegionLayoutCO.class.
Screen14
Connect the server through WINSCP, move the controller (XxExtAttrPageRegionLayoutCO.class file) from the corresponding directory to the corresponding path in the server as shown below
Local Machine E:\Jdeveloper\jdevhome\jdev\myclasses\oracle\apps\pa\extensible\webui
Server: /oraapps/r12idevcomn/apps/apps_st/comn/java/classes/xx/oracle/apps/pa/extensible/webui

Finally, bounce the Apache server to see the changes in the project setup page.
Summary:
In this lesson, we are going to see how to extend CO (Controller) in OAF. Before that, let us know the requirement. Go to the following navigation.
Purchasing, Vision Operations -> Supply Base ->Supplier User Management ->Supplier User Creation ->Invite Supplier User.
queries?
Do drop a note by writing us at doyen.ebiz@gmail.com or use the comment section below to ask your questions.