Plan Creation Flow in Config Snapshot
We have Config Snapshot tool to automate the migrations from one instance to another instance with less time and with minimal manual effort.
Following table details the sequence of steps involved in plan creation process
Steps Description Responsible
Step 1 Login to the CSS tool
Step 2 Create a Plan by providing the Plan Name and select directory, where we have to store these plan
Step 3 Connect to the Instance, from where we are planning to extract the data
Step 4 Select the Application
Step 5 Select the function/setup activity which we are planning to migrate
Step 6 Fill the Configuration Name/Planning Name
Step 7 Select the output directory
Step 8 Click on create plan
Step 9 Select the setup step and click on create new steps
Step 10 Decide on the FILTER or COMPARE
Step 11 If it is Filter, select the setup/object code or name
Step 12 Click on Load Button to extract the data
Step 13 Click on Detail to review the setups which are extracted
Step 14 We can migrate the same to Target Instance.
⦁ Login to CSS Tool
Navigation: Click on the CSS tool Icon, it will ask for the credentials, provide the same to login.
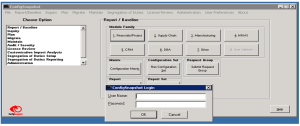
Click on OK Button to login.
Then it will give you a successfully connected notification
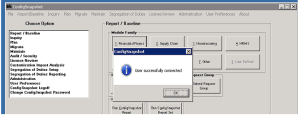
⦁ Planning
Select the Plan Option

System will open a Planning Area
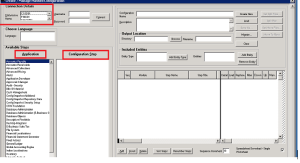
Select the Instance from the LOV and Provide the User name and password to connect Instance. Once you are connected, select the Application and the function/setup
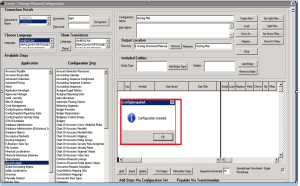
For creating a plan, provide the Configuration Name (Plan Name) and select the output Location directory for storing the plan details.
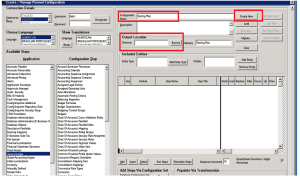
Once after selecting the output location directory, click on create New Button
Select the application General Ledger and configuration step as Set of Books/Ledger, as we are planning to create this plan to migrate the ledgers setup.
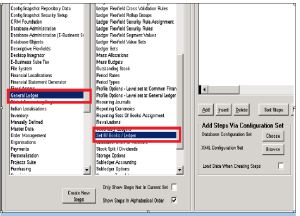
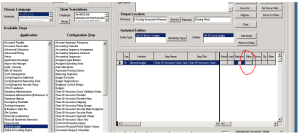
Click on Create New Steps Button, so that, setup step will added to the plan as below

Here, we do have two options
⦁ Filter Option :
By using Filter Option, we will be extracting the selected items/values from the source instance. It will be use full when you are having less value
Ex: if you select the Ledger, in ledger setup step, it will extract configuration details of the ledger,
When you are doing any segment values, COA Segments migration from one instance to another instance, this feature is not suggestable.
⦁ Compare Option:
By using this option, we can compare the Source Instance and the Target instance and will be getting the difference values.
Ex: In source instance, we have a Value Set and in target Instance, we do not have, now we are planning to migrate the same.
Let us start with FILTER Option.
Click on FILTER button to select the value sets that needs to extract.
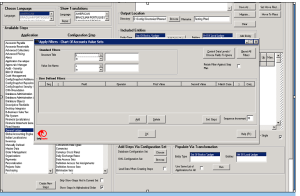
Place the mouse pointer at the value set name field and click on search button
Select the value set name from the LOV, and move the same by clicking on the arrow symbol and then click on OK Button
Click on LOAD Button to upload/extract the data/details from the source instance
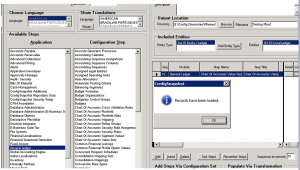
Once the records are loaded/extracted, it will show the message as above