Integration of Payment and SSO in Oracle Apex
Introduction/ Issue:
The ATS Resume Scanner app needed two things before a user could actually use it: a login that didn’t require yet another password, and a way to charge an access fee before unlocking the tool. I ended up solving both with the same two building blocks – Google Sign-In through Oracle APEX’s native OAuth2 support, and Razorpay Checkout for the one-time access payment. This post covers both, since in the app they work as a single flow: sign in with Google, then pay to unlock.
Why we need to do / Cause of the issue:
Asking users to create a fresh username and password just for this app adds friction and usually means weaker, reused passwords. Since almost everyone already has a Google account, reusing that identity removes the signup step entirely and keeps login consistent with what they already trust. A full enterprise identity setup (IDCS / OCI IAM) wasn’t justified for a single app, so a plain OAuth2 authentication scheme pointed directly at Google was the simpler route.
On the payment side, the app is meant to charge a flat access fee before letting someone generate or scan a resume. Razorpay was the natural choice since it has a lightweight client-side Checkout widget that can be dropped straight into an APEX page, with the actual charge and verification handled through its API rather than anything built from scratch.
How do we solve:
Part A – Google SSO
There are three moving parts: a Google Cloud OAuth2 client, an APEX Web Credential that stores it securely, and an APEX Authentication Scheme that ties the two together.
Step 1 – Google Cloud Console:
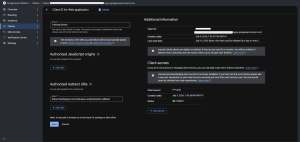
- Create/reuse a project, then configure the OAuth consent screen (app name, support email, scopes: openid, email, profile).
- Create an OAuth Client ID of type ‘Web application’ under APIs & Services > Credentials.
- Add the APEX callback URL as an Authorized redirect URI: https://<host>/ords/<workspace>/apex_authentication.callback – this has to match exactly, or Google returns a redirect_uri_mismatch error.
- Copy the generated Client ID and Client Secret.
Step 2 – APEX Web Credential:
- Shared Components > Web Credentials > Create, authentication type OAuth2 Client Credentials.
- Paste in the Client ID and Client Secret, and save it under a recognizable name (e.g. google_sso_cred).
Step 3 – APEX Authentication Scheme:
- Shared Components > Authentication Schemes > Create > Social Sign-In / Generic OAuth2.
- Reference the Web Credential created above.
- Fill in Google’s authorization, token, and userinfo endpoints, and set scope to ‘openid email profile’.
- Set it as the app’s current authentication scheme and test the full login round-trip before rolling it out.
Part B – Razorpay Payment
Razorpay configuration:
1. Create your razor pay account and verify your details
2. After creating the account you can click on test_mode before involving real money
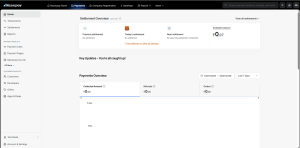
3. Go to Accounts & settings and in Website and app settings click on Api Keys
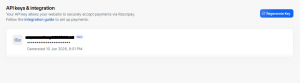
4. Click on Add Key – you will be provided with key note that
5. Once a user is signed in, they land on a page that runs the Razorpay Checkout widget before granting access. On the page (P2 in this app), a Dynamic Action fires the checkout on button click and calls the Razorpay JS SDK loaded from their CDN:
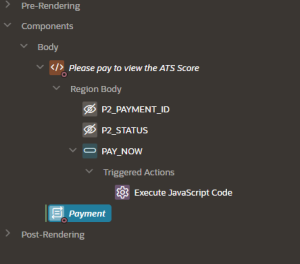
var options = {
key: “rzp_your_key_…….”,
amount: 2000,
currency: “INR”,
name: “ATS Resume Scanner”,
description: “Access Fee”,
handler: function(response){
$s(“P2_PAYMENT_ID”,
response.razorpay_payment_id);
$s(“P2_STATUS”,
“SUCCESS”);
apex.submit(“PAYMENT_SUCCESS”);
}
};
var rzp = new Razorpay(options);
rzp.open();
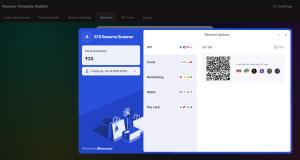
A quick walkthrough of what’s happening in that snippet:
- key is the Razorpay test Key ID – safe to expose client-side, since it’s the publishable identifier, not the account secret.
- amount is in the smallest currency unit, so 2000 here means Rs. 20.00.
- handler runs once the payment succeeds in the widget. It uses APEX’s $s() JavaScript shortcut to push the returned razorpay_payment_id and a SUCCESS flag into page items (P2_PAYMENT_ID, P2_STATUS).
- submit(“PAYMENT_SUCCESS”) then submits the page with that request, which triggers a server-side Process to record the payment and unlock the app for that user.
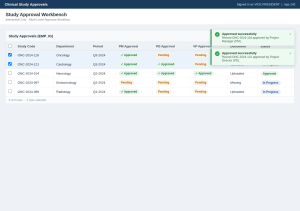
On the server side, the PAYMENT_SUCCESS process reads P2_PAYMENT_ID, marks the signed-in user’s profile as paid, and redirects them into the actual resume scanner. The Client ID from the OAuth login and the payment record both key off the same APEX_USER, so there’s no separate account-linking step needed – Google login identifies the user, and the payment flag on that same user record decides whether they get past the paywall.
Conclusion:
With these two pieces together, the flow is: sign in with Google, get routed to the Razorpay checkout if not already paid, and land in the resume scanner once payment succeeds. Both halves are independent of each other – the SSO scheme works fine without a payment step, and the Razorpay checkout works fine behind ordinary APEX authentication – which made it straightforward to build and test them separately before wiring them into one login-to-paywall flow for this app.